1. About the Documentation
This section provides a brief overview of Reactor reference documentation. You do not need to read this guide in a linear fashion. Each piece stands on its own, though they often refer to other pieces.
1.1. Latest Version & Copyright Notice
The Reactor reference guide is available as HTML documents. The latest copy is available at https://projectreactor.io/docs/core/release/reference/index.html
Copies of this document may be made for your own use and for distribution to others, provided that you do not charge any fee for such copies and further provided that each copy contains this Copyright Notice, whether distributed in print or electronically.
1.2. Contributing to the Documentation
The reference guide is written in Asciidoc, and you can find its sources at https://github.com/reactor/reactor-core/tree/main/docs/asciidoc.
If you have an improvement or a suggestion, we will be happy to get a pull request from you!
We recommend that you check out a local copy of the repository so that you can
generate the documentation by running the asciidoctor gradle task and checking the
rendering. Some of the sections rely on included files, so GitHub rendering is
not always complete.
| To facilitate documentation edits, most sections have a link at the end that opens an edit UI directly on GitHub for the main source file for that section. These links are only present in the HTML5 version of this reference guide. They look like the following: Suggest Edit to About the Documentation. |
1.3. Getting Help
You can reach out for help in several ways with Reactor:
-
Get in touch with the community on Gitter.
-
Ask a question on stackoverflow.com at
project-reactor. -
Report bugs in Github issues. We closely monitor the following repositories: reactor-core (which covers the essential features) and reactor-addons (which covers reactor-test and adapters issues).
| All of Reactor is open source, including this documentation. If you find problems with the docs or if you want to improve them, please get involved. |
1.4. Where to Go from Here
-
Head to Getting Started if you feel like jumping straight into the code.
-
If you are new to reactive programming, though, you should probably start with the Introduction to Reactive Programming.
-
If you are familiar with Reactor concepts and are just looking for the right tool for the job but cannot think of a relevant operator, try the Which operator do I need? Appendix.
-
In order to dig deeper into the core features of Reactor, head to Reactor Core Features to learn:
-
More about Reactor’s reactive types in the
Flux, an Asynchronous Sequence of 0-N Items andMono, an Asynchronous 0-1 Result sections. -
How to switch threading contexts using a scheduler.
-
How to handle errors in the Handling Errors section.
-
-
Unit testing? Yes it is possible with the
reactor-testproject! See Testing. -
Programmatically creating a sequence offers a more advanced way of creating reactive sources.
-
Other advanced topics are covered in Advanced Features and Concepts.
2. Getting Started
This section contains information that should help you get going with Reactor. It includes the following sections:
2.1. Introducing Reactor
Reactor is a fully non-blocking reactive programming foundation for the JVM, with
efficient demand management (in the form of managing “backpressure”). It integrates
directly with the Java 8 functional APIs, notably CompletableFuture, Stream, and
Duration. It offers composable asynchronous sequence APIs — Flux (for [N] elements) and
Mono (for [0|1] elements) — and extensively implements the
Reactive Streams specification.
Reactor also supports non-blocking inter-process communication with the
reactor-netty project. Suited for Microservices Architecture, Reactor Netty offers
backpressure-ready network engines for HTTP (including Websockets), TCP, and UDP.
Reactive encoding and decoding are fully supported.
2.2. Prerequisites
Reactor Core runs on Java 8 and above.
It has a transitive dependency on org.reactivestreams:reactive-streams:1.0.3.
|
Android Support
|
2.3. Understanding the BOM and versioning scheme
Reactor 3 uses a BOM (Bill of Materials) model (since reactor-core 3.0.4, with the Aluminium release train).
This curated list groups artifacts that are meant to work well together, providing
the relevant versions despite potentially divergent versioning schemes in these artifacts.
Note the versioning scheme has changed between 3.3.x and 3.4.x (Dysprosium and Europium).
Artifacts follow a versioning scheme of MAJOR.MINOR.PATCH-QUALIFIER while the BOM is versioned using a CalVer inspired scheme of YYYY.MINOR.PATCH-QUALIFIER, where:
-
MAJORis the current generation of Reactor, where each new generation can bring fundamental changes to the structure of the project (which might imply a more significant migration effort) -
YYYYis the year of the first GA release in a given release cycle (like 3.4.0 for 3.4.x) -
.MINORis a 0-based number incrementing with each new release cycle-
in the case of projects, it generally reflects wider changes and can indicate a moderate migration effort
-
in the case of the BOM it allows discerning between release cycles in case two get first released the same year
-
-
.PATCHis a 0-based number incrementing with each service release -
-QUALIFIERis a textual qualifier, which is omitted in the case of GA releases (see below)
The first release cycle to follow that convention is thus 2020.0.x, codename Europium.
The scheme uses the following qualifiers (note the use of dash separator), in order:
-
-M1..-M9: milestones (we don’t expect more than 9 per service release) -
-RC1..-RC9: release candidates (we don’t expect more than 9 per service release) -
-SNAPSHOT: snapshots -
no qualifier for GA releases
| snapshots appear higher in the order above because, conceptually, they’re always "the freshest pre-release" of any given PATCH. Even though the first deployed artifact of a PATCH cycle will always be a -SNAPSHOT, a similarly named but more up-to-date snapshot would also get released after eg. a milestone or between release candidates. |
Each release cycle is also given a codename, in continuity with the previous codename-based scheme, which can be used to reference it more informally (like in discussions, blog posts, etc…). The codenames represent what would traditionally be the MAJOR.MINOR number. They (mostly) come from the Periodic Table of Elements, in increasing alphabetical order.
| Up until Dysprosium, the BOM was versioned using a release train scheme with a codename followed by a qualifier, and the qualifiers were slightly different. For example: Aluminium-RELEASE (first GA release, would now be something like YYYY.0.0), Bismuth-M1, Californium-SR1 (service release would now be something like YYYY.0.1), Dysprosium-RC1, Dysprosium-BUILD-SNAPSHOT (after each patch, we’d go back to the same snapshot version. would now be something like YYYY.0.X-SNAPSHOT so we get 1 snapshot per PATCH) |
2.4. Getting Reactor
As mentioned earlier, the easiest way to use Reactor in your core is to use the BOM and add the relevant dependencies to your project. Note that, when you add such a dependency, you must omit the version so that the version gets picked up from the BOM.
However, if you want to force the use of a specific artifact’s version, you can specify it when adding your dependency, as you usually would. You can also forgo the BOM entirely and specify dependencies by their artifact versions.
As of this version (reactor-core 3.4.25), the latest stable BOM in the associated
release train line is 2020.0.25, which is what is used in snippets below.
There might be newer versions since then (including snapshots, milestones and new release train lines),
see https://projectreactor.io/docs for the latest artifacts and BOMs.
|
2.4.1. Maven Installation
Maven natively supports the BOM concept. First, you need to import the BOM by
adding the following snippet to your pom.xml:
<dependencyManagement> (1)
    <dependencies>
        <dependency>
            <groupId>io.projectreactor</groupId>
            <artifactId>reactor-bom</artifactId>
            <version>2020.0.25</version>
            <type>pom</type>
            <scope>import</scope>
        </dependency>
    </dependencies>
</dependencyManagement>| 1 | Notice the dependencyManagement tag. This is in addition to the regular
dependencies section. |
If the top section (dependencyManagement) already exists in your pom, add only the contents.
Next, add your dependencies to the relevant reactor projects, as usual, except without a
<version>, as follows:
<dependencies>
    <dependency>
        <groupId>io.projectreactor</groupId>
        <artifactId>reactor-core</artifactId> (1)
        (2)
    </dependency>
    <dependency>
        <groupId>io.projectreactor</groupId>
        <artifactId>reactor-test</artifactId> (3)
        <scope>test</scope>
    </dependency>
</dependencies>| 1 | Dependency on the core library. |
| 2 | No version tag here. |
| 3 | reactor-test provides facilities to unit test reactive streams. |
2.4.2. Gradle Installation
Prior to version 5.0, Gradle has no core support for Maven BOMs, but you can use Spring’s gradle-dependency-management plugin.
First, apply the plugin from the Gradle Plugin Portal, as follows:
plugins {
    id "io.spring.dependency-management" version "1.0.7.RELEASE" (1)
}| 1 | as of this writing, 1.0.7.RELEASE is the latest version of the plugin. Check for updates. |
Then use it to import the BOM, as follows:
dependencyManagement {
     imports {
          mavenBom "io.projectreactor:reactor-bom:2020.0.25"
     }
}
Finally add a dependency to your project, without a version number, as follows:
dependencies {
     implementation 'io.projectreactor:reactor-core' (1)
}| 1 | There is no third : separated section for the version. It is taken from
the BOM. |
Since Gradle 5.0, you can use the native Gradle support for BOMs:
dependencies {
     implementation platform('io.projectreactor:reactor-bom:2020.0.25')
     implementation 'io.projectreactor:reactor-core' (1)
}| 1 | There is no third : separated section for the version. It is taken from
the BOM. |
2.4.3. Milestones and Snapshots
Milestones and developer previews are distributed through the Spring Milestones repository rather than Maven Central. To add it to your build configuration file, use the following snippet:
<repositories>
	<repository>
		<id>spring-milestones</id>
		<name>Spring Milestones Repository</name>
		<url>https://repo.spring.io/milestone</url>
	</repository>
</repositories>
For Gradle, use the following snippet:
repositories {
  maven { url 'https://repo.spring.io/milestone' }
  mavenCentral()
}
Similarly, snapshots are also available in a separate dedicated repository, as the following example show:
<repositories>
	<repository>
		<id>spring-snapshots</id>
		<name>Spring Snapshot Repository</name>
		<url>https://repo.spring.io/snapshot</url>
	</repository>
</repositories>repositories {
maven { url 'https://repo.spring.io/snapshot' }
mavenCentral()
}2.5. Support and policies
The entries below are mirroring https://github.com/reactor/.github/blob/main/SUPPORT.adoc
2.5.1. Do you have a question?
| Search Stack Overflow first; discuss if necessary |
If you’re unsure why something isn’t working or wondering if there is a better way of doing it please check on Stack Overflow first and if necessary start a discussion. Use relevant tags among the ones we monitor for that purpose:
-
reactor-nettyfor specific reactor-netty questions -
project-reactorfor generic reactor questions
If you prefer real-time discussion, we also have a few Gitter channels:
-
reactoris the historic most active one, where most of the community can help -
reactor-coreis intended for more advanced pinpointed discussions around the inner workings of the library -
reactor-nettyis intended for netty-specific questions
Refer to each project’s README for potential other sources of information.
We generally discourage opening GitHub issues for questions, in favor of the two channels above.
2.5.2. Our policy on deprecations
When dealing with deprecations, given a version A.B.C, we’ll ensure that:
-
deprecations introduced in version
A.B.0will be removed no sooner than versionA.B+1.0 -
deprecations introduced in version
A.B.1+will be removed no sooner than versionA.B+2.0 -
we’ll strive to mention the following in the deprecation javadoc:
-
target minimum version for removal
-
pointers to replacements for the deprecated method
-
version in which method was deprecated
-
This policy is officially in effect as of January 2021, for all modules in 2020.0 BOMs and newer release trains, as well as Dysprosium releases after Dysprosium-SR15.
|
| Deprecation removal targets are not a hard commitment, and the deprecated methods could live on further than these minimum target GA versions (ie. only the most problematic deprecated methods will be removed aggressively). |
| That said, deprecated code that has outlived its minimum removal target version may be removed in any subsequent release (including patch releases, aka service releases) without further notice. So users should still strive to update their code as early as possible. |
2.5.3. Active Development
The following table summarises the development status of the various Reactor release trains:
| Version | Supported |
|---|---|
2020.0.0 (codename Europium) (core 3.4.x, netty 1.0.x) |
|
Dysprosium Train (core 3.3.x, netty 0.9.x) |
|
Califonium and below (core < 3.3, netty < 0.9) |
|
Reactor 1.x and 2.x Generations |
3. Introduction to Reactive Programming
Reactor is an implementation of the Reactive Programming paradigm, which can be summed up as follows:
Reactive programming is an asynchronous programming paradigm concerned with data streams and the propagation of change. This means that it becomes possible to express static (e.g. arrays) or dynamic (e.g. event emitters) data streams with ease via the employed programming language(s).
As a first step in the direction of reactive programming, Microsoft created the Reactive
Extensions (Rx) library in the .NET ecosystem. Then RxJava implemented reactive
programming on the JVM. As time went on, a standardization for Java emerged through the
Reactive Streams effort, a specification that defines a set of interfaces and
interaction rules for reactive libraries on the JVM. Its interfaces have been
integrated into Java 9 under the Flow class.
The reactive programming paradigm is often presented in object-oriented languages as an
extension of the Observer design pattern. You can also compare the main reactive streams
pattern with the familiar Iterator design pattern, as there is a duality to the
Iterable-Iterator pair in all of these libraries. One major difference is that, while
an Iterator is pull-based, reactive streams are push-based.
Using an iterator is an imperative programming pattern, even though the method of
accessing values is solely the responsibility of the Iterable. Indeed, it is up to the
developer to choose when to access the next() item in the sequence. In reactive
streams, the equivalent of the above pair is Publisher-Subscriber. But it is the
Publisher that notifies the Subscriber of newly available values as they come, and
this push aspect is the key to being reactive. Also, operations applied to pushed values
are expressed declaratively rather than imperatively: The programmer expresses the logic
of the computation rather than describing its exact control flow.
In addition to pushing values, the error-handling and completion aspects are also covered
in a well defined manner. A Publisher can push new values to its Subscriber (by
calling onNext) but can also signal an error (by calling onError) or completion (by
calling onComplete). Both errors and completion terminate the sequence. This can
be summed up as follows:
onNext x 0..N [onError | onComplete]This approach is very flexible. The pattern supports use cases where there is no value, one value, or n values (including an infinite sequence of values, such as the continuing ticks of a clock).
But why do we need such an asynchronous reactive library in the first place?
3.1. Blocking Can Be Wasteful
Modern applications can reach huge numbers of concurrent users, and, even though the capabilities of modern hardware have continued to improve, performance of modern software is still a key concern.
There are, broadly, two ways one can improve a program’s performance:
-
parallelize to use more threads and more hardware resources.
-
seek more efficiency in how current resources are used.
Usually, Java developers write programs by using blocking code. This practice is fine until there is a performance bottleneck. Then it is time to introduce additional threads, running similar blocking code. But this scaling in resource utilization can quickly introduce contention and concurrency problems.
Worse still, blocking wastes resources. If you look closely, as soon as a program involves some latency (notably I/O, such as a database request or a network call), resources are wasted because threads (possibly many threads) now sit idle, waiting for data.
So the parallelization approach is not a silver bullet. It is necessary to access the full power of the hardware, but it is also complex to reason about and susceptible to resource wasting.
3.2. Asynchronicity to the Rescue?
The second approach mentioned earlier, seeking more efficiency, can be a solution to the resource wasting problem. By writing asynchronous, non-blocking code, you let the execution switch to another active task that uses the same underlying resources and later comes back to the current process when the asynchronous processing has finished.
But how can you produce asynchronous code on the JVM? Java offers two models of asynchronous programming:
-
Callbacks: Asynchronous methods do not have a return value but take an extra
callbackparameter (a lambda or anonymous class) that gets called when the result is available. A well known example is Swing’sEventListenerhierarchy. -
Futures: Asynchronous methods immediately return a
Future<T>. The asynchronous process computes aTvalue, but theFutureobject wraps access to it. The value is not immediately available, and the object can be polled until the value is available. For instance, anExecutorServicerunningCallable<T>tasks useFutureobjects.
Are these techniques good enough? Not for every use case, and both approaches have limitations.
Callbacks are hard to compose together, quickly leading to code that is difficult to read and maintain (known as “Callback Hell”).
Consider an example: showing the top five favorites from a user on the UI or suggestions if she does not have a favorite. This goes through three services (one gives favorite IDs, the second fetches favorite details, and the third offers suggestions with details), as follows:
userService.getFavorites(userId, new Callback<List<String>>() { (1)
  public void onSuccess(List<String> list) { (2)
    if (list.isEmpty()) { (3)
      suggestionService.getSuggestions(new Callback<List<Favorite>>() {
        public void onSuccess(List<Favorite> list) { (4)
          UiUtils.submitOnUiThread(() -> { (5)
            list.stream()
                .limit(5)
                .forEach(uiList::show); (6)
            });
        }

        public void onError(Throwable error) { (7)
          UiUtils.errorPopup(error);
        }
      });
    } else {
      list.stream() (8)
          .limit(5)
          .forEach(favId -> favoriteService.getDetails(favId, (9)
            new Callback<Favorite>() {
              public void onSuccess(Favorite details) {
                UiUtils.submitOnUiThread(() -> uiList.show(details));
              }

              public void onError(Throwable error) {
                UiUtils.errorPopup(error);
              }
            }
          ));
    }
  }

  public void onError(Throwable error) {
    UiUtils.errorPopup(error);
  }
});| 1 | We have callback-based services: a Callback interface with a method invoked when
the asynchronous process was successful and one invoked when an error occurs. |
| 2 | The first service invokes its callback with the list of favorite IDs. |
| 3 | If the list is empty, we must go to the suggestionService. |
| 4 | The suggestionService gives a List<Favorite> to a second callback. |
| 5 | Since we deal with a UI, we need to ensure our consuming code runs in the UI thread. |
| 6 | We use a Java 8 Stream to limit the number of suggestions processed to five, and we
show them in a graphical list in the UI. |
| 7 | At each level, we deal with errors the same way: We show them in a popup. |
| 8 | Back to the favorite ID level. If the service returned a full list, we need to
go to the favoriteService to get detailed Favorite objects. Since we want only five,
we first stream the list of IDs to limit it to five. |
| 9 | Once again, a callback. This time we get a fully-fledged Favorite object that we
push to the UI inside the UI thread. |
That is a lot of code, and it is a bit hard to follow and has repetitive parts. Consider its equivalent in Reactor:
userService.getFavorites(userId) (1)
           .flatMap(favoriteService::getDetails) (2)
           .switchIfEmpty(suggestionService.getSuggestions()) (3)
           .take(5) (4)
           .publishOn(UiUtils.uiThreadScheduler()) (5)
.subscribe(uiList::show, UiUtils::errorPopup); (6)| 1 | We start with a flow of favorite IDs. |
| 2 | We asynchronously transform these into detailed Favorite objects
(flatMap). We now have a flow of Favorite. |
| 3 | If the flow of Favorite is empty, we switch to a fallback through the
suggestionService. |
| 4 | We are only interested in, at most, five elements from the resulting flow. |
| 5 | At the end, we want to process each piece of data in the UI thread. |
| 6 | We trigger the flow by describing what to do with the final form of the data (show it in a UI list) and what to do in case of an error (show a popup). |
What if you want to ensure the favorite IDs are retrieved in less than 800ms or, if it
takes longer, get them from a cache? In the callback-based code, that is a complicated
task. In Reactor it becomes as easy as adding a timeout operator in the chain, as follows:
userService.getFavorites(userId)
           .timeout(Duration.ofMillis(800)) (1)
           .onErrorResume(cacheService.cachedFavoritesFor(userId)) (2)
           .flatMap(favoriteService::getDetails) (3)
           .switchIfEmpty(suggestionService.getSuggestions())
           .take(5)
           .publishOn(UiUtils.uiThreadScheduler())
.subscribe(uiList::show, UiUtils::errorPopup);| 1 | If the part above emits nothing for more than 800ms, propagate an error. |
| 2 | In case of an error, fall back to the cacheService. |
| 3 | The rest of the chain is similar to the previous example. |
Future objects are a bit better than callbacks, but they still do not do well at composition,
despite the improvements brought in Java 8 by CompletableFuture. Orchestrating multiple
Future objects together is doable but not easy. Also, Future has other problems:
-
It is easy to end up with another blocking situation with
Futureobjects by calling theget()method. -
They do not support lazy computation.
-
They lack support for multiple values and advanced error handling.
Consider another example: We get a list of IDs from which we want to fetch a name and a
statistic and combine these pair-wise, all of it asynchronously. The following example
does so with a list of type CompletableFuture:
CompletableFuture combinationCompletableFuture<List<String>> ids = ifhIds(); (1)
CompletableFuture<List<String>> result = ids.thenComposeAsync(l -> { (2)
Stream<CompletableFuture<String>> zip =
l.stream().map(i -> { (3)
CompletableFuture<String> nameTask = ifhName(i); (4)
CompletableFuture<Integer> statTask = ifhStat(i); (5)
return nameTask.thenCombineAsync(statTask, (name, stat) -> "Name " + name + " has stats " + stat); (6)
});
List<CompletableFuture<String>> combinationList = zip.collect(Collectors.toList()); (7)
CompletableFuture<String>[] combinationArray = combinationList.toArray(new CompletableFuture[combinationList.size()]);
CompletableFuture<Void> allDone = CompletableFuture.allOf(combinationArray); (8)
return allDone.thenApply(v -> combinationList.stream()
.map(CompletableFuture::join) (9)
.collect(Collectors.toList()));
});
List<String> results = result.join(); (10)
assertThat(results).contains(
"Name NameJoe has stats 103",
"Name NameBart has stats 104",
"Name NameHenry has stats 105",
"Name NameNicole has stats 106",
"Name NameABSLAJNFOAJNFOANFANSF has stats 121");| 1 | We start off with a future that gives us a list of id values to process. |
| 2 | We want to start some deeper asynchronous processing once we get the list. |
| 3 | For each element in the list: |
| 4 | Asynchronously get the associated name. |
| 5 | Asynchronously get the associated task. |
| 6 | Combine both results. |
| 7 | We now have a list of futures that represent all the combination tasks. To execute these tasks, we need to convert the list to an array. |
| 8 | Pass the array to CompletableFuture.allOf, which outputs a Future that completes
when all tasks have completed. |
| 9 | The tricky bit is that allOf returns CompletableFuture<Void>, so we
reiterate over the list of futures, collecting their results by using join()
(which, here, does not block, since allOf ensures the futures are all done). |
| 10 | Once the whole asynchronous pipeline has been triggered, we wait for it to be processed and return the list of results that we can assert. |
Since Reactor has more combination operators out of the box, this process can be simplified, as follows:
Flux<String> ids = ifhrIds(); (1)

Flux<String> combinations =
		ids.flatMap(id -> { (2)
			Mono<String> nameTask = ifhrName(id); (3)
			Mono<Integer> statTask = ifhrStat(id); (4)

			return nameTask.zipWith(statTask, (5)
					(name, stat) -> "Name " + name + " has stats " + stat);
		});

Mono<List<String>> result = combinations.collectList(); (6)

List<String> results = result.block(); (7)
assertThat(results).containsExactly( (8)
		"Name NameJoe has stats 103",
		"Name NameBart has stats 104",
		"Name NameHenry has stats 105",
		"Name NameNicole has stats 106",
		"Name NameABSLAJNFOAJNFOANFANSF has stats 121"
);| 1 | This time, we start from an asynchronously provided sequence of ids (a
Flux<String>). |
| 2 | For each element in the sequence, we asynchronously process it (inside the function
that is the body flatMap call) twice. |
| 3 | Get the associated name. |
| 4 | Get the associated statistic. |
| 5 | Asynchronously combine the two values. |
| 6 | Aggregate the values into a List as they become available. |
| 7 | In production, we would continue working with the Flux asynchronously by further
combining it or subscribing to it. Most probably, we would return the result Mono.
Since we are in a test, we instead block, waiting for the processing to finish, and then
directly return the aggregated list of values. |
| 8 | Assert the result. |
The perils of using callbacks and Future objects are similar and are what reactive programming
addresses with the Publisher-Subscriber pair.
3.3. From Imperative to Reactive Programming
Reactive libraries, such as Reactor, aim to address these drawbacks of “classic” asynchronous approaches on the JVM while also focusing on a few additional aspects:
-
Composability and readability
-
Data as a flow manipulated with a rich vocabulary of operators
-
Nothing happens until you subscribe
-
Backpressure or the ability for the consumer to signal the producer that the rate of emission is too high
-
High level but high value abstraction that is concurrency-agnostic
3.3.1. Composability and Readability
By “composability”, we mean the ability to orchestrate multiple asynchronous tasks, in which we use results from previous tasks to feed input to subsequent ones. Alternatively, we can run several tasks in a fork-join style. In addition, we can reuse asynchronous tasks as discrete components in a higher-level system.
The ability to orchestrate tasks is tightly coupled to the readability and maintainability of code. As the layers of asynchronous processes increase in both number and complexity, being able to compose and read code becomes increasingly difficult. As we saw, the callback model is simple, but one of its main drawbacks is that, for complex processes, you need to have a callback executed from a callback, itself nested inside another callback, and so on. That mess is known as “Callback Hell”. As you can guess (or know from experience), such code is pretty hard to go back to and reason about.
Reactor offers rich composition options, wherein code mirrors the organization of the abstract process, and everything is generally kept at the same level (nesting is minimized).
3.3.2. The Assembly Line Analogy
You can think of data processed by a reactive application as moving through an assembly
line. Reactor is both the conveyor belt and the workstations. The raw material pours from
a source (the original Publisher) and ends up as a finished product ready to be pushed
to the consumer (or Subscriber).
The raw material can go through various transformations and other intermediary steps or be part of a larger assembly line that aggregates intermediate pieces together. If there is a glitch or clogging at one point (perhaps boxing the products takes a disproportionately long time), the afflicted workstation can signal upstream to limit the flow of raw material.
3.3.3. Operators
In Reactor, operators are the workstations in our assembly analogy. Each operator adds
behavior to a Publisher and wraps the previous step’s Publisher into a new instance.
The whole chain is thus linked, such that data originates from the first Publisher and
moves down the chain, transformed by each link. Eventually, a Subscriber finishes the
process. Remember that nothing happens until a Subscriber subscribes to a Publisher,
as we see shortly.
| Understanding that operators create new instances can help you avoid a common mistake that would lead you to believe that an operator you used in your chain is not being applied. See this item in the FAQ. |
While the Reactive Streams specification does not specify operators at all, one of the best added values of reactive libraries, such as Reactor, is the rich vocabulary of operators that they provide. These cover a lot of ground, from simple transformation and filtering to complex orchestration and error handling.
3.3.4. Nothing Happens Until You subscribe()
In Reactor, when you write a Publisher chain, data does not start pumping into it by
default. Instead, you create an abstract description of your asynchronous process (which
can help with reusability and composition).
By the act of subscribing, you tie the Publisher to a Subscriber, which triggers
the flow of data in the whole chain. This is achieved internally by a single request
signal from the Subscriber that is propagated upstream, all the way back to the source
Publisher.
3.3.5. Backpressure
Propagating signals upstream is also used to implement backpressure, which we described in the assembly line analogy as a feedback signal sent up the line when a workstation processes more slowly than an upstream workstation.
The real mechanism defined by the Reactive Streams specification is pretty close to the
analogy: A subscriber can work in unbounded mode and let the source push all the data
at its fastest achievable rate or it can use the request mechanism to signal the source
that it is ready to process at most n elements.
Intermediate operators can also change the request in-transit. Imagine a buffer
operator that groups elements in batches of ten. If the subscriber requests one buffer, it
is acceptable for the source to produce ten elements. Some operators also implement
prefetching strategies, which avoid request(1) round-trips and is beneficial
if producing the elements before they are requested is not too costly.
This transforms the push model into a push-pull hybrid, where the downstream can pull n elements from upstream if they are readily available. But if the elements are not ready, they get pushed by the upstream whenever they are produced.
3.3.6. Hot vs Cold
The Rx family of reactive libraries distinguishes two broad categories of reactive sequences: hot and cold. This distinction mainly has to do with how the reactive stream reacts to subscribers:
-
A Cold sequence starts anew for each
Subscriber, including at the source of data. For example, if the source wraps an HTTP call, a new HTTP request is made for each subscription. -
A Hot sequence does not start from scratch for each
Subscriber. Rather, late subscribers receive signals emitted after they subscribed. Note, however, that some hot reactive streams can cache or replay the history of emissions totally or partially. From a general perspective, a hot sequence can even emit when no subscriber is listening (an exception to the “nothing happens before you subscribe” rule).
For more information on hot vs cold in the context of Reactor, see this reactor-specific section.
4. Reactor Core Features
The Reactor project main artifact is reactor-core, a reactive library that focuses on
the Reactive Streams specification and targets Java 8.
Reactor introduces composable reactive types that implement Publisher but also provide
a rich vocabulary of operators: Flux and Mono. A Flux object
represents a reactive sequence of 0..N items, while a Mono object represents a
single-value-or-empty (0..1) result.
This distinction carries a bit of semantic information into the type, indicating the
rough cardinality of the asynchronous processing. For instance, an HTTP request produces
only one response, so there is not much sense in doing a count operation. Expressing
the result of such an HTTP call as a Mono<HttpResponse> thus makes more sense than
expressing it as a Flux<HttpResponse>, as it offers only operators that are relevant to
a context of zero items or one item.
Operators that change the maximum cardinality of the processing also switch to the
relevant type. For instance, the count operator exists in Flux, but it returns a
Mono<Long>.
4.1. Flux, an Asynchronous Sequence of 0-N Items
The following image shows how a Flux transforms items:
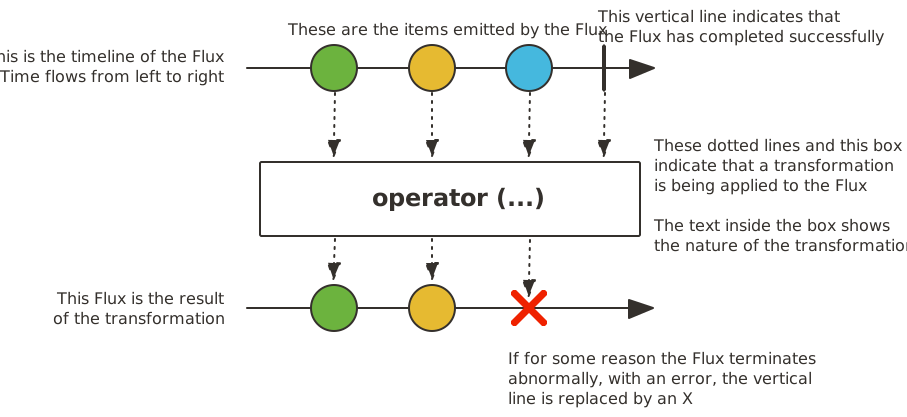
A Flux<T> is a standard Publisher<T> that represents an asynchronous sequence of 0 to N
emitted items, optionally terminated by either a completion signal or an error.
As in the Reactive Streams spec, these three types of signal translate to calls to a downstream
Subscriber’s onNext, onComplete, and onError methods.
With this large scope of possible signals, Flux is the general-purpose reactive type.
Note that all events, even terminating ones, are optional: no onNext event but an
onComplete event represents an empty finite sequence, but remove the onComplete and
you have an infinite empty sequence (not particularly useful, except for tests around cancellation).
Similarly, infinite sequences are not necessarily empty. For example, Flux.interval(Duration)
produces a Flux<Long> that is infinite and emits regular ticks from a clock.
4.2. Mono, an Asynchronous 0-1 Result
The following image shows how a Mono transforms an item:
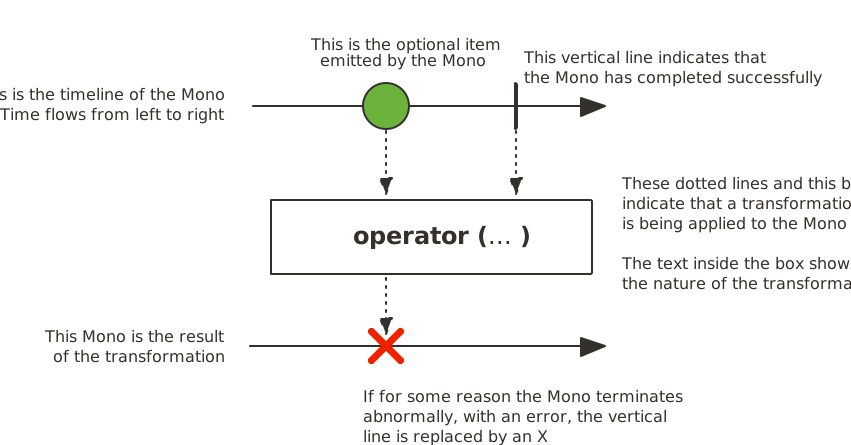
A Mono<T> is a specialized Publisher<T> that emits at most one item via the
onNext signal then terminates with an onComplete signal (successful Mono,
with or without value), or only emits a single onError signal (failed Mono).
Most Mono implementations are expected to immediately call onComplete on their
Subscriber after having called onNext. Mono.never() is an outlier: it doesn’t
emit any signal, which is not technically forbidden although not terribly useful outside
of tests. On the other hand, a combination of onNext and onError is explicitly forbidden.
Mono offers only a subset of the operators that are available for a Flux, and
some operators (notably those that combine the Mono with another Publisher)
switch to a Flux.
For example, Mono#concatWith(Publisher) returns a Flux while Mono#then(Mono)
returns another Mono.
Note that you can use a Mono to represent no-value asynchronous processes that only
have the concept of completion (similar to a Runnable). To create one, you can use an empty
Mono<Void>.
4.3. Simple Ways to Create a Flux or Mono and Subscribe to It
The easiest way to get started with Flux and Mono is to use one of the numerous
factory methods found in their respective classes.
For instance, to create a sequence of String, you can either enumerate them or put them
in a collection and create the Flux from it, as follows:
Flux<String> seq1 = Flux.just("foo", "bar", "foobar");

List<String> iterable = Arrays.asList("foo", "bar", "foobar");
Flux<String> seq2 = Flux.fromIterable(iterable);
Other examples of factory methods include the following:
Mono<String> noData = Mono.empty(); (1)

Mono<String> data = Mono.just("foo");

Flux<Integer> numbersFromFiveToSeven = Flux.range(5, 3); (2)| 1 | Notice the factory method honors the generic type even though it has no value. |
| 2 | The first parameter is the start of the range, while the second parameter is the number of items to produce. |
When it comes to subscribing, Flux and Mono make use of Java 8 lambdas. You
have a wide choice of .subscribe() variants that take lambdas for different
combinations of callbacks, as shown in the following method signatures:
Fluxsubscribe(); (1)
subscribe(Consumer<? super T> consumer); (2)
subscribe(Consumer<? super T> consumer,
Consumer<? super Throwable> errorConsumer); (3)
subscribe(Consumer<? super T> consumer,
Consumer<? super Throwable> errorConsumer,
Runnable completeConsumer); (4)
subscribe(Consumer<? super T> consumer,
Consumer<? super Throwable> errorConsumer,
Runnable completeConsumer,
Consumer<? super Subscription> subscriptionConsumer); (5)| 1 | Subscribe and trigger the sequence. |
| 2 | Do something with each produced value. |
| 3 | Deal with values but also react to an error. |
| 4 | Deal with values and errors but also run some code when the sequence successfully completes. |
| 5 | Deal with values and errors and successful completion but also do something with the
Subscription produced by this subscribe call. |
These variants return a reference to the subscription that you can use to cancel the
subscription when no more data is needed. Upon cancellation, the source should stop
producing values and clean up any resources it created. This cancel-and-clean-up behavior
is represented in Reactor by the general-purpose Disposable interface.
|
4.3.1. subscribe Method Examples
This section contains minimal examples of each of the five signatures for the subscribe
method. The following code shows an example of the basic method with no arguments:
Flux<Integer> ints = Flux.range(1, 3); (1)
ints.subscribe(); (2)| 1 | Set up a Flux that produces three values when a subscriber attaches. |
| 2 | Subscribe in the simplest way. |
The preceding code produces no visible output, but it does work. The Flux produces
three values. If we provide a lambda, we can make the values visible. The next example
for the subscribe method shows one way to make the values appear:
Flux<Integer> ints = Flux.range(1, 3); (1)
ints.subscribe(i -> System.out.println(i)); (2)| 1 | Set up a Flux that produces three values when a subscriber attaches. |
| 2 | Subscribe with a subscriber that will print the values. |
The preceding code produces the following output:
1
2
3
To demonstrate the next signature, we intentionally introduce an error, as shown in the following example:
Flux<Integer> ints = Flux.range(1, 4) (1)
      .map(i -> { (2)
        if (i <= 3) return i; (3)
        throw new RuntimeException("Got to 4"); (4)
      });
ints.subscribe(i -> System.out.println(i), (5)
error -> System.err.println("Error: " + error));| 1 | Set up a Flux that produces four values when a subscriber attaches. |
| 2 | We need a map so that we can handle some values differently. |
| 3 | For most values, return the value. |
| 4 | For one value, force an error. |
| 5 | Subscribe with a subscriber that includes an error handler. |
We now have two lambda expressions: one for the content we expect and one for errors. The preceding code produces the following output:
1
2
3
Error: java.lang.RuntimeException: Got to 4
The next signature of the subscribe method includes both an error handler and
a handler for completion events, as shown in the following example:
Flux<Integer> ints = Flux.range(1, 4); (1)
ints.subscribe(i -> System.out.println(i),
    error -> System.err.println("Error " + error),
() -> System.out.println("Done")); (2)| 1 | Set up a Flux that produces four values when a subscriber attaches. |
| 2 | Subscribe with a Subscriber that includes a handler for completion events. |
Error signals and completion signals are both terminal events and are exclusive of one another (you never get both). To make the completion consumer work, we must take care not to trigger an error.
The completion callback has no input, as represented by an empty pair of
parentheses: It matches the run method in the Runnable interface. The preceding code
produces the following output:
1
2
3
4
Done
4.3.2. Cancelling a subscribe() with Its Disposable
All these lambda-based variants of subscribe() have a Disposable return type.
In this case, the Disposable interface represents the fact that the subscription
can be cancelled, by calling its dispose() method.
For a Flux or Mono, cancellation is a signal that the source should stop
producing elements. However, it is NOT guaranteed to be immediate: Some sources
might produce elements so fast that they could complete even before receiving the
cancel instruction.
Some utilities around Disposable are available in the Disposables class.
Among these, Disposables.swap() creates a Disposable wrapper that lets
you atomically cancel and replace a concrete Disposable. This can be useful,
for instance, in a UI scenario where you want to cancel a request and replace it
with a new one whenever the user clicks on a button. Disposing the wrapper itself
closes it. Doing so disposes the current concrete value and all future attempted replacements.
Another interesting utility is Disposables.composite(…). This composite
lets you collect several Disposable — for instance, multiple in-flight requests
associated with a service call — and dispose all of them at once later on.
Once the composite’s dispose() method has been called, any attempt to add
another Disposable immediately disposes it.
4.3.3. An Alternative to Lambdas: BaseSubscriber
There is an additional subscribe method that is more generic and takes a full-blown
Subscriber rather than composing one out of lambdas. In order to help with writing
such a Subscriber, we provide an extendable class called BaseSubscriber.
Instances of BaseSubscriber (or subclasses of it) are single-use,
meaning that a BaseSubscriber cancels its subscription to the first Publisher if it
is subscribed to a second Publisher.
That is because using an instance twice would violate the Reactive Streams rule that
the onNext method of a Subscriber must not be called in parallel.
As a result, anonymous implementations are fine only if they are declared directly within
the call to Publisher#subscribe(Subscriber).
|
Now we can implement one of these. We call it a SampleSubscriber. The following
example shows how it would be attached to a Flux:
SampleSubscriber<Integer> ss = new SampleSubscriber<Integer>();
Flux<Integer> ints = Flux.range(1, 4);
ints.subscribe(ss);
The following example shows what SampleSubscriber could look like, as a minimalistic
implementation of a BaseSubscriber:
package io.projectreactor.samples;

import org.reactivestreams.Subscription;

import reactor.core.publisher.BaseSubscriber;

public class SampleSubscriber<T> extends BaseSubscriber<T> {

	public void hookOnSubscribe(Subscription subscription) {
		System.out.println("Subscribed");
		request(1);
	}

	public void hookOnNext(T value) {
		System.out.println(value);
		request(1);
	}
}
The SampleSubscriber class extends BaseSubscriber, which is the recommended abstract
class for user-defined Subscribers in Reactor. The class offers hooks that can be
overridden to tune the subscriber’s behavior. By default, it triggers an unbounded
request and behaves exactly as subscribe(). However, extending BaseSubscriber is
much more useful when you want a custom request amount.
For a custom request amount, the bare minimum is to implement hookOnSubscribe(Subscription subscription)
and hookOnNext(T value), as we did. In our case, the hookOnSubscribe method
prints a statement to standard out and makes the first request. Then the hookOnNext
method prints a statement and performs additional requests, one request
at a time.
The SampleSubscriber class produces the following output:
Subscribed
1
2
3
4
BaseSubscriber also offers a requestUnbounded() method to switch to unbounded mode
(equivalent to request(Long.MAX_VALUE)), as well as a cancel() method.
It also has additional hooks: hookOnComplete, hookOnError, hookOnCancel, and hookFinally
(which is always called when the sequence terminates, with the type of termination passed
in as a SignalType parameter)
You almost certainly want to implement the hookOnError, hookOnCancel, and
hookOnComplete methods. You may also want to implement the hookFinally method.
SampleSubscriber is the absolute minimum implementation of a Subscriber that performs
bounded requests.
|
4.3.4. On Backpressure and Ways to Reshape Requests
When implementing backpressure in Reactor, the way consumer pressure is propagated back to the source is by sending a request to the upstream operator.
The sum of current requests is sometimes referenced to as the current “demand”, or “pending request”.
Demand is capped at Long.MAX_VALUE, representing an unbounded request (meaning “produce as fast as you can” — basically disabling backpressure).
The first request comes from the final subscriber at subscription time, yet the most direct ways of subscribing all immediately trigger an unbounded request of Long.MAX_VALUE:
-
subscribe()and most of its lambda-based variants (to the exception of the one that has aConsumer<Subscription>) -
block(),blockFirst()andblockLast() -
iterating over a
toIterable()ortoStream()
The simplest way of customizing the original request is to subscribe with a BaseSubscriber with the hookOnSubscribe method overridden, as the following example shows:
Flux.range(1, 10)
    .doOnRequest(r -> System.out.println("request of " + r))
    .subscribe(new BaseSubscriber<Integer>() {

      @Override
      public void hookOnSubscribe(Subscription subscription) {
        request(1);
      }

      @Override
      public void hookOnNext(Integer integer) {
        System.out.println("Cancelling after having received " + integer);
        cancel();
      }
    });
The preceding snippet prints out the following:
request of 1
Cancelling after having received 1
When manipulating a request, you must be careful to produce enough demand for
the sequence to advance, or your Flux can get “stuck”. That is why BaseSubscriber
defaults to an unbounded request in hookOnSubscribe. When overriding this hook, you should usually
call request at least once.
|
Operators that Change the Demand from Downstream
One thing to keep in mind is that demand expressed at the subscribe level can be reshaped by each operator in the upstream chain.
A textbook case is the buffer(N) operator: If it receives a request(2), it is interpreted as a demand for two full buffers.
As a consequence, since buffers need N elements to be considered full, the buffer operator reshapes the request to 2 x N.
You might also have noticed that some operators have variants that take an int input parameter called prefetch.
This is another category of operators that modify the downstream request.
These are usually operators that deal with inner sequences, deriving a Publisher from each incoming element (like flatMap).
Prefetch is a way to tune the initial request made on these inner sequences.
If unspecified, most of these operators start with a demand of 32.
These operators usually also implement a replenishing optimization: Once the operator has seen 75% of the prefetch request fulfilled, it re-requests 75% from upstream. This is a heuristic optimization made so that these operators proactively anticipate the upcoming requests.
Finally, a couple of operators let you directly tune the request: limitRate and limitRequest.
limitRate(N) splits the downstream requests so that they are propagated upstream in smaller batches.
For instance, a request of 100 made to limitRate(10) would result in, at most, 10 requests of 10 being propagated to the upstream.
Note that, in this form, limitRate actually implements the replenishing optimization discussed earlier.
The operator has a variant that also lets you tune the replenishing amount (referred to as the lowTide in the variant): limitRate(highTide, lowTide).
Choosing a lowTide of 0 results in strict batches of highTide requests, instead of batches further reworked by the replenishing strategy.
limitRequest(N), on the other hand, caps the downstream request to a maximum total demand.
It adds up requests up to N. If a single request does not make the total demand overflow over N, that particular request is wholly propagated upstream.
After that amount has been emitted by the source, limitRequest considers the sequence complete, sends an onComplete signal downstream, and cancels the source.
4.4. Programmatically creating a sequence
In this section, we introduce the creation of a Flux or a Mono by
programmatically defining its associated events (onNext, onError, and
onComplete). All these methods share the fact that they expose an API to
trigger the events that we call a sink. There are actually a few sink
variants, which we’ll get to shortly.
4.4.1. Synchronous generate
The simplest form of programmatic creation of a Flux is through the generate
method, which takes a generator function.
This is for synchronous and one-by-one emissions, meaning that
the sink is a SynchronousSink and that its next() method can only be called
at most once per callback invocation. You can then additionally call error(Throwable)
or complete(), but this is optional.
The most useful variant is probably the one that also lets you keep a state
that you can refer to in your sink usage to decide what to emit next. The generator
function then becomes a BiFunction<S, SynchronousSink<T>, S>, with <S> the
type of the state object. You have to provide a Supplier<S> for the initial
state, and your generator function now returns a new state on each round.
For instance, you could use an int as the state:
generateFlux<String> flux = Flux.generate(
() -> 0, (1)
(state, sink) -> {
sink.next("3 x " + state + " = " + 3*state); (2)
if (state == 10) sink.complete(); (3)
return state + 1; (4)
});| 1 | We supply the initial state value of 0. |
| 2 | We use the state to choose what to emit (a row in the multiplication table of 3). |
| 3 | We also use it to choose when to stop. |
| 4 | We return a new state that we use in the next invocation (unless the sequence terminated in this one). |
The preceding code generates the table of 3, as the following sequence:
3 x 0 = 0
3 x 1 = 3
3 x 2 = 6
3 x 3 = 9
3 x 4 = 12
3 x 5 = 15
3 x 6 = 18
3 x 7 = 21
3 x 8 = 24
3 x 9 = 27
3 x 10 = 30
You can also use a mutable <S>. The example above could for instance be
rewritten using a single AtomicLong as the state, mutating it on each round:
Flux<String> flux = Flux.generate(
    AtomicLong::new, (1)
    (state, sink) -> {
      long i = state.getAndIncrement(); (2)
      sink.next("3 x " + i + " = " + 3*i);
      if (i == 10) sink.complete();
      return state; (3)
});| 1 | This time, we generate a mutable object as the state. |
| 2 | We mutate the state here. |
| 3 | We return the same instance as the new state. |
If your state object needs to clean up some resources, use the
generate(Supplier<S>, BiFunction, Consumer<S>) variant to clean up the last
state instance.
|
The following example uses the generate method that includes a Consumer:
Flux<String> flux = Flux.generate(
    AtomicLong::new,
      (state, sink) -> { (1)
      long i = state.getAndIncrement(); (2)
      sink.next("3 x " + i + " = " + 3*i);
      if (i == 10) sink.complete();
      return state; (3)
}, (state) -> System.out.println("state: " + state)); (4)| 1 | Again, we generate a mutable object as the state. |
| 2 | We mutate the state here. |
| 3 | We return the same instance as the new state. |
| 4 | We see the last state value (11) as the output of this Consumer lambda. |
In the case of the state containing a database connection or other resource
that needs to be handled at the end of the process, the Consumer lambda could
close the connection or otherwise handle any tasks that should be done at the
end of the process.
4.4.2. Asynchronous and Multi-threaded: create
create is a more advanced form of programmatic creation of a Flux which is
suitable for multiple emissions per round, even from multiple threads.
It exposes a FluxSink, with its next, error, and complete methods.
Contrary to generate, it doesn’t have a state-based variant. On the other
hand, it can trigger multi-threaded events in the callback.
create can be very useful to bridge an existing API with the reactive
world - such as an asynchronous API based on listeners.
|
create doesn’t parallelize your code nor does it make it asynchronous, even
though it can be used with asynchronous APIs. If you block within the create lambda,
you expose yourself to deadlocks and similar side effects. Even with the use of subscribeOn,
there’s the caveat that a long-blocking create lambda (such as an infinite loop calling
sink.next(t)) can lock the pipeline: the requests would never be performed due to the
loop starving the same thread they are supposed to run from. Use the subscribeOn(Scheduler, false)
variant: requestOnSeparateThread = false will use the Scheduler thread for the create
and still let data flow by performing request in the original thread.
|
Imagine that you use a listener-based API. It processes data by chunks
and has two events: (1) a chunk of data is ready and (2) the processing is
complete (terminal event), as represented in the MyEventListener interface:
interface MyEventListener<T> {
    void onDataChunk(List<T> chunk);
    void processComplete();
}
You can use create to bridge this into a Flux<T>:
Flux<String> bridge = Flux.create(sink -> {
    myEventProcessor.register( (4)
      new MyEventListener<String>() { (1)

        public void onDataChunk(List<String> chunk) {
          for(String s : chunk) {
            sink.next(s); (2)
          }
        }

        public void processComplete() {
            sink.complete(); (3)
        }
    });
});| 1 | Bridge to the MyEventListener API |
| 2 | Each element in a chunk becomes an element in the Flux. |
| 3 | The processComplete event is translated to onComplete. |
| 4 | All of this is done asynchronously whenever the myEventProcessor executes. |
Additionally, since create can bridge asynchronous APIs and manages backpressure, you
can refine how to behave backpressure-wise, by indicating an OverflowStrategy:
-
IGNOREto Completely ignore downstream backpressure requests. This may yieldIllegalStateExceptionwhen queues get full downstream. -
ERRORto signal anIllegalStateExceptionwhen the downstream can’t keep up. -
DROPto drop the incoming signal if the downstream is not ready to receive it. -
LATESTto let downstream only get the latest signals from upstream. -
BUFFER(the default) to buffer all signals if the downstream can’t keep up. (this does unbounded buffering and may lead toOutOfMemoryError).
Mono also has a create generator. The MonoSink of Mono’s create
doesn’t allow several emissions. It will drop all signals after the first one.
|
4.4.3. Asynchronous but single-threaded: push
push is a middle ground between generate and create which is suitable for
processing events from a single producer. It is similar to create in the sense
that it can also be asynchronous and can manage backpressure using any of the
overflow strategies supported by create. However, only one producing thread
may invoke next, complete or error at a time.
Flux<String> bridge = Flux.push(sink -> {
    myEventProcessor.register(
      new SingleThreadEventListener<String>() { (1)

        public void onDataChunk(List<String> chunk) {
          for(String s : chunk) {
            sink.next(s); (2)
          }
        }

        public void processComplete() {
            sink.complete(); (3)
        }

        public void processError(Throwable e) {
            sink.error(e); (4)
        }
    });
});| 1 | Bridge to the SingleThreadEventListener API. |
| 2 | Events are pushed to the sink using next from a single listener thread. |
| 3 | complete event generated from the same listener thread. |
| 4 | error event also generated from the same listener thread. |
A hybrid push/pull model
Most Reactor operators, like create, follow a hybrid push/pull model.
What we mean by that is that despite most of the processing being asynchronous
(suggesting a push approach), there is a small pull component to it: the
request.
The consumer pulls data from the source in the sense that it won’t emit anything until first requested. The source pushes data to the consumer whenever it becomes available, but within the bounds of its requested amount.
Note that push() and create() both allow to set up an onRequest consumer
in order to manage the request amount and to ensure that data is pushed through
the sink only when there is pending request.
Flux<String> bridge = Flux.create(sink -> {
    myMessageProcessor.register(
      new MyMessageListener<String>() {

        public void onMessage(List<String> messages) {
          for(String s : messages) {
            sink.next(s); (3)
          }
        }
    });
    sink.onRequest(n -> {
        List<String> messages = myMessageProcessor.getHistory(n); (1)
        for(String s : messages) {
           sink.next(s); (2)
        }
    });
});| 1 | Poll for messages when requests are made. |
| 2 | If messages are available immediately, push them to the sink. |
| 3 | The remaining messages that arrive asynchronously later are also delivered. |
Cleaning up after push() or create()
Two callbacks, onDispose and onCancel, perform any cleanup on cancellation
or termination. onDispose can be used to perform cleanup when the Flux
completes, errors out, or is cancelled. onCancel can be used to perform any
action specific to cancellation prior to cleanup with onDispose.
Flux<String> bridge = Flux.create(sink -> {
    sink.onRequest(n -> channel.poll(n))
        .onCancel(() -> channel.cancel()) (1)
        .onDispose(() -> channel.close())  (2)
});| 1 | onCancel is invoked first, for cancel signal only. |
| 2 | onDispose is invoked for complete, error, or cancel signals. |
4.4.4. Handle
The handle method is a bit different: it is an instance method, meaning that
it is chained on an existing source (as are the common operators). It is present
in both Mono and Flux.
It is close to generate, in the sense that it uses a SynchronousSink and
only allows one-by-one emissions. However, handle can be used to generate an
arbitrary value out of each source element, possibly skipping some elements. In
this way, it can serve as a combination of map and filter. The signature of
handle is as follows:
Flux<R> handle(BiConsumer<T, SynchronousSink<R>>);Let’s consider an example. The reactive streams specification disallows null
values in a sequence. What if you want to perform a map but you want to use
a preexisting method as the map function, and that method sometimes returns null?
For instance, the following method can be applied safely to a source of integers:
public String alphabet(int letterNumber) {
	if (letterNumber < 1 || letterNumber > 26) {
		return null;
	}
	int letterIndexAscii = 'A' + letterNumber - 1;
	return "" + (char) letterIndexAscii;
}
We can then use handle to remove any nulls:
handle for a "map and eliminate nulls" scenarioFlux<String> alphabet = Flux.just(-1, 30, 13, 9, 20)
.handle((i, sink) -> {
String letter = alphabet(i); (1)
if (letter != null) (2)
sink.next(letter); (3)
});
alphabet.subscribe(System.out::println);| 1 | Map to letters. |
| 2 | If the "map function" returns null…. |
| 3 | Filter it out by not calling sink.next. |
Which will print out:
M
I
T
4.5. Threading and Schedulers
Reactor, like RxJava, can be considered to be concurrency-agnostic. That is, it does not enforce a concurrency model. Rather, it leaves you, the developer, in command. However, that does not prevent the library from helping you with concurrency.
Obtaining a Flux or a Mono does not necessarily mean that it runs in a dedicated
Thread. Instead, most operators continue working in the Thread on which the
previous operator executed. Unless specified, the topmost operator (the source)
itself runs on the Thread in which the subscribe() call was made. The following
example runs a Mono in a new thread:
public static void main(String[] args) throws InterruptedException {
  final Mono<String> mono = Mono.just("hello "); (1)

  Thread t = new Thread(() -> mono
      .map(msg -> msg + "thread ")
      .subscribe(v -> (2)
          System.out.println(v + Thread.currentThread().getName()) (3)
      )
  )
  t.start();
  t.join();

}| 1 | The Mono<String> is assembled in thread main. |
| 2 | However, it is subscribed to in thread Thread-0. |
| 3 | As a consequence, both the map and the onNext callback actually run in Thread-0 |
The preceding code produces the following output:
hello thread Thread-0In Reactor, the execution model and where the execution happens is determined by the
Scheduler that is used. A
Scheduler
has scheduling responsibilities similar to an ExecutorService, but having a
dedicated abstraction lets it do more, notably acting as a clock and enabling
a wider range of implementations (virtual time for tests, trampolining or
immediate scheduling, and so on).
The Schedulers
class has static methods that give access to the following execution contexts:
-
No execution context (
Schedulers.immediate()): at processing time, the submittedRunnablewill be directly executed, effectively running them on the currentThread(can be seen as a "null object" or no-opScheduler). -
A single, reusable thread (
Schedulers.single()). Note that this method reuses the same thread for all callers, until the Scheduler is disposed. If you want a per-call dedicated thread, useSchedulers.newSingle()for each call. -
An unbounded elastic thread pool (
Schedulers.elastic()). This one is no longer preferred with the introduction ofSchedulers.boundedElastic(), as it has a tendency to hide backpressure problems and lead to too many threads (see below). -
A bounded elastic thread pool (
Schedulers.boundedElastic()). Like its predecessorelastic(), it creates new worker pools as needed and reuses idle ones. Worker pools that stay idle for too long (the default is 60s) are also disposed. Unlike itselastic()predecessor, it has a cap on the number of backing threads it can create (default is number of CPU cores x 10). Up to 100 000 tasks submitted after the cap has been reached are enqueued and will be re-scheduled when a thread becomes available (when scheduling with a delay, the delay starts when the thread becomes available). This is a better choice for I/O blocking work.Schedulers.boundedElastic()is a handy way to give a blocking process its own thread so that it does not tie up other resources. See How Do I Wrap a Synchronous, Blocking Call?, but doesn’t pressure the system too much with new threads. -
A fixed pool of workers that is tuned for parallel work (
Schedulers.parallel()). It creates as many workers as you have CPU cores.
Additionally, you can create a Scheduler out of any pre-existing ExecutorService by
using Schedulers.fromExecutorService(ExecutorService). (You can also create one from an
Executor, although doing so is discouraged.)
You can also create new instances of the various scheduler types by using the newXXX
methods. For example, Schedulers.newParallel(yourScheduleName) creates a new parallel
scheduler named yourScheduleName.
|
While Custom |
Some operators use a specific scheduler from Schedulers by default (and usually give
you the option of providing a different one). For instance, calling the
Flux.interval(Duration.ofMillis(300)) factory method produces a Flux<Long> that ticks every 300ms.
By default, this is enabled by Schedulers.parallel(). The following line changes the
Scheduler to a new instance similar to Schedulers.single():
Flux.interval(Duration.ofMillis(300), Schedulers.newSingle("test"))Reactor offers two means of switching the execution context (or Scheduler) in a
reactive chain: publishOn and subscribeOn. Both take a Scheduler and let you switch
the execution context to that scheduler. But the placement of publishOn in the chain
matters, while the placement of subscribeOn does not. To understand that difference,
you first have to remember that nothing happens until you
subscribe.
In Reactor, when you chain operators, you can wrap as many Flux and Mono
implementations inside one another as you need. Once you subscribe, a chain of
Subscriber objects is created, backward (up the chain) to the first
publisher. This is effectively hidden from you. All you can see is the outer layer of
Flux (or Mono) and Subscription, but these intermediate operator-specific
subscribers are where the real work happens.
With that knowledge, we can have a closer look at the publishOn and subscribeOn
operators:
4.5.1. The publishOn Method
publishOn applies in the same way as any other operator, in the middle of the
subscriber chain. It takes signals from upstream and replays them downstream while
executing the callback on a worker from the associated Scheduler. Consequently, it
affects where the subsequent operators execute (until another publishOn is
chained in), as follows:
-
Changes the execution context to one
Threadpicked by theScheduler -
as per the specification,
onNextcalls happen in sequence, so this uses up a single thread -
unless they work on a specific
Scheduler, operators afterpublishOncontinue execution on that same thread
The following example uses the publishOn method:
Scheduler s = Schedulers.newParallel("parallel-scheduler", 4); (1)

final Flux<String> flux = Flux
    .range(1, 2)
    .map(i -> 10 + i)  (2)
    .publishOn(s)  (3)
    .map(i -> "value " + i);  (4)

new Thread(() -> flux.subscribe(System.out::println)); (5)| 1 | Creates a new Scheduler backed by four Thread instances. |
| 2 | The first map runs on the anonymous thread in <5>. |
| 3 | The publishOn switches the whole sequence on a Thread picked from <1>. |
| 4 | The second map runs on the Thread from <1>. |
| 5 | This anonymous Thread is the one where the subscription happens.
The print happens on the latest execution context, which is the one from publishOn. |
4.5.2. The subscribeOn Method
subscribeOn applies to the subscription process, when that backward chain is
constructed. As a consequence, no matter where you place the subscribeOn in the chain,
it always affects the context of the source emission. However, this does not affect the
behavior of subsequent calls to publishOn — they still switch the execution context for
the part of the chain after them.
-
Changes the
Threadfrom which the whole chain of operators subscribes -
Picks one thread from the
Scheduler
Only the earliest subscribeOn call in the chain is actually taken into account.
|
The following example uses the subscribeOn method:
Scheduler s = Schedulers.newParallel("parallel-scheduler", 4); (1)

final Flux<String> flux = Flux
    .range(1, 2)
    .map(i -> 10 + i)  (2)
    .subscribeOn(s)  (3)
    .map(i -> "value " + i);  (4)

new Thread(() -> flux.subscribe(System.out::println)); (5)| 1 | Creates a new Scheduler backed by four Thread. |
| 2 | The first map runs on one of these four threads… |
| 3 | …because subscribeOn switches the whole sequence right from subscription time (<5>). |
| 4 | The second map also runs on same thread. |
| 5 | This anonymous Thread is the one where the subscription initially happens, but subscribeOn immediately shifts it to one of the four scheduler threads. |
4.6. Handling Errors
| For a quick look at the available operators for error handling, see the relevant operator decision tree. |
In Reactive Streams, errors are terminal events. As soon as an error occurs, it stops the
sequence and gets propagated down the chain of operators to the last step, the
Subscriber you defined and its onError method.
Such errors should still be dealt with at the application level. For instance, you might
display an error notification in a UI or send a meaningful error payload in a REST
endpoint. For this reason, the subscriber’s onError method should always be defined.
If not defined, onError throws an UnsupportedOperationException. You can
further detect and triage it with the Exceptions.isErrorCallbackNotImplemented method.
|
Reactor also offers alternative means of dealing with errors in the middle of the chain, as error-handling operators. The following example shows how to do so:
Flux.just(1, 2, 0)
    .map(i -> "100 / " + i + " = " + (100 / i)) //this triggers an error with 0
    .onErrorReturn("Divided by zero :("); // error handling example
Before you learn about error-handling operators, you must keep in mind that
any error in a reactive sequence is a terminal event. Even if an error-handling
operator is used, it does not let the original sequence continue. Rather, it
converts the onError signal into the start of a new sequence (the fallback one). In
other words, it replaces the terminated sequence upstream of it.
|
Now we can consider each means of error handling one-by-one. When relevant, we make a
parallel with imperative programming’s try patterns.
4.6.1. Error Handling Operators
You may be familiar with several ways of dealing with exceptions in a try-catch block. Most notably, these include the following:
-
Catch and return a static default value.
-
Catch and execute an alternative path with a fallback method.
-
Catch and dynamically compute a fallback value.
-
Catch, wrap to a
BusinessException, and re-throw. -
Catch, log an error-specific message, and re-throw.
-
Use the
finallyblock to clean up resources or a Java 7 “try-with-resource” construct.
All of these have equivalents in Reactor, in the form of error-handling operators. Before looking into these operators, we first want to establish a parallel between a reactive chain and a try-catch block.
When subscribing, the onError callback at the end of the chain is akin to a catch
block. There, execution skips to the catch in case an Exception is thrown, as the
following example shows:
Flux<String> s = Flux.range(1, 10)
    .map(v -> doSomethingDangerous(v)) (1)
    .map(v -> doSecondTransform(v)); (2)
s.subscribe(value -> System.out.println("RECEIVED " + value), (3)
            error -> System.err.println("CAUGHT " + error) (4)
);| 1 | A transformation that can throw an exception is performed. |
| 2 | If everything went well, a second transformation is performed. |
| 3 | Each successfully transformed value is printed out. |
| 4 | In case of an error, the sequence terminates and an error message is displayed. |
The preceding example is conceptually similar to the following try-catch block:
try {
    for (int i = 1; i < 11; i++) {
        String v1 = doSomethingDangerous(i); (1)
        String v2 = doSecondTransform(v1); (2)
        System.out.println("RECEIVED " + v2);
    }
} catch (Throwable t) {
    System.err.println("CAUGHT " + t); (3)
}| 1 | If an exception is thrown here… |
| 2 | …the rest of the loop is skipped… |
| 3 | … and the execution goes straight to here. |
Now that we have established a parallel, we can look at the different error handling cases and their equivalent operators.
Static Fallback Value
The equivalent of “Catch and return a static default value” is onErrorReturn.
The following example shows how to use it:
try {
  return doSomethingDangerous(10);
}
catch (Throwable error) {
  return "RECOVERED";
}
The following example shows the Reactor equivalent:
Flux.just(10)
    .map(this::doSomethingDangerous)
    .onErrorReturn("RECOVERED");
You also have the option of applying a Predicate on the exception to decide
whether or not to recover, as the following example shows:
Flux.just(10)
    .map(this::doSomethingDangerous)
.onErrorReturn(e -> e.getMessage().equals("boom10"), "recovered10"); (1)| 1 | Recover only if the message of the exception is "boom10" |
Catch and swallow the error
If you don’t even want to replace the exception with a fallback value, but instead to ignore it and
only propagate elements that have been produced so far, what you want is essentially replacing
the onError signal with an onComplete signal. This can be done by the onErrorComplete operator:
Flux.just(10,20,30)
    .map(this::doSomethingDangerousOn30)
.onErrorComplete(); (1)| 1 | Recover by turning the onError into an onComplete |
Like onErrorReturn, onErrorComplete has variants that let you filter which exceptions
to fall back on, based either on the exception’s class or on a Predicate.
Fallback Method
If you want more than a single default value and you have an alternative (safer) way of
processing your data, you can use onErrorResume. This would be the equivalent of
“Catch and execute an alternative path with a fallback method”.
For example, if your nominal process is fetching data from an external and unreliable service but you also keep a local cache of the same data that can be a bit more out of date but is more reliable, you could do the following:
String v1;
try {
  v1 = callExternalService("key1");
}
catch (Throwable error) {
  v1 = getFromCache("key1");
}

String v2;
try {
  v2 = callExternalService("key2");
}
catch (Throwable error) {
  v2 = getFromCache("key2");
}
The following example shows the Reactor equivalent:
Flux.just("key1", "key2")
    .flatMap(k -> callExternalService(k) (1)
        .onErrorResume(e -> getFromCache(k)) (2)
);| 1 | For each key, asynchronously call the external service. |
| 2 | If the external service call fails, fall back to the cache for that key. Note that
we always apply the same fallback, whatever the source error, e, is. |
Like onErrorReturn, onErrorResume has variants that let you filter which exceptions
to fall back on, based either on the exception’s class or on a Predicate. The fact that it
takes a Function also lets you choose a different fallback sequence to switch to,
depending on the error encountered. The following example shows how to do so:
Flux.just("timeout1", "unknown", "key2")
    .flatMap(k -> callExternalService(k)
        .onErrorResume(error -> { (1)
            if (error instanceof TimeoutException) (2)
                return getFromCache(k);
            else if (error instanceof UnknownKeyException)  (3)
                return registerNewEntry(k, "DEFAULT");
            else
                return Flux.error(error); (4)
        })
);| 1 | The function allows dynamically choosing how to continue. |
| 2 | If the source times out, hit the local cache. |
| 3 | If the source says the key is unknown, create a new entry. |
| 4 | In all other cases, “re-throw”. |
Dynamic Fallback Value
Even if you do not have an alternative (safer) way of processing your data, you might want to compute a fallback value out of the exception you received. This would be the equivalent of “Catch and dynamically compute a fallback value”.
For instance, if your return type (MyWrapper) has a variant dedicated to holding an exception (think
Future.complete(T success) versus Future.completeExceptionally(Throwable error)), you
could instantiate the error-holding variant and pass the exception.
An imperative example would look like the following:
try {
  Value v = erroringMethod();
  return MyWrapper.fromValue(v);
}
catch (Throwable error) {
  return MyWrapper.fromError(error);
}
You can do this reactively in the same way as the fallback method solution,
by using onErrorResume, with a tiny bit of boilerplate, as follows:
erroringFlux.onErrorResume(error -> Mono.just( (1)
        MyWrapper.fromError(error) (2)
));| 1 | Since you expect a MyWrapper representation of the error, you need to get a
Mono<MyWrapper> for onErrorResume. We use Mono.just() for that. |
| 2 | We need to compute the value out of the exception. Here, we achieved that
by wrapping the exception with a relevant MyWrapper factory method. |
Catch and Rethrow
"Catch, wrap to a BusinessException, and re-throw" looks like the following in the
imperative world:
try {
  return callExternalService(k);
}
catch (Throwable error) {
  throw new BusinessException("oops, SLA exceeded", error);
}
In the “fallback method” example, the last line inside the flatMap gives us a hint
at achieving the same reactively, as follows:
Flux.just("timeout1")
    .flatMap(k -> callExternalService(k))
    .onErrorResume(original -> Flux.error(
            new BusinessException("oops, SLA exceeded", original))
    );
However, there is a more straightforward way of achieving the same effect with onErrorMap:
Flux.just("timeout1")
    .flatMap(k -> callExternalService(k))
    .onErrorMap(original -> new BusinessException("oops, SLA exceeded", original));
Log or React on the Side
For cases where you want the error to continue propagating but still want to react to
it without modifying the sequence (logging it, for instance), you can use the doOnError
operator. This is the equivalent of “Catch, log an error-specific message, and re-throw”
pattern, as the following example shows:
try {
  return callExternalService(k);
}
catch (RuntimeException error) {
  //make a record of the error
  log("uh oh, falling back, service failed for key " + k);
  throw error;
}
The doOnError operator, as well as all operators prefixed with doOn , are sometimes
referred to as having a “side-effect”. They let you peek inside the sequence’s events without
modifying them.
Like the imperative example shown earlier, the following example still propagates the error yet ensures that we at least log that the external service had a failure:
LongAdder failureStat = new LongAdder();
Flux<String> flux =
Flux.just("unknown")
    .flatMap(k -> callExternalService(k) (1)
        .doOnError(e -> {
            failureStat.increment();
            log("uh oh, falling back, service failed for key " + k); (2)
        })
        (3)
);| 1 | The external service call that can fail… |
| 2 | …is decorated with a logging and stats side-effect… |
| 3 | …after which, it still terminates with an error, unless we use an error-recovery operator here. |
We can also imagine we have statistic counters to increment as a second error side-effect.
Using Resources and the Finally Block
The last parallel to draw with imperative programming is the cleaning up that can be done
either by using a “Use of the finally block to clean up resources” or by using a
“Java 7 try-with-resource construct”, both shown below:
Stats stats = new Stats();
stats.startTimer();
try {
  doSomethingDangerous();
}
finally {
  stats.stopTimerAndRecordTiming();
}try (SomeAutoCloseable disposableInstance = new SomeAutoCloseable()) {
return disposableInstance.toString();
}Both have their Reactor equivalents: doFinally and using.
doFinally is about side-effects that you want to be executed whenever the
sequence terminates (with onComplete or onError) or is cancelled.
It gives you a hint as to what kind of termination triggered the side-effect.
The following example shows how to use doFinally:
doFinally()Stats stats = new Stats();
LongAdder statsCancel = new LongAdder();
Flux<String> flux =
Flux.just("foo", "bar")
.doOnSubscribe(s -> stats.startTimer())
.doFinally(type -> { (1)
stats.stopTimerAndRecordTiming();(2)
if (type == SignalType.CANCEL) (3)
statsCancel.increment();
})
.take(1); (4)| 1 | doFinally consumes a SignalType for the type of termination. |
| 2 | Similarly to finally blocks, we always record the timing. |
| 3 | Here we also increment statistics in case of cancellation only. |
| 4 | take(1) cancels after one item is emitted. |
On the other hand, using handles the case where a Flux is derived from a
resource and that resource must be acted upon whenever processing is done.
In the following example, we replace the AutoCloseable interface of “try-with-resource” with a
Disposable:
AtomicBoolean isDisposed = new AtomicBoolean();
Disposable disposableInstance = new Disposable() {
    @Override
    public void dispose() {
        isDisposed.set(true); (4)
    }

    @Override
    public String toString() {
        return "DISPOSABLE";
    }
};
Now we can do the reactive equivalent of “try-with-resource” on it, which looks like the following:
using()Flux<String> flux =
Flux.using(
() -> disposableInstance, (1)
disposable -> Flux.just(disposable.toString()), (2)
Disposable::dispose (3)
);| 1 | The first lambda generates the resource. Here, we return our mock Disposable. |
| 2 | The second lambda processes the resource, returning a Flux<T>. |
| 3 | The third lambda is called when the Flux from <2> terminates or is cancelled, to
clean up resources. |
| 4 | After subscription and execution of the sequence, the isDisposed atomic boolean
becomes true. |
Demonstrating the Terminal Aspect of onError
In order to demonstrate that all these operators cause the upstream original sequence to
terminate when an error happens, we can use a more visual example with a
Flux.interval. The interval operator ticks every x units of time with an increasing
Long value. The following example uses an interval operator:
Flux<String> flux =
Flux.interval(Duration.ofMillis(250))
    .map(input -> {
        if (input < 3) return "tick " + input;
        throw new RuntimeException("boom");
    })
    .onErrorReturn("Uh oh");

flux.subscribe(System.out::println);
Thread.sleep(2100); (1)| 1 | Note that interval executes on a timer Scheduler by default. If we want
to run that example in a main class, we would need to add a sleep call here so that the
application does not exit immediately without any value being produced. |
The preceding example prints out one line every 250ms, as follows:
tick 0
tick 1
tick 2
Uh oh
Even with one extra second of runtime, no more tick comes in from the interval. The
sequence was indeed terminated by the error.
Retrying
There is another operator of interest with regards to error handling, and you might be
tempted to use it in the case described in the previous section. retry, as its name
indicates, lets you retry an error-producing sequence.
The thing to keep in mind is that it works by re-subscribing to the upstream Flux.
This is really a different sequence, and the original one is still terminated.
To verify that, we can re-use the previous example and append a retry(1) to
retry once instead of using onErrorReturn. The following example shows how to do sl:
Flux.interval(Duration.ofMillis(250))
    .map(input -> {
        if (input < 3) return "tick " + input;
        throw new RuntimeException("boom");
    })
    .retry(1)
    .elapsed() (1)
    .subscribe(System.out::println, System.err::println); (2)

Thread.sleep(2100); (3)| 1 | elapsed associates each value with the duration since previous value was emitted. |
| 2 | We also want to see when there is an onError. |
| 3 | Ensure we have enough time for our 4x2 ticks. |
The preceding example produces the following output:
259,tick 0
249,tick 1
251,tick 2
506,tick 0 (1)
248,tick 1
253,tick 2
java.lang.RuntimeException: boom| 1 | A new interval started, from tick 0. The additional 250ms duration is
coming from the 4th tick, the one that causes the exception and subsequent
retry. |
As you can see from the preceding example, retry(1) merely re-subscribed to the original interval
once, restarting the tick from 0. The second time around, since the exception
still occurs, it gives up and propagates the error downstream.
There is a more advanced version of retry (called retryWhen) that uses a “companion”
Flux to tell whether or not a particular failure should retry. This companion Flux is
created by the operator but decorated by the user, in order to customize the retry
condition.
The companion Flux is a Flux<RetrySignal> that gets passed to a Retry strategy/function,
supplied as the sole parameter of retryWhen. As the user, you define that function and make it return a new
Publisher<?>. The Retry class is an abstract class, but it offers a factory method if you
want to transform the companion with a simple lambda (Retry.from(Function)).
Retry cycles go as follows:
-
Each time an error happens (giving potential for a retry), a
RetrySignalis emitted into the companionFlux, which has been decorated by your function. Having aFluxhere gives a bird eye’s view of all the attempts so far. TheRetrySignalgives access to the error as well as metadata around it. -
If the companion
Fluxemits a value, a retry happens. -
If the companion
Fluxcompletes, the error is swallowed, the retry cycle stops, and the resulting sequence completes, too. -
If the companion
Fluxproduces an error (e), the retry cycle stops and the resulting sequence errors withe.
The distinction between the previous two cases is important. Simply completing the
companion would effectively swallow an error. Consider the following way of emulating
retry(3) by using retryWhen:
Flux<String> flux = Flux
    .<String>error(new IllegalArgumentException()) (1)
    .doOnError(System.out::println) (2)
    .retryWhen(Retry.from(companion -> (3)
companion.take(3))); (4)| 1 | This continuously produces errors, calling for retry attempts. |
| 2 | doOnError before the retry lets us log and see all failures. |
| 3 | The Retry is adapted from a very simple Function lambda |
| 4 | Here, we consider the first three errors as retry-able (take(3)) and then give up. |
In effect, the preceding example results in an empty Flux, but it completes successfully. Since
retry(3) on the same Flux would have terminated with the latest error, this
retryWhen example is not exactly the same as a retry(3).
Getting to the same behavior involves a few additional tricks:
AtomicInteger errorCount = new AtomicInteger();
Flux<String> flux =
		Flux.<String>error(new IllegalArgumentException())
				.doOnError(e -> errorCount.incrementAndGet())
				.retryWhen(Retry.from(companion -> (1)
						companion.map(rs -> { (2)
							if (rs.totalRetries() < 3) return rs.totalRetries(); (3)
							else throw Exceptions.propagate(rs.failure()); (4)
						})
));| 1 | We customize Retry by adapting from a Function lambda rather than providing a concrete class |
| 2 | The companion emits RetrySignal objects, which bear number of retries so far and last failure |
| 3 | To allow for three retries, we consider indexes < 3 and return a value to emit (here we simply return the index). |
| 4 | In order to terminate the sequence in error, we throw the original exception after these three retries. |
One can use the builders exposed in Retry to achieve the same in a more fluent manner, as
well as more finely tuned retry strategies. For example: errorFlux.retryWhen(Retry.max(3));.
|
| You can use similar code to implement an “exponential backoff and retry” pattern, as shown in the FAQ. |
The core-provided Retry helpers, RetrySpec and RetryBackoffSpec, both allow advanced customizations like:
-
setting the
filter(Predicate)for the exceptions that can trigger a retry -
modifying such a previously set filter through
modifyErrorFilter(Function) -
triggering a side effect like logging around the retry trigger (ie for backoff before and after the delay), provided the retry is validated (
doBeforeRetry()anddoAfterRetry()are additive) -
triggering an asynchronous
Mono<Void>around the retry trigger, which allows to add asynchronous behavior on top of the base delay but thus further delay the trigger (doBeforeRetryAsyncanddoAfterRetryAsyncare additive) -
customizing the exception in case the maximum number of attempts has been reached, through
onRetryExhaustedThrow(BiFunction). By default,Exceptions.retryExhausted(…)is used, which can be distinguished withExceptions.isRetryExhausted(Throwable) -
activating the handling of transient errors (see below)
Retrying with transient errors
Some long-lived sources may see sporadic bursts of errors followed by longer periods of time during which all is running smoothly. This documentation refers to this pattern of errors as transient errors.
In such cases, it would be desirable to deal with each burst in isolation, so that the next burst doesn’t inherit the retry state from the previous one.
For instance, with an exponential backoff strategy each subsequent burst should delay retry attempts starting from the minimum backoff Duration instead of an ever-growing one.
The RetrySignal interface, which represents retryWhen state, has a totalRetriesInARow() value which can be used for this.
Instead of the usual monotonically-increasing totalRetries() index, this secondary index is reset to 0 each time an error
is recovered from by the retry (ie. when a retry attempt results in an incoming onNext instead of an onError again).
When setting the transientErrors(boolean) configuration parameter to true in the RetrySpec or RetryBackoffSpec, the resulting strategy makes use of that totalRetriesInARow() index, effectively dealing with transient errors.
These specs compute the retry pattern from the index, so in effect all other configuration parameters of the spec apply to each burst of error independently.
AtomicInteger errorCount = new AtomicInteger(); (1)
Flux<Integer> transientFlux = httpRequest.get() (2)
        .doOnError(e -> errorCount.incrementAndGet());

transientFlux.retryWhen(Retry.max(2).transientErrors(true))  (3)
             .blockLast();
assertThat(errorCount).hasValue(6); (4)| 1 | We will count the number of errors in the retried sequence for illustration. |
| 2 | We assume a http request source, eg. a streaming endpoint that will sometimes fail two times in a row, then recover. |
| 3 | We use retryWhen on that source, configured for at most 2 retry attempts, but in transientErrors mode. |
| 4 | At the end, a valid response is achieved and the transientFlux successfully completes after 6 attempts have been registered in errorCount. |
Without the transientErrors(true), the configured maximum attempt of 2 would be exceeded by the second burst and the whole sequence would have ultimately failed.
|
If you want to locally try this without an actual http remote endpoint, you can implement a pseudo
|
4.6.2. Handling Exceptions in Operators or Functions
In general, all operators can themselves contain code that potentially trigger an exception or calls to a user-defined callback that can similarly fail, so they all contain some form of error handling.
As a rule of thumb, an unchecked exception is always propagated through onError. For
instance, throwing a RuntimeException inside a map function translates to an
onError event, as the following code shows:
Flux.just("foo")
    .map(s -> { throw new IllegalArgumentException(s); })
    .subscribe(v -> System.out.println("GOT VALUE"),
               e -> System.out.println("ERROR: " + e));
The preceding code prints out the following:
ERROR: java.lang.IllegalArgumentException: foo
You can tune the Exception before it is passed to onError, through the use of a
hook.
|
Reactor, however, defines a set of exceptions (such as OutOfMemoryError) that are
always deemed to be fatal. See the Exceptions.throwIfFatal method. These errors mean that
Reactor cannot keep operating and are thrown rather than propagated.
Internally, there are also cases where an unchecked exception still cannot be
propagated (most notably during the subscribe and request phases), due to concurrency
races that could lead to double onError or onComplete conditions. When these races
happen, the error that cannot be propagated is “dropped”. These cases can still be
managed to some extent by using customizable hooks. See Dropping Hooks.
|
You may ask: “What about checked exceptions?”
If, for example, you need to call some method that declares it throws exceptions, you
still have to deal with those exceptions in a try-catch block. You have several
options, though:
-
Catch the exception and recover from it. The sequence continues normally.
-
Catch the exception, wrap it into an unchecked exception, and then throw it (interrupting the sequence). The
Exceptionsutility class can help you with that (we get to that next). -
If you need to return a
Flux(for example, you are in aflatMap), wrap the exception in an error-producingFlux, as follows:return Flux.error(checkedException). (The sequence also terminates.)
Reactor has an Exceptions utility class that you can use to ensure that exceptions are
wrapped only if they are checked exceptions:
-
Use the
Exceptions.propagatemethod to wrap exceptions, if necessary. It also callsthrowIfFatalfirst and does not wrapRuntimeException. -
Use the
Exceptions.unwrapmethod to get the original unwrapped exception (going back to the root cause of a hierarchy of reactor-specific exceptions).
Consider the following example of a map that uses a conversion method that can throw an
IOException:
public String convert(int i) throws IOException {
    if (i > 3) {
        throw new IOException("boom " + i);
    }
    return "OK " + i;
}
Now imagine that you want to use that method in a map. You must now explicitly catch
the exception, and your map function cannot re-throw it. So you can propagate it to the
map’s onError method as a RuntimeException, as follows:
Flux<String> converted = Flux
    .range(1, 10)
    .map(i -> {
        try { return convert(i); }
        catch (IOException e) { throw Exceptions.propagate(e); }
    });
Later on, when subscribing to the preceding Flux and reacting to errors (such as in the
UI), you could revert back to the original exception if you want to do something
special for IOExceptions. The following example shows how to do so:
converted.subscribe(
    v -> System.out.println("RECEIVED: " + v),
    e -> {
        if (Exceptions.unwrap(e) instanceof IOException) {
            System.out.println("Something bad happened with I/O");
        } else {
            System.out.println("Something bad happened");
        }
    }
);
4.7. Processors and Sinks
Processors are a special kind of Publisher that are also a Subscriber.
They were originally intended as a possible representation of an intermediate step that
could then be shared between Reactive Streams implementations.
In Reactor however, such steps are rather represented by operators that are Publisher.
A common mistake when coming across a Processor for the first time is the temptation to
directly call the exposed onNext, onComplete and onError methods from the Subscriber interface.
Such manual calls should be made with care, especially regarding external synchronization
of calls with respect to the Reactive Streams specification.
Processors are actually probably marginally useful, unless one comes across a Reactive Streams
based API that requires a Subscriber to be passed, rather than exposing a Publisher.
Sinks are usually a better alternative. In Reactor a sink is a class that allows safe manual triggering of signals. It can either be associated to a subscription (from inside an operator) or completely standalone.
Since 3.4.0, sinks become the first class citizen and Processor are being phased out entirely:
-
both abstract and concrete
FluxProcessorandMonoProcessorare deprecated and slated for removal in 3.5.0 -
sinks which are not produced by an operator are constructed through factory methods in the
Sinksclass. -
we expect all processor usages to be replaceable with either an existing operator or a new sink from
Sinks. Users have time until 3.5 to surface situations where that isn’t the case, while falling back to using the deprecated APIs in the meantime.
4.7.1. Safely Produce from Multiple Threads by Using Sinks.One and Sinks.Many
Default flavors of Sinks exposed by reactor-core ensure that multi-threaded usage is detected
and cannot lead to spec violations or undefined behavior from the perspective of downstream
subscribers. When using the tryEmit* API, parallel calls fail fast. When using the emit*
API, the provided EmissionFailureHandler may allow to retry on contention (eg. busy looping),
otherwise the sink will terminate with an error.
This is an improvement over Processor.onNext, which must be synchronized externally or
lead to undefined behavior from the perspective of the downstream subscribers.
The Sinks builder provide a guided API to the main supported producer types.
You will recognize some of the behavior found in Flux such as onBackpressureBuffer.
Sinks.Many<Integer> replaySink = Sinks.many().replay().all();Multiple producer threads may concurrently generate data on the sink by doing the following:
//thread1
replaySink.emitNext(1, FAIL_FAST);

//thread2, later
replaySink.emitNext(2, FAIL_FAST);

//thread3, concurrently with thread 2
EmitResult result = replaySink.tryEmitNext(3); //would return FAIL_NON_SERIALIZED
The Sinks.Many can be presented to downstream consumers as a Flux, like in the below example:
Flux<Integer> fluxView = replaySink.asFlux();
fluxView
	.takeWhile(i -> i < 10)
	.log()
	.blockLast();
Similarly, the Sinks.Empty and Sinks.One flavors can be viewed as a Mono with the asMono() method.
The Sinks categories are:
-
many().multicast(): a sink that will transmit only newly pushed data to its subscribers, honoring their backpressure (newly pushed as in "after the subscriber’s subscription"). -
many().unicast(): same as above, with the twist that data pushed before the first subscriber registers is buffered. -
many().replay(): a sink that will replay a specified history size of pushed data to new subscribers then continue pushing new data live. -
one(): a sink that will play a single element to its subscribers -
empty(): a sink that will play a terminal signal only to its subscribers (error or complete), but can still be viewed as aMono<T>(notice the generic type<T>).
4.7.2. Overview of Available Sinks
Sinks.many().unicast().onBackpressureBuffer(args?)
A unicast Sinks.Many can deal with backpressure by using an internal buffer.
The trade-off is that it can have at most one Subscriber.
The basic unicast sink is created via Sinks.many().unicast().onBackpressureBuffer().
But there are a few additional unicast static factory methods in Sinks.many().unicast() allowing finer tuning.
For instance, by default, it is unbounded: if you push any amount of data through it while
its Subscriber has not yet requested data, it buffers all of the data.
You can change this by providing a custom Queue implementation for the internal
buffering in the Sinks.many().unicast().onBackpressureBuffer(Queue) factory method.
If that queue is bounded, the sink could reject the push of a value when the buffer
is full and not enough requests from downstream have been received.
Sinks.many().multicast().onBackpressureBuffer(args?)
A multicast Sinks.Many can emit to several subscribers while honoring backpressure for each of its subscribers.
Subscribers receive only the signals pushed through the sink after they have subscribed.
The basic multicast sink is created via Sinks.many().multicast().onBackpressureBuffer().
By default, if all of its subscribers are cancelled (which basically means they have all
un-subscribed), it clears its internal buffer and stops accepting new subscribers.
You can tune this by using the autoCancel parameter in the multicast static factory methods
under Sinks.many().multicast().
Sinks.many().multicast().directAllOrNothing()
A multicast Sinks.Many with a simplistic handling of backpressure: if any of the subscribers
is too slow (has zero demand), the onNext is dropped for all subscribers.
However, the slow subscribers are not terminated and once the slow subscribers have started requesting again, all will resume receiving elements pushed from there on.
Once the Sinks.Many has terminated (usually through its emitError(Throwable) or
emitComplete() methods being called), it lets more subscribers subscribe but replays the
termination signal to them immediately.
Sinks.many().multicast().directBestEffort()
A multicast Sinks.Many with a best effort handling of backpressure: if a subscriber
is too slow (has zero demand), the onNext is dropped for this slow subscriber only.
However, the slow subscribers are not terminated and once they have started requesting again they will resume receiving newly pushed elements.
Once the Sinks.Many has terminated (usually through its emitError(Throwable) or
emitComplete() methods being called), it lets more subscribers subscribe but replays the
termination signal to them immediately.
Sinks.many().replay()
A replay Sinks.Many caches emitted elements and replays them to late subscribers.
It can be created in multiple configurations:
-
Caching a limited history (
Sinks.many().replay().limit(int)) or an unbounded history (Sinks.many().replay().all()). -
Caching a time-based replay window (
Sinks.many().replay().limit(Duration)). -
Caching a combination of history size and time window (
Sinks.many().replay().limit(int, Duration)).
Additional overloads for fine tuning of the above can also be found under Sinks.many().replay(), as well
as a variant that allows caching of a single element (latest() and latestOrDefault(T)).
Sinks.unsafe().many()
Advanced users and operators builders might want to consider using Sinks.unsafe().many()
which will provide the same Sinks.Many factories without the extra producer thread safety.
As a result there will be less overhead per sink, since thread-safe sinks have to detect multi-threaded access.
Library developers should not expose unsafe sinks but can use them internally in a controlled
calling environment where they can ensure external synchronization of the calls that lead to
onNext, onComplete and onError signals, in respect of the Reactive Streams specification.
Sinks.one()
This method directly construct a simple instance of Sinks.One<T>.
This flavor of Sinks is viewable as a Mono (through its asMono() view method), and
has slightly different emit methods to better convey this Mono-like semantics:
-
emitValue(T value)generates anonNext(value)signal and - in most implementations - will also trigger an implicitonComplete() -
emitEmpty()generates an isolatedonComplete()signal, intended as generating the equivalent of an emptyMono -
emitError(Throwable t)generates anonError(t)signal
Sinks.one() accepts one call of any of these methods, effectively generating a Mono
that either completed with a value, completed empty or failed.
Sinks.empty()
This method directly constructs a simple instance of Sinks.Empty<T>.
This flavor of Sinks is like Sinks.One<T>, except it doesn’t offer the emitValue method.
As a result, it can only generates a Mono that completes empty or fails.
The sink is still typed with a generic <T> despite being unable to trigger an onNext,
because it allows easy composition and inclusion in chains of operators that require a specific type.
5. Kotlin support
Kotlin is a statically-typed language targeting the JVM (and other platforms), which allows writing concise and elegant code while providing very good interoperability with existing libraries written in Java.
This section describes Reactor’s support for Kotlin.
5.1. Requirements
Reactor supports Kotlin 1.1+ and requires
kotlin-stdlib
(or one of its kotlin-stdlib-jdk7
or kotlin-stdlib-jdk8 variants).
5.2. Extensions
|
As of As a consequence, Kotlin extensions in |
Thanks to its great Java interoperability and to Kotlin extensions, Reactor Kotlin APIs leverage regular Java APIs and are additionally enhanced by a few Kotlin-specific APIs that are available out of the box within Reactor artifacts.
Keep in mind that Kotlin extensions need to be imported to be used. This means
for example that the Throwable.toFlux Kotlin extension
is available only if import reactor.kotlin.core.publisher.toFlux is imported.
That said, similar to static imports, an IDE should automatically suggest the import in most cases.
|
For example, Kotlin reified type parameters provide a workaround for JVM generics type erasure, and Reactor provides some extensions to take advantage of this feature.
The following table compares Reactor with Java against Reactor with Kotlin and extensions:
Java |
Kotlin with extensions |
|
|
|
|
|
|
|
|
|
|
|
|
The Reactor KDoc API lists and documents all the available Kotlin extensions.
5.3. Null Safety
One of Kotlin’s key features is null safety,
which cleanly deals with null values at compile time rather than bumping into the famous
NullPointerException at runtime. This makes applications safer through nullability
declarations and expressive “value or no value” semantics without paying the cost of wrappers such as Optional.
(Kotlin allows using functional constructs with nullable values. See this
comprehensive guide to Kotlin null-safety.)
Although Java does not let one express null safety in its type-system, Reactor now
provides null safety of the whole Reactor API through tooling-friendly annotations declared
in the reactor.util.annotation package.
By default, types from Java APIs used in Kotlin are recognized as
platform types
for which null-checks are relaxed.
Kotlin support for JSR 305 annotations
and Reactor nullability annotations provide null-safety for the whole Reactor API to Kotlin developers,
with the advantage of dealing with null-related issues at compile time.
You can configure the JSR 305 checks by adding the -Xjsr305 compiler flag with the following
options: -Xjsr305={strict|warn|ignore}.
For kotlin versions 1.1.50+, the default behavior is the same as -Xjsr305=warn.
The strict value is required to have the Reactor API full null-safety taken into account
but should be considered experimental, since the Reactor API nullability declaration could evolve
even between minor releases, as more checks may be added in the future).
| Nullability for generic type arguments, variable arguments, and array elements is not supported yet, but itshould be in an upcoming release. See this dicussion for up-to-date information. |
6. Testing
Whether you have written a simple chain of Reactor operators or your own operator, automated testing is always a good idea.
Reactor comes with a few elements dedicated to testing, gathered into their own
artifact: reactor-test. You can find that project
on Github,
inside of the reactor-core repository.
To use it in your tests, you must add it as a test dependency.
The following example shows how to add reactor-test as a dependency in Maven:
<dependencies><dependency>
<groupId>io.projectreactor</groupId>
<artifactId>reactor-test</artifactId>
<scope>test</scope>
(1)
</dependency>| 1 | If you use the BOM, you do not need to specify a <version>. |
The following example shows how to add reactor-test as a dependency in Gradle:
dependencies blockdependencies {
testCompile 'io.projectreactor:reactor-test'
}The three main uses of reactor-test are as follows:
-
Testing that a sequence follows a given scenario, step-by-step, with
StepVerifier. -
Producing data in order to test the behavior of downstream operators (including you own operators) with
TestPublisher. -
In sequences that can go through several alternative
Publisher(for example, a chain that usesswitchIfEmpty, probing such aPublisherto ensure it was used (that is, subscribed to).
6.1. Testing a Scenario with StepVerifier
The most common case for testing a Reactor sequence is to have a Flux or a Mono defined
in your code (for example, it might be returned by a method) and to want to test how it
behaves when subscribed to.
This situation translates well to defining a “test scenario,” where you define your expectations in terms of events, step-by-step. You can ask and answer questions such as the following:
-
What is the next expected event?
-
Do you expect the
Fluxto emit a particular value? -
Or maybe to do nothing for the next 300ms?
You can express all of that through the StepVerifier API.
For instance, you could have the following utility method in your codebase that
decorates a Flux:
public <T> Flux<T> appendBoomError(Flux<T> source) {
  return source.concatWith(Mono.error(new IllegalArgumentException("boom")));
}
In order to test it, you want to verify the following scenario:
I expect this
Fluxto first emitthing1, then emitthing2, and then produce an error with the message,boom. Subscribe and verify these expectations.
In the StepVerifier API, this translates to the following test:
@Test
public void testAppendBoomError() {
  Flux<String> source = Flux.just("thing1", "thing2"); (1)

  StepVerifier.create( (2)
    appendBoomError(source)) (3)
    .expectNext("thing1") (4)
    .expectNext("thing2")
    .expectErrorMessage("boom") (5)
    .verify(); (6)
}| 1 | Since our method needs a source Flux, define a simple one for testing purposes. |
| 2 | Create a StepVerifier builder that wraps and verifies a Flux. |
| 3 | Pass the Flux to be tested (the result of calling our utility method). |
| 4 | The first signal we expect to happen upon subscription is an onNext, with a value
of thing1. |
| 5 | The last signal we expect to happen is a termination of the sequence with an
onError. The exception should have boom as a message. |
| 6 | It is important to trigger the test by calling verify(). |
The API is a builder. You start by creating a StepVerifier and passing the
sequence to be tested. This offers a choice of methods that let you:
-
Express expectations about the next signals to occur. If any other signal is received (or the content of the signal does not match the expectation), the whole test fails with a meaningful
AssertionError. For example, you might useexpectNext(T…)andexpectNextCount(long). -
Consume the next signal. This is used when you want to skip part of the sequence or when you want to apply a custom
assertionon the content of the signal (for example, to check that there is anonNextevent and assert that the emitted item is a list of size 5). For example, you might useconsumeNextWith(Consumer<T>). -
Take miscellaneous actions such as pausing or running arbitrary code. For example, if you want to manipulate a test-specific state or context. To that effect, you might use
thenAwait(Duration)andthen(Runnable).
For terminal events, the corresponding expectation methods (expectComplete() and
expectError() and all their variants) switch to an API where you cannot express
expectations anymore. In that last step, all you can do is perform some additional
configuration on the StepVerifier and then trigger the verification, often
with verify() or one of its variants.
What happens at this point is that the StepVerifier subscribes to the tested Flux or
Mono and plays the sequence, comparing each new signal with the next step in the
scenario. As long as these match, the test is considered a success. As soon as there is a
discrepancy, an AssertionError is thrown.
Remember the verify() step, which triggers the verification. To
help, the API includes a few shortcut methods that combine the terminal expectations with
a call to verify(): verifyComplete(), verifyError(), verifyErrorMessage(String),
and others.
|
Note that, if one of the lambda-based expectations throws an AssertionError, it is
reported as is, failing the test. This is useful for custom assertions.
By default, the verify() method and derived shortcut methods (verifyThenAssertThat,
verifyComplete(), and so on) have no timeout. They can block indefinitely. You can use
StepVerifier.setDefaultTimeout(Duration) to globally set a timeout for these methods,
or specify one on a per-call basis with verify(Duration).
|
6.1.1. Better Identifying Test Failures
StepVerifier provides two options to better identify exactly which expectation step caused
a test to fail:
-
as(String): Used after mostexpect*methods to give a description to the preceding expectation. If the expectation fails, its error message contains the description. Terminal expectations andverifycannot be described that way. -
StepVerifierOptions.create().scenarioName(String): By usingStepVerifierOptionsto create yourStepVerifier, you can use thescenarioNamemethod to give the whole scenario a name, which is also used in assertion error messages.
Note that, in both cases, the use of the description or name in messages is only guaranteed for
StepVerifier methods that produce their own AssertionError (for example, throwing an exception
manually or through an assertion library in assertNext does not add the description or name to
the error’s message).
6.2. Manipulating Time
You can use StepVerifier with time-based operators to avoid long run times for
corresponding tests. You can do so through the StepVerifier.withVirtualTime builder.
It looks like the following example:
StepVerifier.withVirtualTime(() -> Mono.delay(Duration.ofDays(1)))
//... continue expectations here
This virtual time feature plugs in a custom Scheduler in Reactor’s Schedulers
factory. Since these timed operators usually use the default Schedulers.parallel()
scheduler, replacing it with a VirtualTimeScheduler does the trick. However, an
important prerequisite is that the operator be instantiated after the virtual time
scheduler has been activated.
To increase the chances that this happens correctly, the StepVerifier does not take
a simple Flux as input. withVirtualTime takes a Supplier, which guides you into lazily
creating the instance of the tested flux after having done the scheduler set up.
Take extra care to ensure the Supplier<Publisher<T>> can be used in a lazy
fashion. Otherwise, virtual time is not guaranteed. Especially avoid instantiating the
Flux earlier in the test code and having the Supplier return that variable. Instead,
always instantiate the Flux inside the lambda.
|
There are two expectation methods that deal with time, and they are both valid with or without virtual time:
-
thenAwait(Duration): Pauses the evaluation of steps (allowing a few signals to occur or delays to run out). -
expectNoEvent(Duration): Also lets the sequence play out for a given duration but fails the test if any signal occurs during that time.
Both methods pause the thread for the given duration in classic mode and advance the virtual clock instead in virtual mode.
expectNoEvent also considers the subscription as an event. If you use it as a
first step, it usually fails because the subscription signal is detected. Use
expectSubscription().expectNoEvent(duration) instead.
|
In order to quickly evaluate the behavior of our Mono.delay above, we can finish
writing our code as follows:
StepVerifier.withVirtualTime(() -> Mono.delay(Duration.ofDays(1)))
    .expectSubscription() (1)
    .expectNoEvent(Duration.ofDays(1)) (2)
    .expectNext(0L) (3)
.verifyComplete(); (4)| 1 | See the preceding tip. |
| 2 | Expect nothing to happen for a full day. |
| 3 | Then expect a delay that emits 0. |
| 4 | Then expect completion (and trigger the verification). |
We could have used thenAwait(Duration.ofDays(1)) above, but expectNoEvent has the
benefit of guaranteeing that nothing happened earlier than it should have.
Note that verify() returns a Duration value. This is the real-time duration of the
entire test.
Virtual time is not a silver bullet. All Schedulers are
replaced with the same VirtualTimeScheduler. In some cases, you can lock the
verification process because the virtual clock has not moved forward before an
expectation is expressed, resulting in the expectation waiting on data that can only be
produced by advancing time. In most cases, you need to advance the virtual clock for
sequences to emit. Virtual time also gets very limited with infinite sequences, which
might hog the thread on which both the sequence and its verification run.
|
6.3. Performing Post-execution Assertions with StepVerifier
After having described the final expectation of your scenario, you can switch to a
complementary assertion API instead of triggering verify(). To do so, use
verifyThenAssertThat() instead.
verifyThenAssertThat() returns a StepVerifier.Assertions object, which you can use to
assert a few elements of state once the whole scenario has played out successfully
(because it also calls verify()). Typical (albeit advanced) usage is to capture
elements that have been dropped by some operator and assert them (see the section on
Hooks).
6.4. Testing the Context
For more information about the Context, see Adding a Context to a Reactive Sequence.
StepVerifier comes with a couple of expectations around the propagation of a Context:
-
expectAccessibleContext: Returns aContextExpectationsobject that you can use to set up expectations on the propagatedContext. Be sure to callthen()to return to the set of sequence expectations. -
expectNoAccessibleContext: Sets up an expectation that NOContextcan be propagated up the chain of operators under test. This most likely occurs when thePublisherunder test is not a Reactor one or does not have any operator that can propagate theContext(for example, a generator source).
Additionally, you can associate a test-specific initial Context to a StepVerifier by
using StepVerifierOptions to create the verifier.
These features are demonstrated in the following snippet:
StepVerifier.create(Mono.just(1).map(i -> i + 10),
				StepVerifierOptions.create().withInitialContext(Context.of("thing1", "thing2"))) (1)
		            .expectAccessibleContext() (2)
		            .contains("thing1", "thing2") (3)
		            .then() (4)
		            .expectNext(11)
.verifyComplete(); (5)| 1 | Create the StepVerifier by using StepVerifierOptions and pass in an initial Context |
| 2 | Start setting up expectations about Context propagation. This alone ensures that a
Context was propagated. |
| 3 | An example of a Context-specific expectation. It must contain value "thing2" for key "thing1". |
| 4 | We then() switch back to setting up normal expectations on the data. |
| 5 | Let us not forget to verify() the whole set of expectations. |
6.5. Manually Emitting with TestPublisher
For more advanced test cases, it might be useful to have complete mastery over the source of data, to trigger finely chosen signals that closely match the particular situation you want to test.
Another situation is when you have implemented your own operator and you want to verify how it behaves with regards to the Reactive Streams specification, especially if its source is not well behaved.
For both cases, reactor-test offers the TestPublisher class. This is a Publisher<T>
that lets you programmatically trigger various signals:
-
next(T)andnext(T, T…)triggers 1-nonNextsignals. -
emit(T…)triggers 1-nonNextsignals and doescomplete(). -
complete()terminates with anonCompletesignal. -
error(Throwable)terminates with anonErrorsignal.
You can get a well behaved TestPublisher through the create factory method. Also,
you can create a misbehaving TestPublisher by using the createNonCompliant factory
method. The latter takes a value or multiple values from the TestPublisher.Violation
enum. The values define which parts of the specification the publisher can overlook.
These enum values include:
-
REQUEST_OVERFLOW: Allowsnextcalls to be made despite an insufficient request, without triggering anIllegalStateException. -
ALLOW_NULL: Allowsnextcalls to be made with anullvalue without triggering aNullPointerException. -
CLEANUP_ON_TERMINATE: Allows termination signals to be sent several times in a row. This includescomplete(),error(), andemit(). -
DEFER_CANCELLATION: Allows theTestPublisherto ignore cancellation signals and continue emitting signals as if the cancellation lost the race against said signals.
Finally, the TestPublisher keeps track of internal state after subscription, which can
be asserted through its various assert* methods.
You can use it as a Flux or Mono by using the conversion methods, flux() and
mono().
6.6. Checking the Execution Path with PublisherProbe
When building complex chains of operators, you could come across cases where there are several possible execution paths, materialized by distinct sub-sequences.
Most of the time, these sub-sequences produce a specific-enough onNext signal
that you can assert that it was executed by looking at the end result.
For instance, consider the following method, which builds a chain of operators from a
source and uses a switchIfEmpty to fall back to a particular alternative if the source
is empty:
public Flux<String> processOrFallback(Mono<String> source, Publisher<String> fallback) {
    return source
            .flatMapMany(phrase -> Flux.fromArray(phrase.split("\\s+")))
            .switchIfEmpty(fallback);
}
You can test which logical branch of the switchIfEmpty was used, as follows:
@Test
public void testSplitPathIsUsed() {
    StepVerifier.create(processOrFallback(Mono.just("just a  phrase with    tabs!"),
            Mono.just("EMPTY_PHRASE")))
                .expectNext("just", "a", "phrase", "with", "tabs!")
                .verifyComplete();
}

@Test
public void testEmptyPathIsUsed() {
    StepVerifier.create(processOrFallback(Mono.empty(), Mono.just("EMPTY_PHRASE")))
                .expectNext("EMPTY_PHRASE")
                .verifyComplete();
}
However, think about an example where the method produces a Mono<Void> instead. It waits
for the source to complete, performs an additional task, and completes. If the source
is empty, a fallback Runnable-like task must be performed instead. The following example
shows such a case:
private Mono<String> executeCommand(String command) {
    return Mono.just(command + " DONE");
}

public Mono<Void> processOrFallback(Mono<String> commandSource, Mono<Void> doWhenEmpty) {
    return commandSource
            .flatMap(command -> executeCommand(command).then()) (1)
            .switchIfEmpty(doWhenEmpty); (2)
}| 1 | then() forgets about the command result. It cares only that it was completed. |
| 2 | How to distinguish between two cases that are both empty sequences? |
To verify that your processOrFallback method does indeed go through the doWhenEmpty path,
you need to write a bit of boilerplate. Namely you need a Mono<Void> that:
-
Captures the fact that it has been subscribed to.
-
Lets you assert that fact after the whole process has terminated.
Before version 3.1, you would need to manually maintain one AtomicBoolean per state you
wanted to assert and attach a corresponding doOn* callback to the publisher you wanted
to evaluate. This could be a lot of boilerplate when having to apply this pattern
regularly. Fortunately, 3.1.0 introduced an alternative with PublisherProbe. The
following example shows how to use it:
@Test
public void testCommandEmptyPathIsUsed() {
    PublisherProbe<Void> probe = PublisherProbe.empty(); (1)

    StepVerifier.create(processOrFallback(Mono.empty(), probe.mono())) (2)
                .verifyComplete();

    probe.assertWasSubscribed(); (3)
    probe.assertWasRequested(); (4)
    probe.assertWasNotCancelled(); (5)
}| 1 | Create a probe that translates to an empty sequence. |
| 2 | Use the probe in place of Mono<Void> by calling probe.mono(). |
| 3 | After completion of the sequence, the probe lets you assert that it was used. You can check that is was subscribed to… |
| 4 | …as well as actually requested data… |
| 5 | …and whether or not it was cancelled. |
You can also use the probe in place of a Flux<T> by calling .flux() instead of
.mono(). For cases where you need to probe an execution path but also need the
probe to emit data, you can wrap any Publisher<T> by using PublisherProbe.of(Publisher).
Suggest Edit to "Testing"
7. Debugging Reactor
Switching from an imperative and synchronous programming paradigm to a reactive and asynchronous one can sometimes be daunting. One of the steepest steps in the learning curve is how to analyze and debug when something goes wrong.
In the imperative world, debugging is usually pretty straightforward. You can read the stacktrace and see where the problem originated. Was it entirely a failure of your code? Did the failure occur in some library code? If so, what part of your code called the library, potentially passing in improper parameters that ultimately caused the failure?
7.1. The Typical Reactor Stack Trace
When you shift to asynchronous code, things can get much more complicated.
Consider the following stack trace:
java.lang.IndexOutOfBoundsException: Source emitted more than one item
    at reactor.core.publisher.MonoSingle$SingleSubscriber.onNext(MonoSingle.java:129)
    at reactor.core.publisher.FluxFlatMap$FlatMapMain.tryEmitScalar(FluxFlatMap.java:445)
    at reactor.core.publisher.FluxFlatMap$FlatMapMain.onNext(FluxFlatMap.java:379)
    at reactor.core.publisher.FluxMapFuseable$MapFuseableSubscriber.onNext(FluxMapFuseable.java:121)
    at reactor.core.publisher.FluxRange$RangeSubscription.slowPath(FluxRange.java:154)
    at reactor.core.publisher.FluxRange$RangeSubscription.request(FluxRange.java:109)
    at reactor.core.publisher.FluxMapFuseable$MapFuseableSubscriber.request(FluxMapFuseable.java:162)
    at reactor.core.publisher.FluxFlatMap$FlatMapMain.onSubscribe(FluxFlatMap.java:332)
    at reactor.core.publisher.FluxMapFuseable$MapFuseableSubscriber.onSubscribe(FluxMapFuseable.java:90)
    at reactor.core.publisher.FluxRange.subscribe(FluxRange.java:68)
    at reactor.core.publisher.FluxMapFuseable.subscribe(FluxMapFuseable.java:63)
    at reactor.core.publisher.FluxFlatMap.subscribe(FluxFlatMap.java:97)
    at reactor.core.publisher.MonoSingle.subscribe(MonoSingle.java:58)
    at reactor.core.publisher.Mono.subscribe(Mono.java:3096)
    at reactor.core.publisher.Mono.subscribeWith(Mono.java:3204)
    at reactor.core.publisher.Mono.subscribe(Mono.java:3090)
    at reactor.core.publisher.Mono.subscribe(Mono.java:3057)
    at reactor.core.publisher.Mono.subscribe(Mono.java:3029)
    at reactor.guide.GuideTests.debuggingCommonStacktrace(GuideTests.java:995)
There is a lot going on there. We get an IndexOutOfBoundsException, which tells us that
a source emitted more than one item.
We can probably quickly come to assume that this source is a Flux or a Mono, as confirmed by
the next line, which mentions MonoSingle. So it appears to be some sort of complaint
from a single operator.
Referring to the Javadoc for the Mono#single operator, we see that single has a contract:
The source must emit exactly one element. It appears we had a source that emitted more
than one and thus violated that contract.
Can we dig deeper and identify that source? The following rows are not very helpful. They
take us through the internals of what seems to be a reactive chain, through
multiple calls to subscribe and request.
By skimming over these rows, we can at least start to form a picture of the kind of chain
that went wrong: It seems to involve a MonoSingle, a FluxFlatMap, and a FluxRange
(each gets several rows in the trace, but overall these three classes are involved). So a
range().flatMap().single() chain maybe?
But what if we use that pattern a lot in our application? This still does not tell us
much, and simply searching for single is not going to find the problem. Then the last
line refers to some of our code. Finally, we are getting close.
Hold on, though. When we go to the source file, all we see is that a
pre-existing Flux is subscribed to, as follows:
toDebug
    .subscribeOn(Schedulers.immediate())
    .subscribe(System.out::println, Throwable::printStackTrace);
All of this happened at subscription time, but the Flux itself was not
declared there. Worse, when we go to where the variable is declared, we see the following:
public Mono<String> toDebug; //please overlook the public class attributeThe variable is not instantiated where it is declared. We must assume a worst-case scenario where we find out that there could be a few different code paths that set it in the application. We remain unsure of which one caused the issue.
| This is kind of the Reactor equivalent of a runtime error, as opposed to a compilation error. |
What we want to find out more easily is where the operator was added into the chain -
that is, where the Flux was declared. We usually refer to that as the “assembly” of
the Flux.
7.2. Activating Debug Mode - aka tracebacks
this section describes the easiest but also the slowest way to enable
the debugging capabilities due to the fact that it captures the stacktrace on every operator.
See The checkpoint() Alternative for a more fine grained way of debugging,
and Production-ready Global Debugging for a more advanced and performant global option.
|
Even though the stacktrace was still able to convey some information for someone with a bit of experience, we can see that it is not ideal by itself in more advanced cases.
Fortunately, Reactor comes with assembly-time instrumentation that is designed for debugging.
This is done by activating a global debug mode via the Hooks.onOperatorDebug() method at application start (or at
least before the incriminated Flux or Mono can be instantiated), as follows:
Hooks.onOperatorDebug();This starts instrumenting the calls to Reactor operator methods (where they are assembled into the chain) by wrapping the construction of the operator and capturing a stack trace there. Since this is done when the operator chain is declared, the hook should be activated before that, so the safest way is to activate it right at the start of your application.
Later on, if an exception occurs, the failing operator is able to refer to that capture and to rework the stack trace, appending additional information.
| We call this captured assembly information (and additional information added to the exceptions by Reactor in general) a traceback. |
In the next section, we see how the stack trace differs and how to interpret that new information.
7.3. Reading a Stack Trace in Debug Mode
When we reuse our initial example but activate the operatorStacktrace debug feature,
several things happen:
-
The stack trace, which points to subscription site and is thus less interesting, is cut after the first frame and set aside.
-
A special suppressed exception is added to the original exception (or amended if already there).
-
A message is constructed for that special exception with several sections.
-
First section will trace back to the assembly site of the operator that fails.
-
Second section will attempt to display the chain(s) that are built from this operator and have seen the error propagate
-
Last section is the original stack trace
The full stack trace, once printed, is as follows:
java.lang.IndexOutOfBoundsException: Source emitted more than one item
    at reactor.core.publisher.MonoSingle$SingleSubscriber.onNext(MonoSingle.java:127) (1)
    Suppressed: The stacktrace has been enhanced by Reactor, refer to additional information below: (2)
Assembly trace from producer [reactor.core.publisher.MonoSingle] : (3)
    reactor.core.publisher.Flux.single(Flux.java:7915)
    reactor.guide.GuideTests.scatterAndGather(GuideTests.java:1017)
Error has been observed at the following site(s): (4)
    *_______Flux.single ⇢ at reactor.guide.GuideTests.scatterAndGather(GuideTests.java:1017) (5)
    |_ Mono.subscribeOn ⇢ at reactor.guide.GuideTests.debuggingActivated(GuideTests.java:1071) (6)
Original Stack Trace: (7)
        at reactor.core.publisher.MonoSingle$SingleSubscriber.onNext(MonoSingle.java:127)
...
(8)
...
        at reactor.core.publisher.Mono.subscribeWith(Mono.java:4363)
        at reactor.core.publisher.Mono.subscribe(Mono.java:4223)
        at reactor.core.publisher.Mono.subscribe(Mono.java:4159)
        at reactor.core.publisher.Mono.subscribe(Mono.java:4131)
at reactor.guide.GuideTests.debuggingActivated(GuideTests.java:1067)| 1 | The original stack trace is truncated to a single frame. |
| 2 | This is new: We see the wrapper operator that captures the stack. This is where the traceback starts to appear. |
| 3 | First, we get some details about where the operator was assembled. |
| 4 | Second, we get a notion of operator chain(s) through which the error propagated, from first to last (error site to subscribe site). |
| 5 | Each operator that saw the error is mentioned along with the user class and line where it was used. Here we have a "root". |
| 6 | Here we have a simple part of the chain. |
| 7 | The rest of the stack trace is moved at the end… |
| 8 | …showing a bit of the operator’s internals (so we removed a bit of the snippet here). |
The captured stack trace is appended to the original error as a
suppressed OnAssemblyException. There are three parts to it, but the first section is the
most interesting. It shows the path of construction for the operator that triggered the
exception. Here, it shows that the single that caused our issue was actually created in the
scatterAndGather method.
Now that we are armed with enough information to find the culprit, we can have
a meaningful look at that scatterAndGather method:
private Mono<String> scatterAndGather(Flux<String> urls) {
    return urls.flatMap(url -> doRequest(url))
           .single(); (1)
}| 1 | Sure enough, here is our single. |
Now we can see what the root cause of the error was a flatMap that performs
several HTTP calls to a few URLs but that is chained with single, which is too
restrictive. After a short git blame and a quick discussion with the author of
that line, we find out he meant to use the less restrictive take(1) instead.
We have solved our problem.
Now consider the following section in the stack trace:
Error has been observed at the following site(s):That second part of the traceback was not necessarily interesting in
this particular example, because the error was actually happening in the last
operator in the chain (the one closest to subscribe). Considering another
example might make it more clear:
FakeRepository.findAllUserByName(Flux.just("pedro", "simon", "stephane"))
              .transform(FakeUtils1.applyFilters)
              .transform(FakeUtils2.enrichUser)
              .blockLast();
Now imagine that, inside findAllUserByName, there is a map that fails. Here,
we would see the following in the second part of the traceback:
Error has been observed at the following site(s):
    *________Flux.map ⇢ at reactor.guide.FakeRepository.findAllUserByName(FakeRepository.java:27)
    |_       Flux.map ⇢ at reactor.guide.FakeRepository.findAllUserByName(FakeRepository.java:28)
    |_    Flux.filter ⇢ at reactor.guide.FakeUtils1.lambda$static$1(FakeUtils1.java:29)
    |_ Flux.transform ⇢ at reactor.guide.GuideDebuggingExtraTests.debuggingActivatedWithDeepTraceback(GuideDebuggingExtraTests.java:39)
    |_   Flux.elapsed ⇢ at reactor.guide.FakeUtils2.lambda$static$0(FakeUtils2.java:30)
    |_ Flux.transform ⇢ at reactor.guide.GuideDebuggingExtraTests.debuggingActivatedWithDeepTraceback(GuideDebuggingExtraTests.java:40)
This corresponds to the section of the chain(s) of operators that gets notified of the error:
-
The exception originates in the first
map. This one is identified as a root by the*connector and the fact_are used for indentation. -
The exception is seen by a second
map(both in fact correspond to thefindAllUserByNamemethod). -
It is then seen by a
filterand atransform, which indicate that part of the chain is constructed by a reusable transformation function (here, theapplyFiltersutility method). -
Finally, it is seen by an
elapsedand atransform. Once again,elapsedis applied by the transformation function of that second transform.
In some cases where the same exception is propagated through multiple chains, the "root" marker *_
allows us to better separate such chains.
If a site is seen several time, there will be an (observed x times) after the call site information.
For instance, let us consider the following snippet:
public class MyClass {
    public void myMethod() {
        Flux<String> source = Flux.error(sharedError);
        Flux<String> chain1 = source.map(String::toLowerCase).filter(s -> s.length() < 4);
        Flux<String> chain2 = source.filter(s -> s.length() > 5).distinct();

        Mono<Void> when = Mono.when(chain1, chain2);
    }
}
In the code above, error propagates to the when, going through two separate chains chain1 and chain2.
It would lead to a traceback containing the following:
Error has been observed at the following site(s):
    *_____Flux.error ⇢ at myClass.myMethod(MyClass.java:3) (observed 2 times)
    |_      Flux.map ⇢ at myClass.myMethod(MyClass.java:4)
    |_   Flux.filter ⇢ at myClass.myMethod(MyClass.java:4)
    *_____Flux.error ⇢ at myClass.myMethod(MyClass.java:3) (observed 2 times)
    |_   Flux.filter ⇢ at myClass.myMethod(MyClass.java:5)
    |_ Flux.distinct ⇢ at myClass.myMethod(MyClass.java:5)
    *______Mono.when ⇢ at myClass.myMethod(MyClass.java:7)
We see that:
-
there are 3 "root" elements (the
whenis the true root). -
two chains starting from
Flux.errorare visible. -
both chains seem to be based on the same
Flux.errorsource (observed 2 times). -
first chain is
Flux.error().map().filter -
second chain is `Flux.error().filter().distinct()
A note on tracebacks and suppressed exceptions:
As tracebacks are appended to original errors as suppressed exceptions, this can somewhat
interfere with another type of exception that uses this mechanism: composite exceptions.
Such exceptions can be created directly via Exceptions.multiple(Throwable…), or by some
operators that might join multiple erroring sources (like Flux#flatMapDelayError). They
can be unwrapped into a List via Exceptions.unwrapMultiple(Throwable), in which case the traceback
would be considered a component of the composite and be part of the returned List.
If that is somehow not desirable, tracebacks can be identified thanks to Exceptions.isTraceback(Throwable)
check, and excluded from such an unwrap by using Exceptions.unwrapMultipleExcludingTracebacks(Throwable)
instead.
|
We deal with a form of instrumentation here, and creating a stack trace is costly. That is why this debugging feature should only be activated in a controlled manner, as a last resort.
7.3.1. The checkpoint() Alternative
The debug mode is global and affects every single operator assembled into a Flux or a
Mono inside the application. This has the benefit of allowing after-the-fact
debugging: Whatever the error, we can obtain additional information to debug it.
As we saw earlier, this global knowledge comes at the cost of an impact on performance (due to the number of populated stack traces). That cost can be reduced if we have an idea of likely problematic operators. However, we usually do not know which operators are likely to be problematic unless we observed an error in the wild, saw we were missing assembly information, and then modified the code to activate assembly tracking, hoping to observe the same error again.
In that scenario, we have to switch into debugging mode and make preparations in order to better observe a second occurrence of the error, this time capturing all the additional information.
If you can identify reactive chains that you assemble in your application for which
serviceability is critical, you can achieve a mix of both techniques with the
checkpoint() operator.
You can chain this operator into a method chain. The checkpoint operator works like the
hook version but only for its link of that particular chain.
There is also a checkpoint(String) variant that lets you add a unique String identifier
to the assembly traceback. This way, the stack trace is omitted and you rely on the
description to identify the assembly site. checkpoint(String) imposes less processing
cost than a regular checkpoint.
Last but not least, if you want to add a more generic description to the checkpoint but
still rely on the stack trace mechanism to identify the assembly site, you can force that
behavior by using the checkpoint("description", true) version. We are now back to the
initial message for the traceback, augmented with a description, as shown in the
following example:
Assembly trace from producer [reactor.core.publisher.ParallelSource], described as [descriptionCorrelation1234] : (1)
	reactor.core.publisher.ParallelFlux.checkpoint(ParallelFlux.java:215)
	reactor.core.publisher.FluxOnAssemblyTest.parallelFluxCheckpointDescriptionAndForceStack(FluxOnAssemblyTest.java:225)
Error has been observed at the following site(s):
|_ ParallelFlux.checkpoint ⇢ reactor.core.publisher.FluxOnAssemblyTest.parallelFluxCheckpointDescriptionAndForceStack(FluxOnAssemblyTest.java:225)| 1 | descriptionCorrelation1234 is the description provided in the checkpoint. |
The description could be a static identifier or user-readable description or a wider correlation ID (for instance, coming from a header in the case of an HTTP request).
| When global debugging is enabled in conjunction with checkpoints, the global debugging traceback style is applied and checkpoints are only reflected in the "Error has been observed…" section. As a result, the name of heavy checkpoints is not visible in this case. |
7.4. Production-ready Global Debugging
Project Reactor comes with a separate Java Agent that instruments your code and adds debugging info without paying the cost of capturing the stacktrace on every operator call. The behaviour is very similar to Activating Debug Mode - aka tracebacks, but without the runtime performance overhead.
To use it in your app, you must add it as a dependency.
The following example shows how to add reactor-tools as a dependency in Maven:
<dependencies><dependency>
<groupId>io.projectreactor</groupId>
<artifactId>reactor-tools</artifactId>
(1)
</dependency>| 1 | If you use the BOM, you do not need to specify a <version>. |
The following example shows how to add reactor-tools as a dependency in Gradle:
dependencies blockdependencies {
compile 'io.projectreactor:reactor-tools'
}It also needs to be explicitly initialized with:
ReactorDebugAgent.init();| Since the implementation will instrument your classes when they are loaded, the best place to put it is before everything else in your main(String[]) method: |
public static void main(String[] args) {
    ReactorDebugAgent.init();
    SpringApplication.run(Application.class, args);
}
You may also re-process existing classes with processExistingClasses() if you cannot run the init eagerly. For example, in JUnit5 tests from a TestExecutionListener or even in the class static initializer block:
ReactorDebugAgent.init();
ReactorDebugAgent.processExistingClasses();| Be aware that the re-processing takes a couple of seconds due to the need to iterate over all loaded classes and apply the transformation. Use it only if you see that some call-sites are not instrumented. |
7.4.1. Limitations
ReactorDebugAgent is implemented as a Java Agent and uses ByteBuddy
to perform the self-attach.
Self-attach may not work on some JVMs, please refer to ByteBuddy’s documentation for more details.
7.4.2. Running ReactorDebugAgent as a Java Agent
If your environment does not support ByteBuddy’s self-attachment, you can run reactor-tools as a
Java Agent:
java -javaagent reactor-tools.jar -jar app.jar7.4.3. Running ReactorDebugAgent at build time
It is also possible to run reactor-tools at build time. To do so, you need to apply it as a
plugin for ByteBuddy’s build instrumentation.
| The transformation will only be applied to your project’s classes. The classpath libraries will not be instrumented. |
<dependencies>
	<dependency>
		<groupId>io.projectreactor</groupId>
		<artifactId>reactor-tools</artifactId>
		(1)
		<classifier>original</classifier> (2)
		<scope>runtime</scope>
	</dependency>
</dependencies>

<build>
	<plugins>
		<plugin>
			<groupId>net.bytebuddy</groupId>
			<artifactId>byte-buddy-maven-plugin</artifactId>
			<configuration>
				<transformations>
					<transformation>
						<plugin>reactor.tools.agent.ReactorDebugByteBuddyPlugin</plugin>
					</transformation>
				</transformations>
			</configuration>
		</plugin>
	</plugins>
</build>| 1 | If you use the BOM, you do not need to specify a <version>. |
| 2 | classifier here is important. |
plugins {
	id 'net.bytebuddy.byte-buddy-gradle-plugin' version '1.10.9'
}

configurations {
	byteBuddyPlugin
}

dependencies {
	byteBuddyPlugin(
			group: 'io.projectreactor',
			name: 'reactor-tools',
			(1)
			classifier: 'original', (2)
	)
}

byteBuddy {
	transformation {
		plugin = "reactor.tools.agent.ReactorDebugByteBuddyPlugin"
		classPath = configurations.byteBuddyPlugin
	}
}| 1 | If you use the BOM, you do not need to specify a version. |
| 2 | classifier here is important. |
7.5. Logging a Sequence
In addition to stack trace debugging and analysis, another powerful tool to have in your toolkit is the ability to trace and log events in an asynchronous sequence.
The log() operator can do just that. Chained inside a sequence, it peeks at every
event of the Flux or Mono upstream of it (including onNext, onError, and
onComplete as well as subscriptions, cancellations, and requests).
For instance, suppose we have Logback activated and configured and a chain like
range(1,10).take(3). By placing a log() before the take, we can get some
insight into how it works and what kind of events it propagates upstream to the range,
as the following example shows:
Flux<Integer> flux = Flux.range(1, 10)
                         .log()
                         .take(3);
flux.subscribe();
This prints out the following (through the logger’s console appender):
10:45:20.200 [main] INFO  reactor.Flux.Range.1 - | onSubscribe([Synchronous Fuseable] FluxRange.RangeSubscription) (1)
10:45:20.205 [main] INFO  reactor.Flux.Range.1 - | request(unbounded) (2)
10:45:20.205 [main] INFO  reactor.Flux.Range.1 - | onNext(1) (3)
10:45:20.205 [main] INFO  reactor.Flux.Range.1 - | onNext(2)
10:45:20.205 [main] INFO  reactor.Flux.Range.1 - | onNext(3)
10:45:20.205 [main] INFO  reactor.Flux.Range.1 - | cancel() (4)
Here, in addition to the logger’s own formatter (time, thread, level, message), the
log() operator outputs a few things in its own format:
| 1 | reactor.Flux.Range.1 is an automatic category for the log, in case you use the
operator several times in a chain. It lets you distinguish which operator’s events
are logged (in this case, the range). You can overwrite the identifier with your own
custom category by using the log(String) method signature. After a few separating
characters, the actual event gets printed. Here, we get an onSubscribe call, a
request call, three onNext calls, and a cancel call. For the first line,
onSubscribe, we get the implementation of the Subscriber, which usually corresponds
to the operator-specific implementation. Between square brackets, we get additional
information, including whether the operator can be automatically optimized through
synchronous or asynchronous fusion. |
| 2 | On the second line, we can see that an unbounded request was propagated up from downstream. |
| 3 | Then the range sends three values in a row. |
| 4 | On the last line, we see cancel(). |
The last line, (4), is the most interesting. We can see the take in action there. It
operates by cutting the sequence short after it has seen enough elements emitted. In
short, take() causes the source to cancel() once it has emitted the user-requested
amount.
8. Exposing Reactor metrics
Project Reactor is a library designed for performance and better utilization of resources. But to truly understand the performance of a system, it is best to be able to monitor its various components.
This is why Reactor provides a built-in integration with Micrometer.
| If Micrometer is not on the classpath, metrics will be a no-op. |
8.1. Scheduler metrics
Every async operation in Reactor is done via the Scheduler abstraction described in Threading and Schedulers. This is why it is important to monitor your schedulers, watch out for key metrics that start to look suspicious and react accordingly.
To enable scheduler metrics, you will need to use the following method:
Schedulers.enableMetrics();| The instrumentation is performed when a scheduler is created. It is recommended to call this method as early as possible. |
If you’re using Spring Boot, it is a good idea to place the invocation before SpringApplication.run(Application.class, args) call.
|
Once scheduler metrics are enabled and provided it is on the classpath, Reactor will use Micrometer’s support for instrumenting the executors that back most schedulers.
Please refer to Micrometer’s documentation for the exposed metrics, such as:
-
executor_active_threads
-
executor_completed_tasks_total
-
executor_pool_size_threads
-
executor_queued_tasks
-
executor_secounds_{count, max, sum}
Since one scheduler may have multiple executors, every executor metric has a reactor_scheduler_id tag.
| Grafana + Prometheus users can use a pre-built dashboard which includes panels for threads, completed tasks, task queues and other handy metrics. |
8.2. Publisher metrics
Sometimes it is useful to be able to record metrics at some stage in your reactive pipeline.
One way to do it would be to manually push the values to your metrics backend of choice.
Another option would be to use Reactor’s built-in metrics integration for Flux/Mono and interpret them.
Consider the following pipeline:
listenToEvents()
    .doOnNext(event -> log.info("Received {}", event))
    .delayUntil(this::processEvent)
    .retry()
    .subscribe();
To enable the metrics for this source Flux (returned from listenToEvents()), we need to turn on the metrics collecting:
listenToEvents()
    .name("events") (1)
    .metrics() (2)
    .doOnNext(event -> log.info("Received {}", event))
    .delayUntil(this::processEvent)
    .retry()
.subscribe();| 1 | Every metric at this stage will be identified as "events" (optional). |
| 2 | Flux#metrics operator enables the reporting of metrics, using the name provided in when calling Flux#name operator. In case Flux#name operator has not been used, the default name will be reactor. |
Just adding these two operators will expose a whole bunch of useful metrics!
| metric name | type | description |
|---|---|---|
[name].subscribed |
Counter |
Counts how many Reactor sequences have been subscribed to |
[name].malformed.source |
Counter |
Counts the number of events received from a malformed source (ie an onNext after an onComplete) |
[name].requested |
DistributionSummary |
Counts the amount requested to a named Flux by all subscribers, until at least one requests an unbounded amount |
[name].onNext.delay |
Timer |
Measures delays between onNext signals (or between onSubscribe and first onNext) |
[name].flow.duration |
Timer |
Times the duration elapsed between a subscription and the termination or cancellation of the sequence. A status tag is added to specify what event caused the timer to end ( |
Want to know how many times your event processing has restarted due to some error? Read [name].subscribed, because retry() operator will re-subscribe to the source publisher on error.
Interested in "events per second" metric? Measure the rate of [name].onNext.delay 's count.
Want to be alerted when the listener throws an error? [name].flow.duration with status=error tag is your friend.
Similarly, status=completed and status=completedEmpty will allow you to distinguish sequences that completed with elements from sequences that completed empty.
Please note that when giving a name to a sequence, this sequence could not be aggregated with others anymore. As a compromise if you want to identify your sequence but still make it possible to aggregate with other views, you can use a Tags for the name by calling (tag("flow", "events")) for example.
8.2.1. Tags
Every metric will have a type tag in common, which value will be either Flux or Mono depending on the publisher’s nature.
Users are allowed to add custom tags to their reactive chains:
listenToEvents()
    .name("events") (1)
    .tag("source", "kafka") (2)
    .metrics() (3)
    .doOnNext(event -> log.info("Received {}", event))
    .delayUntil(this::processEvent)
    .retry()
.subscribe();| 1 | Every metric at this stage will be identified as "events". |
| 2 | Set a custom tag "source" to value "kafka". |
| 3 | All reported metrics will have source=kafka tag assigned in addition to the common tag described above. |
Please note that depending on the monitoring system you’re using, using a name can be considered mandatory when using tags, since it would otherwise result in a different set of tags between two default-named sequences. Some systems like Prometheus might also require to have the exact same set of tags for each metric with the same name.
9. Advanced Features and Concepts
This chapter covers advanced features and concepts of Reactor, including the following:
9.1. Mutualizing Operator Usage
From a clean-code perspective, code reuse is generally a good thing. Reactor offers a few patterns that can help you reuse and mutualize code, notably for operators or combinations of operators that you might want to apply regularly in your codebase. If you think of a chain of operators as a recipe, you can create a “cookbook” of operator recipes.
9.1.1. Using the transform Operator
The transform operator lets you encapsulate a piece of an operator chain into a
function. That function is applied to an original operator chain at assembly time to
augment it with the encapsulated operators. Doing so applies the same operations to all
the subscribers of a sequence and is basically equivalent to chaining the operators
directly. The following code shows an example:
Function<Flux<String>, Flux<String>> filterAndMap =
f -> f.filter(color -> !color.equals("orange"))
      .map(String::toUpperCase);

Flux.fromIterable(Arrays.asList("blue", "green", "orange", "purple"))
	.doOnNext(System.out::println)
	.transform(filterAndMap)
	.subscribe(d -> System.out.println("Subscriber to Transformed MapAndFilter: "+d));
The following image shows how the transform operator encapsulates flows:
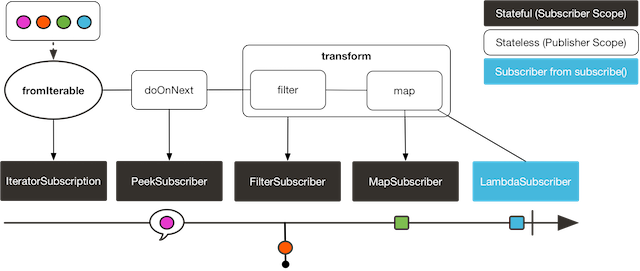
The preceding example produces the following output:
blue
Subscriber to Transformed MapAndFilter: BLUE
green
Subscriber to Transformed MapAndFilter: GREEN
orange
purple
Subscriber to Transformed MapAndFilter: PURPLE
9.1.2. Using the transformDeferred Operator
The transformDeferred operator is similar to transform and also lets you encapsulate operators
in a function. The major difference is that this function is applied to the original
sequence on a per-subscriber basis. It means that the function can actually produce a
different operator chain for each subscription (by maintaining some state). The
following code shows an example:
AtomicInteger ai = new AtomicInteger();
Function<Flux<String>, Flux<String>> filterAndMap = f -> {
	if (ai.incrementAndGet() == 1) {
return f.filter(color -> !color.equals("orange"))
        .map(String::toUpperCase);
	}
	return f.filter(color -> !color.equals("purple"))
	        .map(String::toUpperCase);
};

Flux<String> composedFlux =
Flux.fromIterable(Arrays.asList("blue", "green", "orange", "purple"))
    .doOnNext(System.out::println)
    .transformDeferred(filterAndMap);

composedFlux.subscribe(d -> System.out.println("Subscriber 1 to Composed MapAndFilter :"+d));
composedFlux.subscribe(d -> System.out.println("Subscriber 2 to Composed MapAndFilter: "+d));
The following image shows how the transformDeferred operator works with per-subscriber transformations:
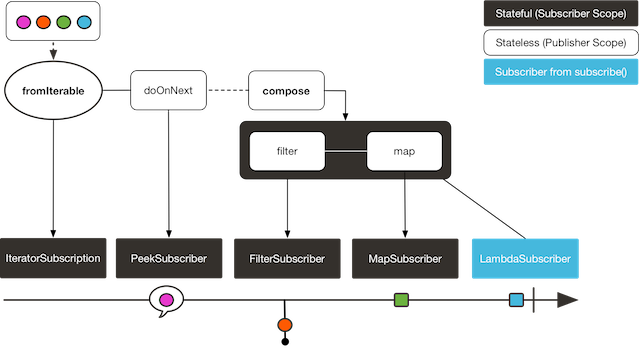
The preceding example produces the following output:
blue
Subscriber 1 to Composed MapAndFilter :BLUE
green
Subscriber 1 to Composed MapAndFilter :GREEN
orange
purple
Subscriber 1 to Composed MapAndFilter :PURPLE
blue
Subscriber 2 to Composed MapAndFilter: BLUE
green
Subscriber 2 to Composed MapAndFilter: GREEN
orange
Subscriber 2 to Composed MapAndFilter: ORANGE
purple
9.2. Hot Versus Cold
So far, we have considered that all Flux (and Mono) are the same: They all represent
an asynchronous sequence of data, and nothing happens before you subscribe.
Really, though, there are two broad families of publishers: hot and cold.
The earlier description applies to the cold family of publishers. They generate data anew for each subscription. If no subscription is created, data never gets generated.
Think of an HTTP request: Each new subscriber triggers an HTTP call, but no call is made if no one is interested in the result.
Hot publishers, on the other hand, do not depend on any number of subscribers. They
might start publishing data right away and would continue doing so whenever a new
Subscriber comes in (in which case, the subscriber would see only new elements emitted
after it subscribed). For hot publishers, something does indeed happen before you
subscribe.
One example of the few hot operators in Reactor is just: It directly captures the value
at assembly time and replays it to anybody subscribing to it later. To re-use the HTTP
call analogy, if the captured data is the result of an HTTP call, then only one network
call is made, when instantiating just.
To transform just into a cold publisher, you can use defer. It defers the HTTP
request in our example to subscription time (and would result in a separate network call
for each new subscription).
On the opposite, share() and replay(…) can be used to turn a cold publisher into
a hot one (at least once a first subscription has happened). Both of these also have
Sinks.Many equivalents in the Sinks class, which allow programmatically
feeding the sequence.
Consider two examples, one that demonstrates a cold Flux and the other that makes use of the
Sinks to simulate a hot Flux. The following code shows the first example:
Flux<String> source = Flux.fromIterable(Arrays.asList("blue", "green", "orange", "purple"))
                          .map(String::toUpperCase);

source.subscribe(d -> System.out.println("Subscriber 1: "+d));
source.subscribe(d -> System.out.println("Subscriber 2: "+d));
This first example produces the following output:
Subscriber 1: BLUE
Subscriber 1: GREEN
Subscriber 1: ORANGE
Subscriber 1: PURPLE
Subscriber 2: BLUE
Subscriber 2: GREEN
Subscriber 2: ORANGE
Subscriber 2: PURPLE
The following image shows the replay behavior:
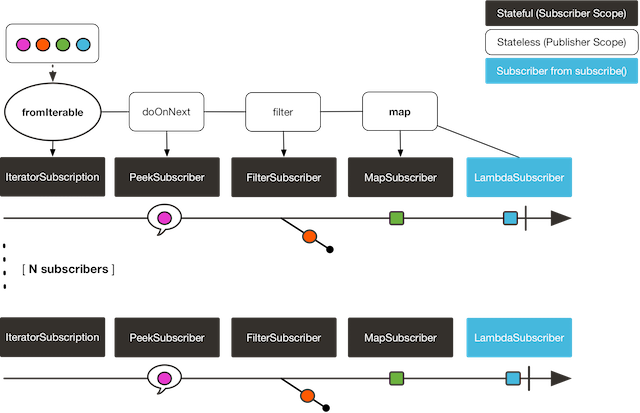
Both subscribers catch all four colors, because each subscriber causes the
process defined by the operators on the Flux to run.
Compare the first example to the second example, shown in the following code:
Sinks.Many<String> hotSource = Sinks.unsafe().many().multicast().directBestEffort();

Flux<String> hotFlux = hotSource.asFlux().map(String::toUpperCase);

hotFlux.subscribe(d -> System.out.println("Subscriber 1 to Hot Source: "+d));

hotSource.emitNext("blue", FAIL_FAST); (1)
hotSource.tryEmitNext("green").orThrow(); (2)

hotFlux.subscribe(d -> System.out.println("Subscriber 2 to Hot Source: "+d));

hotSource.emitNext("orange", FAIL_FAST);
hotSource.emitNext("purple", FAIL_FAST);
hotSource.emitComplete(FAIL_FAST);| 1 | for more details about sinks, see Safely Produce from Multiple Threads by Using Sinks.One and Sinks.Many |
| 2 | side note: orThrow() here is an alternative to emitNext + Sinks.EmitFailureHandler.FAIL_FAST
that is suitable for tests, since throwing there is acceptable (more so than in reactive
applications). |
The second example produces the following output:
Subscriber 1 to Hot Source: BLUE
Subscriber 1 to Hot Source: GREEN
Subscriber 1 to Hot Source: ORANGE
Subscriber 2 to Hot Source: ORANGE
Subscriber 1 to Hot Source: PURPLE
Subscriber 2 to Hot Source: PURPLE
The following image shows how a subscription is broadcast:
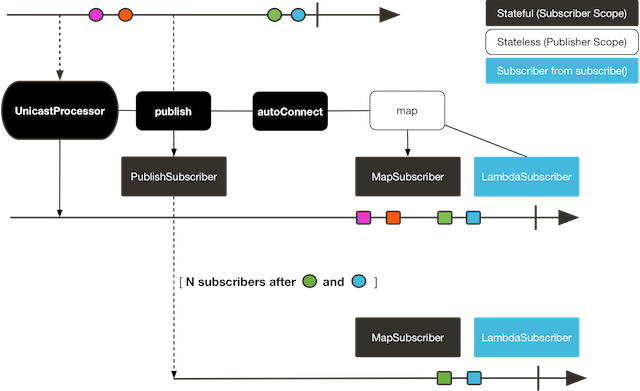
Subscriber 1 catches all four colors. Subscriber 2, having been created after the first
two colors were produced, catches only the last two colors. This difference accounts for
the doubling of ORANGE and PURPLE in the output. The process described by the
operators on this Flux runs regardless of when subscriptions have been attached.
9.3. Broadcasting to Multiple Subscribers with ConnectableFlux
Sometimes, you may want to not defer only some processing to the subscription time of one subscriber, but you might actually want for several of them to rendezvous and then trigger the subscription and data generation.
This is what ConnectableFlux is made for. Two main patterns are covered in the Flux
API that return a ConnectableFlux: publish and replay.
-
publishdynamically tries to respect the demand from its various subscribers, in terms of backpressure, by forwarding these requests to the source. Most notably, if any subscriber has a pending demand of0, publish pauses its requesting to the source. -
replaybuffers data seen through the first subscription, up to configurable limits (in time and buffer size). It replays the data to subsequent subscribers.
A ConnectableFlux offers additional methods to manage subscriptions downstream
versus subscriptions to the original source. These additional methods include the
following:
-
connect()can be called manually once you reach enough subscriptions to theFlux. That triggers the subscription to the upstream source. -
autoConnect(n)can do the same job automatically oncensubscriptions have been made. -
refCount(n)not only automatically tracks incoming subscriptions but also detects when these subscriptions are cancelled. If not enough subscribers are tracked, the source is “disconnected”, causing a new subscription to the source later if additional subscribers appear. -
refCount(int, Duration)adds a “grace period.” Once the number of tracked subscribers becomes too low, it waits for theDurationbefore disconnecting the source, potentially allowing for enough new subscribers to come in and cross the connection threshold again.
Consider the following example:
Flux<Integer> source = Flux.range(1, 3)
                           .doOnSubscribe(s -> System.out.println("subscribed to source"));

ConnectableFlux<Integer> co = source.publish();

co.subscribe(System.out::println, e -> {}, () -> {});
co.subscribe(System.out::println, e -> {}, () -> {});

System.out.println("done subscribing");
Thread.sleep(500);
System.out.println("will now connect");

co.connect();
The preceding code produces the following output:
done subscribing
will now connect
subscribed to source
1
1
2
2
3
3
The following code uses autoConnect:
Flux<Integer> source = Flux.range(1, 3)
                           .doOnSubscribe(s -> System.out.println("subscribed to source"));

Flux<Integer> autoCo = source.publish().autoConnect(2);

autoCo.subscribe(System.out::println, e -> {}, () -> {});
System.out.println("subscribed first");
Thread.sleep(500);
System.out.println("subscribing second");
autoCo.subscribe(System.out::println, e -> {}, () -> {});
The preceding code produces the following output:
subscribed first
subscribing second
subscribed to source
1
1
2
2
3
3
9.4. Three Sorts of Batching
When you have lots of elements and you want to separate them into batches, you have three
broad solutions in Reactor: grouping, windowing, and buffering. These three are
conceptually close, because they redistribute a Flux<T> into an aggregate. Grouping and
windowing create a Flux<Flux<T>>, while buffering aggregates into a Collection<T>.
9.4.1. Grouping with Flux<GroupedFlux<T>>
Grouping is the act of splitting the source Flux<T> into multiple batches, each of which
matches a key.
The associated operator is groupBy.
Each group is represented as a GroupedFlux<T>, which lets you retrieve the key by calling its
key() method.
There is no necessary continuity in the content of the groups. Once a source element produces a new key, the group for this key is opened and elements that match the key end up in the group (several groups could be open at the same time).
This means that groups:
-
Are always disjoint (a source element belongs to one and only one group).
-
Can contain elements from different places in the original sequence.
-
Are never empty.
The following example groups values by whether they are even or odd:
StepVerifier.create(
	Flux.just(1, 3, 5, 2, 4, 6, 11, 12, 13)
		.groupBy(i -> i % 2 == 0 ? "even" : "odd")
		.concatMap(g -> g.defaultIfEmpty(-1) //if empty groups, show them
				.map(String::valueOf) //map to string
				.startWith(g.key())) //start with the group's key
	)
	.expectNext("odd", "1", "3", "5", "11", "13")
	.expectNext("even", "2", "4", "6", "12")
	.verifyComplete();
Grouping is best suited for when you have a medium to low number of groups. The
groups must also imperatively be consumed (such as by a flatMap) so that groupBy
continues fetching data from upstream and feeding more groups. Sometimes, these two
constraints multiply and lead to hangs, such as when you have a high cardinality and the
concurrency of the flatMap consuming the groups is too low.
|
9.4.2. Windowing with Flux<Flux<T>>
Windowing is the act of splitting the source Flux<T> into windows, by criteria of
size, time, boundary-defining predicates, or boundary-defining Publisher.
The associated operators are window, windowTimeout, windowUntil, windowWhile, and
windowWhen.
Contrary to groupBy, which randomly overlaps according to incoming keys,
windows are (most of the time) opened sequentially.
Some variants can still overlap, though. For instance, in window(int maxSize, int skip)
the maxSize parameter is the number of elements after which a window
closes, and the skip parameter is the number of elements in the source after which a
new window is opened. So if maxSize > skip, a new window opens before the previous one
closes and the two windows overlap.
The following example shows overlapping windows:
StepVerifier.create(
	Flux.range(1, 10)
		.window(5, 3) //overlapping windows
		.concatMap(g -> g.defaultIfEmpty(-1)) //show empty windows as -1
	)
		.expectNext(1, 2, 3, 4, 5)
		.expectNext(4, 5, 6, 7, 8)
		.expectNext(7, 8, 9, 10)
		.expectNext(10)
		.verifyComplete();
With the reverse configuration (maxSize < skip), some elements from
the source are dropped and are not part of any window.
|
In the case of predicate-based windowing through windowUntil and windowWhile,
having subsequent source elements that do not match the predicate can also lead
to empty windows, as demonstrated in the following example:
StepVerifier.create(
	Flux.just(1, 3, 5, 2, 4, 6, 11, 12, 13)
		.windowWhile(i -> i % 2 == 0)
		.concatMap(g -> g.defaultIfEmpty(-1))
	)
		.expectNext(-1, -1, -1) //respectively triggered by odd 1 3 5
		.expectNext(2, 4, 6) // triggered by 11
		.expectNext(12) // triggered by 13
		// however, no empty completion window is emitted (would contain extra matching elements)
		.verifyComplete();
9.4.3. Buffering with Flux<List<T>>
Buffering is similar to windowing, with the following twist: Instead of emitting
windows (each of which is each a Flux<T>), it emits buffers (which are Collection<T> — by default, List<T>).
The operators for buffering mirror those for windowing: buffer, bufferTimeout,
bufferUntil, bufferWhile, and bufferWhen.
Where the corresponding windowing operator opens a window, a buffering operator creates a new collection and starts adding elements to it. Where a window closes, the buffering operator emits the collection.
Buffering can also lead to dropping source elements or having overlapping buffers, as the following example shows:
StepVerifier.create(
	Flux.range(1, 10)
		.buffer(5, 3) //overlapping buffers
	)
		.expectNext(Arrays.asList(1, 2, 3, 4, 5))
		.expectNext(Arrays.asList(4, 5, 6, 7, 8))
		.expectNext(Arrays.asList(7, 8, 9, 10))
		.expectNext(Collections.singletonList(10))
		.verifyComplete();
Unlike in windowing, bufferUntil and bufferWhile do not emit an empty buffer, as
the following example shows:
StepVerifier.create(
	Flux.just(1, 3, 5, 2, 4, 6, 11, 12, 13)
		.bufferWhile(i -> i % 2 == 0)
	)
	.expectNext(Arrays.asList(2, 4, 6)) // triggered by 11
	.expectNext(Collections.singletonList(12)) // triggered by 13
	.verifyComplete();
9.5. Parallelizing Work with ParallelFlux
With multi-core architectures being a commodity nowadays, being able to easily
parallelize work is important. Reactor helps with that by providing a special type,
ParallelFlux, that exposes operators that are optimized for parallelized work.
To obtain a ParallelFlux, you can use the parallel() operator on any Flux.
By itself, this method does not parallelize the work. Rather, it divides
the workload into “rails” (by default, as many rails as there are CPU cores).
In order to tell the resulting ParallelFlux where to run each rail (and, by
extension, to run rails in parallel) you have to use runOn(Scheduler). Note that
there is a recommended dedicated Scheduler for parallel work: Schedulers.parallel().
Compare the next two examples:
Flux.range(1, 10)
    .parallel(2) (1)
.subscribe(i -> System.out.println(Thread.currentThread().getName() + " -> " + i));| 1 | We force a number of rails instead of relying on the number of CPU cores. |
Flux.range(1, 10)
    .parallel(2)
    .runOn(Schedulers.parallel())
    .subscribe(i -> System.out.println(Thread.currentThread().getName() + " -> " + i));
The first example produces the following output:
main -> 1
main -> 2
main -> 3
main -> 4
main -> 5
main -> 6
main -> 7
main -> 8
main -> 9
main -> 10
The second correctly parallelizes on two threads, as shown in the following output:
parallel-1 -> 1
parallel-2 -> 2
parallel-1 -> 3
parallel-2 -> 4
parallel-1 -> 5
parallel-2 -> 6
parallel-1 -> 7
parallel-1 -> 9
parallel-2 -> 8
parallel-2 -> 10
If, once you process your sequence in parallel, you want to revert back to a “normal”
Flux and apply the rest of the operator chain in a sequential manner, you can use the
sequential() method on ParallelFlux.
Note that sequential() is implicitly applied if you subscribe to the ParallelFlux
with a Subscriber but not when using the lambda-based variants of subscribe.
Note also that subscribe(Subscriber<T>) merges all the rails, while
subscribe(Consumer<T>) runs all the rails. If the subscribe() method has a lambda,
each lambda is executed as many times as there are rails.
You can also access individual rails or “groups” as a Flux<GroupedFlux<T>> through the
groups() method and apply additional operators to them through the composeGroup()
method.
9.6. Replacing Default Schedulers
As we described in the Threading and Schedulers section, Reactor Core comes with several
Scheduler implementations. While you can always create new instances through the new*
factory methods, each Scheduler flavor also has a default singleton instance that is
accessible through the direct factory method (such as Schedulers.boundedElastic() versus
Schedulers.newBoundedElastic(…)).
These default instances are the ones used by operators that need a Scheduler to work
when you do not explicitly specify one. For example, Flux#delayElements(Duration) uses
the Schedulers.parallel() instance.
In some cases, however, you might need to change these default instances with something
else in a cross-cutting way, without having to make sure every single operator you call
has your specific Scheduler as a parameter. An example is measuring the time every
single scheduled task takes by wrapping the real schedulers, for instrumentation
purposes. In other words, you might want to change the default Schedulers.
Changing the default schedulers is possible through the Schedulers.Factory class. By
default, a Factory creates all the standard Scheduler through similarly named
methods. You can override each of these with your custom implementation.
Additionally, the factory exposes one additional customization method:
decorateExecutorService. It is invoked during the creation of every Reactor Core
Scheduler that is backed by a ScheduledExecutorService (even non-default instances,
such as those created by calls to Schedulers.newParallel()).
This lets you tune the ScheduledExecutorService to be used: The default one is exposed
as a Supplier and, depending on the type of Scheduler being configured, you can choose
to entirely bypass that supplier and return your own instance or you can get() the
default instance and wrap it.
Once you create a Factory that fits your needs, you must install it by calling
Schedulers.setFactory(Factory).
|
Finally, there is a last customizable hook in Schedulers: onHandleError. This hook is
invoked whenever a Runnable task submitted to a Scheduler throws an Exception (note
that if there is an UncaughtExceptionHandler set for the Thread that ran the task,
both the handler and the hook are invoked).
9.7. Using Global Hooks
Reactor has another category of configurable callbacks that are invoked by Reactor
operators in various situations. They are all set in the Hooks class, and they fall into
three categories:
9.7.1. Dropping Hooks
Dropping hooks are invoked when the source of an operator does not comply with the
Reactive Streams specification. These kind of errors are outside of the normal execution
path (that is, they cannot be propagated through onError).
Typically, a Publisher calls onNext on the operator despite having already called
onCompleted on it previously. In that case, the onNext value is dropped. The same
is true for an extraneous onError signal.
The corresponding hooks, onNextDropped and onErrorDropped, let you provide a global
Consumer for these drops. For example, you can use it to log the drop and clean up
resources associated with a value if needed (as it never makes it to the rest of the
reactive chain).
Setting the hooks twice in a row is additive: every consumer you provide is invoked. The
hooks can be fully reset to their defaults by using the Hooks.resetOn*Dropped() methods.
9.7.2. Internal Error Hook
One hook, onOperatorError, is invoked by operators when an unexpected Exception is
thrown during the execution of their onNext, onError, and onComplete methods.
Unlike the previous category, this is still within the normal execution path. A typical
example is the map operator with a map function that throws an Exception (such as
division by zero). It is still possible at this point to go through the usual channel of
onError, and that is what the operator does.
First, it passes the Exception through onOperatorError. The hook lets you inspect the
error (and the incriminating value, if relevant) and change the Exception. Of course,
you can also do something on the side, such as log and return the original Exception.
Note that you can set the onOperatorError hook multiple times. You can provide a
String identifier for a particular BiFunction and subsequent calls with different
keys concatenates the functions, which are all executed. On the other hand, reusing the
same key twice lets you replace a function you previously set.
As a consequence, the default hook behavior can be both fully reset (by using
Hooks.resetOnOperatorError()) or partially reset for a specific key only (by using
Hooks.resetOnOperatorError(String)).
9.7.3. Assembly Hooks
These hooks tie in the lifecycle of operators. They are invoked when a chain of operators
is assembled (that is, instantiated). onEachOperator lets you dynamically change each
operator as it is assembled in the chain, by returning a different Publisher.
onLastOperator is similar, except that it is invoked only on the last operator in the
chain before the subscribe call.
If you want to decorate all operators with a cross-cutting Subscriber implementation,
you can look into the Operators#lift* methods to help you deal with the various
types of Reactor Publishers out there (Flux, Mono, ParallelFlux, GroupedFlux, and ConnectableFlux),
as well as their Fuseable versions.
Like onOperatorError, these hooks are cumulative and can be identified with a key. They
can also be reset partially or totally.
9.7.4. Hook Presets
The Hooks utility class provides two preset hooks. These are alternatives to
the default behaviors that you can use by calling their corresponding method, rather than
coming up with the hook yourself:
-
onNextDroppedFail():onNextDroppedused to throw aExceptions.failWithCancel()exception. It now defaults to logging the dropped value at the DEBUG level. To go back to the old default behavior of throwing, useonNextDroppedFail(). -
onOperatorDebug(): This method activates debug mode. It ties into theonOperatorErrorhook, so callingresetOnOperatorError()also resets it. You can independently reset it by usingresetOnOperatorDebug(), as it uses a specific key internally.
9.8. Adding a Context to a Reactive Sequence
One of the big technical challenges encountered when switching from an imperative programming perspective to a reactive programming mindset lies in how you deal with threading.
Contrary to what you might be used to, in reactive programming, you can use a Thread
to process several asynchronous sequences that run at roughly the same time (actually, in
non-blocking locksteps). The execution can also easily and often jump from one thread to
another.
This arrangement is especially hard for developers that use features dependent on the
threading model being more “stable,” such as ThreadLocal. As it lets you associate
data with a thread, it becomes tricky to use in a reactive context. As a result,
libraries that rely on ThreadLocal at least introduce new challenges when used with
Reactor. At worst, they work badly or even fail. Using the MDC of Logback to store and
log correlation IDs is a prime example of such a situation.
The usual workaround for ThreadLocal usage is to move the contextual data, C, along
your business data, T, in the sequence, by using (for instance) Tuple2<T, C>. This does
not look good and leaks an orthogonal concern (the contextual data) into your method and
Flux signatures.
Since version 3.1.0, Reactor comes with an advanced feature that is somewhat comparable
to ThreadLocal but can be applied to a Flux or a Mono instead of a Thread.
This feature is called Context.
As an illustration of what it looks like, the following example both reads from and
writes to Context:
String key = "message";
Mono<String> r = Mono.just("Hello")
    .flatMap(s -> Mono.deferContextual(ctx ->
         Mono.just(s + " " + ctx.get(key))))
    .contextWrite(ctx -> ctx.put(key, "World"));

StepVerifier.create(r)
            .expectNext("Hello World")
            .verifyComplete();
In the following sections, we cover Context and how to use it, so that you
can eventually understand the preceding example.
This is an advanced feature that is more targeted at library developers. It
requires good understanding of the lifecycle of a Subscription and is intended for
libraries that are responsible for the subscriptions.
|
9.8.1. The Context API
Context is an interface reminiscent of Map.It stores key-value pairs and lets you
fetch a value you stored by its key. It has a simplified version that only exposes read
methods, the ContextView. More specifically:
-
Both key and values are of type
Object, so aContext(andContextView) instance can contain any number of highly divergent values from different libraries and sources. -
A
Contextis immutable. It expose write methods likeputandputAllbut they produce a new instance. -
For a read-only API that doesn’t even expose such write methods, there’s the
ContextViewsuperinterface since 3.4.0 -
You can check whether the key is present with
hasKey(Object key). -
Use
getOrDefault(Object key, T defaultValue)to retrieve a value (cast to aT) or fall back to a default one if theContextinstance does not have that key. -
Use
getOrEmpty(Object key)to get anOptional<T>(theContextinstance attempts to cast the stored value toT). -
Use
put(Object key, Object value)to store a key-value pair, returning a newContextinstance. You can also merge two contexts into a new one by usingputAll(ContextView). -
Use
delete(Object key)to remove the value associated to a key, returning a newContext.
|
When you create a Alternatively you can also create an empty |
9.8.2. Tying a Context to a Flux and Writing
To make a Context be useful, it must be tied to a specific sequence and be accessible by
each operator in a chain. Note that the operator must be a Reactor-native operator, as
Context is specific to Reactor.
Actually, a Context is tied to each Subscriber in a chain. It uses the Subscription
propagation mechanism to make itself available to each operator, starting with the final
subscribe and moving up the chain.
In order to populate the Context, which can only be done at subscription time, you need
to use the contextWrite operator.
contextWrite(ContextView) merges the ContextView you provide and the
Context from downstream (remember, the Context is propagated from the bottom of the
chain towards the top). This is done through a call to putAll, resulting in a NEW
Context for upstream.
You can also use the more advanced contextWrite(Function<Context, Context>).
It receives a copy of the Context from downstream, lets you put or delete values
as you see fit, and returns the new Context to use. You can even decide to return a
completely different instance, although it is really not recommended (doing so might
impact third-party libraries that depend on the Context).
|
9.8.3. Reading a Context, through the ContextView
Once you have populated a Context, you may want to peek into it at runtime.
Most of the time, the responsibility of putting information into the Context
is on the end user’s side, while exploiting that information is on the third-party library’s side,
as such libraries are usually upstream of the client code.
The read oriented operators allow to obtain data from the Context in a chain of operators by exposing
its ContextView:
-
to access the context from a source-like operator, use
deferContextualfactory method -
to access the context from the middle of an operator chain, use
transformDeferredContextual(BiFunction) -
alternatively, when dealing with an inner sequence (like inside a
flatMap), theContextViewcan be materialized usingMono.deferContextual(Mono::just). Usually though, you might want to perform meaningful work directly within the defer’s lambda, eg.Mono.deferContextual(ctx → doSomethingAsyncWithContextData(v, ctx.get(key)))wherevis the value being flatMapped.
In order to read from the Context without misleading users into thinking one can write to it
while data is running through the pipeline, only the ContextView is exposed by the operators above.
|
9.8.4. Simple Context Examples
The examples in this section are meant as ways to better understand some of the caveats of
using a Context.
We first look back at our simple example from the introduction in a bit more detail, as the following example shows:
String key = "message";
Mono<String> r = Mono.just("Hello")
    .flatMap(s -> Mono.deferContextual(ctx ->
         Mono.just(s + " " + ctx.get(key)))) (2)
    .contextWrite(ctx -> ctx.put(key, "World")); (1)

StepVerifier.create(r)
            .expectNext("Hello World") (3)
.verifyComplete();| 1 | The chain of operators ends with a call to contextWrite(Function) that puts
"World" into the Context under a key of "message". |
| 2 | We flatMap on the source element, materializing the ContextView with Mono.deferContextual()
and directly extract the data associated to "message" and concatenate that with the original word. |
| 3 | The resulting Mono<String> emits "Hello World". |
The numbering above versus the actual line order is not a mistake. It represents
the execution order. Even though contextWrite is the last piece of the chain, it is
the one that gets executed first (due to its subscription-time nature and the fact that
the subscription signal flows from bottom to top).
|
In your chain of operators, the relative positions of where you write to the
Context and where you read from it matters. The Context
is immutable and its content can only be seen by operators above it, as demonstrated in
the following example:
|
String key = "message";
Mono<String> r = Mono.just("Hello")
    .contextWrite(ctx -> ctx.put(key, "World")) (1)
    .flatMap( s -> Mono.deferContextual(ctx ->
        Mono.just(s + " " + ctx.getOrDefault(key, "Stranger")))); (2)

StepVerifier.create(r)
            .expectNext("Hello Stranger") (3)
.verifyComplete();| 1 | The Context is written to too high in the chain. |
| 2 | As a result, in the flatMap, there is no value associated with our key. A default value
is used instead. |
| 3 | The resulting Mono<String> thus emits "Hello Stranger". |
Similarly, in the case of several attempts to write the same key to the Context, the
relative order of the writes matters, too. Operators that read the Context see
the value that was set closest to being under them, as demonstrated in the following example:
String key = "message";
Mono<String> r = Mono
    .deferContextual(ctx -> Mono.just("Hello " + ctx.get(key)))
    .contextWrite(ctx -> ctx.put(key, "Reactor")) (1)
    .contextWrite(ctx -> ctx.put(key, "World")); (2)

StepVerifier.create(r)
            .expectNext("Hello Reactor") (3)
.verifyComplete();| 1 | A write attempt on key "message". |
| 2 | Another write attempt on key "message". |
| 3 | The deferContextual only saw the value set closest to it (and below it): "Reactor". |
In the preceding example, the Context is populated with "World" during subscription.
Then the subscription signal moves upstream and another write happens. This produces a
second immutable Context with a value of "Reactor". After that, data starts flowing.
The deferContextual sees the Context closest to it, which is our second Context with the
"Reactor" value (exposed to the user as a ContextView).
You might wonder if the Context is propagated along with the data signal. If that was
the case, putting another flatMap between these two writes would use the value from
the top Context. But this is not the case, as demonstrated by the following example:
String key = "message";
Mono<String> r = Mono
    .deferContextual(ctx -> Mono.just("Hello " + ctx.get(key))) (3)
    .contextWrite(ctx -> ctx.put(key, "Reactor")) (2)
    .flatMap( s -> Mono.deferContextual(ctx ->
        Mono.just(s + " " + ctx.get(key)))) (4)
    .contextWrite(ctx -> ctx.put(key, "World")); (1)

StepVerifier.create(r)
            .expectNext("Hello Reactor World") (5)
.verifyComplete();| 1 | This is the first write to happen. |
| 2 | This is the second write to happen. |
| 3 | The top context read sees second write. |
| 4 | The flatMap concatenates the result from initial read with the value from the first write. |
| 5 | The Mono emits "Hello Reactor World". |
The reason is that the Context is associated to the Subscriber and each operator
accesses the Context by requesting it from its downstream Subscriber.
One last interesting propagation case is the one where the Context is also written to
inside a flatMap, as in the following example:
String key = "message";
Mono<String> r = Mono.just("Hello")
    .flatMap( s -> Mono
        .deferContextual(ctxView -> Mono.just(s + " " + ctxView.get(key)))
    )
    .flatMap( s -> Mono
        .deferContextual(ctxView -> Mono.just(s + " " + ctxView.get(key)))
        .contextWrite(ctx -> ctx.put(key, "Reactor")) (1)
    )
    .contextWrite(ctx -> ctx.put(key, "World")); (2)

StepVerifier.create(r)
            .expectNext("Hello World Reactor")
.verifyComplete();| 1 | This contextWrite does not impact anything outside of its flatMap. |
| 2 | This contextWrite impacts the main sequence’s Context. |
In the preceding example, the final emitted value is "Hello World Reactor" and not "Hello
Reactor World", because the contextWrite that writes "Reactor" does so as part of
the inner sequence of the second flatMap. As a consequence, it is not visible or propagated
through the main sequence and the first flatMap does not see it. Propagation and immutability
isolate the Context in operators that create intermediate inner sequences such as flatMap.
9.8.5. Full Example
Now we can consider a more real life example of a library reading information from the Context:
a reactive HTTP client that takes a Mono<String> as the source of data for a PUT but
also looks for a particular Context key to add a correlation ID to the request’s headers.
From the user perspective, it is called as follows:
doPut("www.example.com", Mono.just("Walter"))In order to propagate a correlation ID, it would be called as follows:
doPut("www.example.com", Mono.just("Walter"))
	.contextWrite(Context.of(HTTP_CORRELATION_ID, "2-j3r9afaf92j-afkaf"))
As the preceding snippets show, the user code uses contextWrite to populate
a Context with an HTTP_CORRELATION_ID key-value pair. The upstream of the operator is
a Mono<Tuple2<Integer, String>> (a simplistic representation of an HTTP response)
returned by the HTTP client library. So it effectively passes information from the
user code to the library code.
The following example shows mock code from the library’s perspective that reads the context and “augments the request” if it can find the correlation ID:
static final String HTTP_CORRELATION_ID = "reactive.http.library.correlationId";

Mono<Tuple2<Integer, String>> doPut(String url, Mono<String> data) {
  Mono<Tuple2<String, Optional<Object>>> dataAndContext =
      data.zipWith(Mono.deferContextual(c -> (1)
          Mono.just(c.getOrEmpty(HTTP_CORRELATION_ID))) (2)
      );

  return dataAndContext.<String>handle((dac, sink) -> {
      if (dac.getT2().isPresent()) { (3)
        sink.next("PUT <" + dac.getT1() + "> sent to " + url +
            " with header X-Correlation-ID = " + dac.getT2().get());
      }
      else {
        sink.next("PUT <" + dac.getT1() + "> sent to " + url);
      }
        sink.complete();
      })
      .map(msg -> Tuples.of(200, msg));
}| 1 | Materialize the ContextView through Mono.deferContextual and… |
| 2 | within the defer, extract a value for the correlation ID key, as an Optional. |
| 3 | If the key was present in the context, use the correlation ID as a header. |
The library snippet zips the data Mono with Mono.deferContextual(Mono::just).
This gives the library a Tuple2<String, ContextView>, and that
context contains the HTTP_CORRELATION_ID entry from downstream (as it is on the direct
path to the subscriber).
The library code then uses map to extract an Optional<String> for that key, and, if
the entry is present, it uses the passed correlation ID as a X-Correlation-ID header.
That last part is simulated by the handle.
The whole test that validates the library code used the correlation ID can be written as follows:
@Test
public void contextForLibraryReactivePut() {
  Mono<String> put = doPut("www.example.com", Mono.just("Walter"))
      .contextWrite(Context.of(HTTP_CORRELATION_ID, "2-j3r9afaf92j-afkaf"))
      .filter(t -> t.getT1() < 300)
      .map(Tuple2::getT2);

  StepVerifier.create(put)
              .expectNext("PUT <Walter> sent to www.example.com" +
                  " with header X-Correlation-ID = 2-j3r9afaf92j-afkaf")
              .verifyComplete();
}
9.9. Dealing with Objects that Need Cleanup
In very specific cases, your application may deal with types that necessitate some form of cleanup once they are no longer in use.
This is an advanced scenario — for, example when you have reference-counted objects or when you deal with off-heap objects.
Netty’s ByteBuf is a prime example of both.
In order to ensure proper cleanup of such objects, you need to account for it on a Flux-by-Flux basis, as well as in several of the global hooks (see Using Global Hooks):
-
The
doOnDiscardFlux/Monooperator -
The
onOperatorErrorhook -
The
onNextDroppedhook -
Operator-specific handlers
This is needed because each hook is made with a specific subset of cleanup in mind, and users might want (for example) to implement specific error-handling logic in addition to cleanup logic within onOperatorError.
Note that some operators are less adapted to dealing with objects that need cleanup.
For example, bufferWhen can introduce overlapping buffers, and that means that the discard “local hook” we used earlier might see a first buffer as being discarded and cleanup an element in it that is in a second buffer, where it is still valid.
For the purpose of cleaning up, all these hooks MUST be IDEMPOTENT.
They might on some occasions get applied several times to the same object.
Unlike the doOnDiscard operator, which performs a class-level instanceOf check, the global hooks are also dealing with instances that can be any Object. It is up to the user’s implementation to distinguish between which instances need cleanup and which do not.
|
9.9.1. The doOnDiscard Operator or Local Hook
This hook has been specifically put in place for cleanup of objects that would otherwise never be exposed to user code.
It is intended as a cleanup hook for flows that operate under normal circumstances (not malformed sources that push too many items, which is covered by onNextDropped).
It is local, in the sense that it is activated through an operator and applies only to a given Flux or Mono.
Obvious cases include operators that filter elements from upstream.
These elements never reach the next operator (or final subscriber), but this is part of the normal path of execution.
As such, they are passed to the doOnDiscard hook.
Examples of when you might use the doOnDiscard hook include the following:
-
filter: Items that do not match the filter are considered to be “discarded.” -
skip: Skipped items are discarded. -
buffer(maxSize, skip)withmaxSize < skip: A “dropping buffer” — items in between buffers are discarded.
But doOnDiscard is not limited to filtering operators, and is also used by operators that internally queue data for backpressure purposes.
More specifically, most of the time, this is important during cancellation. An operator that prefetches data from its source and later drains to its subscriber upon demand could have un-emitted data when it gets cancelled.
Such operators use the doOnDiscard hook during cancellation to clear up their internal backpressure Queue.
Each call to doOnDiscard(Class, Consumer) is additive with the others, to the extent that it is visible and used by only operators upstream of it.
|
9.9.2. The onOperatorError hook
The onOperatorError hook is intended to modify errors in a transverse manner (similar to an AOP catch-and-rethrow).
When the error happens during the processing of an onNext signal, the element that was being emitted is passed to onOperatorError.
If that type of element needs cleanup, you need to implement it in the onOperatorError hook, possibly on top of error-rewriting code.
9.9.3. The onNextDropped Hook
With malformed Publishers, there could be cases where an operator receives an element when it expected none (typically, after having received the onError or onComplete signals).
In such cases, the unexpected element is “dropped” — that is, passed to the onNextDropped hook.
If you have types that need cleanup, you must detect these in the onNextDropped hook and implement cleanup code there as well.
9.9.4. Operator-specific Handlers
Some operators that deal with buffers or collect values as part of their operations have specific handlers for cases where collected data is not propagated downstream. If you use such operators with the type(s) that need cleanup, you need to perform cleanup in these handlers.
For example, distinct has such a callback that is invoked when the operator terminates (or is cancelled) in order to clear the collection it uses to judge whether an element is distinct or not.
By default, the collection is a HashSet, and the cleanup callback is a HashSet::clear.
However, if you deal with reference-counted objects, you might want to change that to a more involved handler that would release each element in the set before calling clear() on it.
9.10. Null Safety
Although Java does not allow expressing null-safety with its type system, Reactor now provides annotations to declare nullability of APIs, similar to those provided by Spring Framework 5.
Reactor uses these annotations, but they can also be used in any Reactor-based Java project to declare null-safe APIs. Nullability of the types used inside method bodies is outside of the scope of this feature.
These annotations are meta-annotated with JSR 305
annotations (a dormant JSR that is supported by tools such as IntelliJ IDEA) to provide
useful warnings to Java developers related to null-safety in order to avoid
NullPointerException at runtime. JSR 305 meta-annotations let tooling vendors
provide null safety support in a generic way, without having to hard-code support for Reactor annotations.
| It is not necessary nor recommended with Kotlin 1.1.5+ to have a dependency on JSR 305 in your project classpath. |
They are also used by Kotlin, which natively supports null safety. See this dedicated section for more details.
The following annotations are provided in the reactor.util.annotation package:
-
@NonNull: Indicates that a specific parameter, return value, or field cannot benull. (It is not needed on parameters and return values where@NonNullApiapplies) . -
@Nullable: Indicates that a parameter, return value, or field can benull. -
@NonNullApi: Package-level annotation that indicates non-null is the default behavior for parameters and return values.
| Nullability for generic type arguments, variable arguments, and array elements is not yet supported. See issue #878 for up-to-date information. |
Appendix A: Which operator do I need?
In this section, if an operator is specific to Flux or Mono, it is prefixed and linked accordingly, like this: Flux#fromArray. Common operators have no prefix, and links to both implementations are provided, for example: just (Flux|Mono). When a specific use case is covered by a combination of operators, it is presented as a method call, with a leading dot and parameters in parentheses, as follows: .methodCall(parameter).
|
I want to deal with:
A.1. Creating a New Sequence…
-
that emits a
T, and I already have:just(Flux|Mono)-
…from an Optional<T>: Mono#justOrEmpty(Optional<T>)
-
…from a potentially
nullT: Mono#justOrEmpty(T)
-
-
that emits a
Treturned by a method:just(Flux|Mono) as well-
…but lazily captured: use Mono#fromSupplier or wrap
just(Flux|Mono) insidedefer(Flux|Mono)
-
-
that emits several
TI can explicitly enumerate: Flux#just(T…) -
that iterates over:
-
an array: Flux#fromArray
-
a collection or iterable: Flux#fromIterable
-
a range of integers: Flux#range
-
a Stream supplied for each Subscription: Flux#fromStream(Supplier<Stream>)
-
-
that emits from various single-valued sources such as:
-
that generates events programmatically (can use state):
-
synchronously and one-by-one: Flux#generate
-
asynchronously (can also be sync), multiple emissions possible in one pass: Flux#create (Mono#create as well, without the multiple emission aspect)
-
A.2. Transforming an Existing Sequence
-
I want to transform existing data:
-
on a 1-to-1 basis (eg. strings to their length):
map(Flux|Mono)-
…in order to materialize each source value’s index: Flux#index
-
on a 1-to-n basis (eg. strings to their characters):
flatMap(Flux|Mono) + use a factory method -
on a 1-to-n basis with programmatic behavior for each source element and/or state:
handle(Flux|Mono) -
running an asynchronous task for each source item (eg. urls to http request):
flatMap(Flux|Mono) + an async Publisher-returning method-
…ignoring some data: conditionally return a Mono.empty() in the flatMap lambda
-
…retaining the original sequence order: Flux#flatMapSequential (this triggers the async processes immediately but reorders the results)
-
…where the async task can return multiple values, from a Mono source: Mono#flatMapMany
-
-
-
I want to add pre-set elements to an existing sequence:
-
at the start: Flux#startWith(T…)
-
at the end: Flux#concatWithValues(T…)
-
-
I want to aggregate a Flux: (the
Flux#prefix is assumed below)-
into a List: collectList, collectSortedList
-
into a Map: collectMap, collectMultiMap
-
into an arbitrary container: collect
-
into the size of the sequence: count
-
by applying a function between each element (eg. running sum): reduce
-
…but emitting each intermediary value: scan
-
-
into a boolean value from a predicate:
-
applied to all values (AND): all
-
applied to at least one value (OR): any
-
testing the presence of any value: hasElements (there is a Mono equivalent in hasElement)
-
testing the presence of a specific value: hasElement(T)
-
-
-
I want to combine publishers…
-
in sequential order: Flux#concat or
.concatWith(other)(Flux|Mono)-
…but delaying any error until remaining publishers have been emitted: Flux#concatDelayError
-
…but eagerly subscribing to subsequent publishers: Flux#mergeSequential
-
-
in emission order (combined items emitted as they come): Flux#merge /
.mergeWith(other)(Flux|Mono)-
…with different types (transforming merge): Flux#zip / Flux#zipWith
-
-
by pairing values:
-
from 2 Monos into a Tuple2: Mono#zipWith
-
from n Monos when they all completed: Mono#zip
-
-
by coordinating their termination:
-
from 1 Mono and any source into a Mono<Void>: Mono#and
-
from n sources when they all completed: Mono#when
-
into an arbitrary container type:
-
each time all sides have emitted: Flux#zip (up to the smallest cardinality)
-
each time a new value arrives at either side: Flux#combineLatest
-
-
-
selecting the first publisher which…
-
triggered by the elements in a source sequence: switchMap (each source element is mapped to a Publisher)
-
triggered by the start of the next publisher in a sequence of publishers: switchOnNext
-
-
I want to repeat an existing sequence:
repeat(Flux|Mono)-
…but at time intervals:
Flux.interval(duration).flatMap(tick → myExistingPublisher)
-
-
I have an empty sequence but…
-
I have a sequence but I am not interested in values:
ignoreElements(Flux.ignoreElements()|Mono.ignoreElement())-
…and I want the completion represented as a Mono<Void>:
then(Flux|Mono) -
…and I want to wait for another task to complete at the end:
thenEmpty(Flux|Mono) -
…and I want to switch to another Mono at the end: Mono#then(mono)
-
…and I want to emit a single value at the end: Mono#thenReturn(T)
-
…and I want to switch to a Flux at the end:
thenMany(Flux|Mono)
-
-
I have a Mono for which I want to defer completion…
-
…until another publisher, which is derived from this value, has completed: Mono#delayUntil(Function)
-
-
I want to expand elements recursively into a graph of sequences and emit the combination…
A.3. Peeking into a Sequence
-
Without modifying the final sequence, I want to:
-
get notified of / execute additional behavior (sometimes referred to as "side-effects") on:
-
completion: Flux#doOnComplete, Mono#doOnSuccess (includes the result, if any)
-
"start" of the sequence:
doFirst(Flux|Mono)-
this is tied to Publisher#subscribe(Subscriber)
-
-
post-subscription :
doOnSubscribe(Flux|Mono)-
Subscriptionacknowledgment aftersubscribe -
this is tied to Subscriber#onSubscribe(Subscription)
-
-
any type of signal, represented as a Signal:
doOnEach(Flux|Mono) -
any terminating condition (complete, error, cancel):
doFinally(Flux|Mono)
-
-
I want to know of all events:
A.4. Filtering a Sequence
-
I want to filter a sequence:
-
restricting on the type of the emitted objects:
ofType(Flux|Mono) -
by ignoring the values altogether:
ignoreElements(Flux.ignoreElements()|Mono.ignoreElement()) -
by ignoring duplicates:
-
in the whole sequence (logical set): Flux#distinct
-
between subsequently emitted items (deduplication): Flux#distinctUntilChanged
-
-
I want to keep only a subset of the sequence:
-
by taking N elements:
-
at the beginning of the sequence: Flux#take(long, true)
-
…requesting an unbounded amount from upstream: Flux#take(long, false)
-
…based on a duration: Flux#take(Duration)
-
…only the first element, as a Mono: Flux#next()
-
…using request(N) rather than cancellation: Flux#limitRequest(long)
-
-
at the end of the sequence: Flux#takeLast
-
until a criteria is met (inclusive): Flux#takeUntil (predicate-based), Flux#takeUntilOther (companion publisher-based)
-
while a criteria is met (exclusive): Flux#takeWhile
-
-
by taking at most 1 element:
-
at a specific position: Flux#elementAt
-
at the end: .takeLast(1)
-
…and emit an error if empty: Flux#last()
-
…and emit a default value if empty: Flux#last(T)
-
-
-
by skipping elements:
-
at the beginning of the sequence: Flux#skip(long)
-
…based on a duration: Flux#skip(Duration)
-
-
at the end of the sequence: Flux#skipLast
-
until a criteria is met (inclusive): Flux#skipUntil (predicate-based), Flux#skipUntilOther (companion publisher-based)
-
while a criteria is met (exclusive): Flux#skipWhile
-
-
by sampling items:
-
by duration: Flux#sample(Duration)
-
but keeping the first element in the sampling window instead of the last: sampleFirst
-
-
by a publisher-based window: Flux#sample(Publisher)
-
based on a publisher "timing out": Flux#sampleTimeout (each element triggers a publisher, and is emitted if that publisher does not overlap with the next)
-
-
-
I expect at most 1 element (error if more than one)…
-
and I want an error if the sequence is empty: Flux#single()
-
and I want a default value if the sequence is empty: Flux#single(T)
-
and I accept an empty sequence as well: Flux#singleOrEmpty
-
A.5. Handling Errors
-
I want the try/catch equivalent of:
-
I want to recover from errors…
-
by falling back:
-
to a completion ("swallowing" the error):
onErrorComplete(Flux|Mono) -
to a Publisher or Mono, possibly different ones depending on the error: Flux#onErrorResume and Mono#onErrorResume
-
by retrying…
-
…with a simple policy (max number of attempts):
retry()(Flux|Mono),retry(long)(Flux|Mono) -
…triggered by a companion control Flux:
retryWhen(Flux|Mono) -
…using a standard backoff strategy (exponential backoff with jitter):
retryWhen(Retry.backoff(…))(Flux|Mono) (see also other factory methods in Retry)
-
-
-
I want to deal with backpressure "errors" (request max from upstream and apply the strategy when downstream does not produce enough request)…
-
by throwing a special IllegalStateException: Flux#onBackpressureError
-
by dropping excess values: Flux#onBackpressureDrop
-
…except the last one seen: Flux#onBackpressureLatest
-
-
by buffering excess values (bounded or unbounded): Flux#onBackpressureBuffer
-
…and applying a strategy when bounded buffer also overflows: Flux#onBackpressureBuffer with a BufferOverflowStrategy
-
-
A.6. Working with Time
-
I want to associate emissions with a timing measured…
-
…with best available precision and versatility of provided data:
timed(Flux|Mono)-
Timed<T>#elapsed() for Duration since last
onNext -
Timed<T>#timestamp() for Instant representation of the epoch timestamp (milliseconds resolution)
-
Timed<T>#elapsedSinceSubcription() for Duration since subscription (rather than last onNext)
-
can have nanoseconds resolution for elapsed Durations
-
-
…as a (legacy) Tuple2<Long, T>…
-
-
I want my sequence to be interrupted if there is too much delay between emissions:
timeout(Flux|Mono) -
I want to get ticks from a clock, regular time intervals: Flux#interval
-
I want to emit a single
0after an initial delay: static Mono.delay. -
I want to introduce a delay:
-
between each onNext signal: Mono#delayElement, Flux#delayElements
-
before the subscription happens:
delaySubscription(Flux|Mono)
-
A.7. Splitting a Flux
-
I want to split a Flux<T> into a
Flux<Flux<T>>, by a boundary criteria:-
of size: window(int)
-
…with overlapping or dropping windows: window(int, int)
-
-
of time window(Duration)
-
…with overlapping or dropping windows: window(Duration, Duration)
-
-
of size OR time (window closes when count is reached or timeout elapsed): windowTimeout(int, Duration)
-
based on a predicate on elements: windowUntil
-
……emitting the element that triggered the boundary in the next window (
cutBeforevariant): .windowUntil(predicate, true) -
…keeping the window open while elements match a predicate: windowWhile (non-matching elements are not emitted)
-
-
driven by an arbitrary boundary represented by onNexts in a control Publisher: window(Publisher), windowWhen
-
-
I want to split a Flux<T> and buffer elements within boundaries together…
-
into List:
-
by a size boundary: buffer(int)
-
…with overlapping or dropping buffers: buffer(int, int)
-
-
by a duration boundary: buffer(Duration)
-
…with overlapping or dropping buffers: buffer(Duration, Duration)
-
-
by a size OR duration boundary: bufferTimeout(int, Duration)
-
by an arbitrary criteria boundary: bufferUntil(Predicate)
-
…putting the element that triggered the boundary in the next buffer: .bufferUntil(predicate, true)
-
…buffering while predicate matches and dropping the element that triggered the boundary: bufferWhile(Predicate)
-
-
driven by an arbitrary boundary represented by onNexts in a control Publisher: buffer(Publisher), bufferWhen
-
-
into an arbitrary "collection" type
C: use variants like buffer(int, Supplier<C>)
-
-
I want to split a Flux<T> so that element that share a characteristic end up in the same sub-flux: groupBy(Function<T,K>) TIP: Note that this returns a
Flux<GroupedFlux<K, T>>, each inner GroupedFlux shares the sameKkey accessible through key().
A.8. Going Back to the Synchronous World
Note: all of these methods except Mono#toFuture will throw an UnsupportedOperatorException if called from within a Scheduler marked as "non-blocking only" (by default parallel() and single()).
-
I have a Flux<T> and I want to:
-
block until I can get the first element: Flux#blockFirst
-
…with a timeout: Flux#blockFirst(Duration)
-
-
block until I can get the last element (or null if empty): Flux#blockLast
-
…with a timeout: Flux#blockLast(Duration)
-
-
synchronously switch to an Iterable<T>: Flux#toIterable
-
synchronously switch to a Java 8 Stream<T>: Flux#toStream
-
-
I have a Mono<T> and I want:
-
to block until I can get the value: Mono#block
-
…with a timeout: Mono#block(Duration)
-
-
A.9. Multicasting a Flux to several Subscribers
-
I want to connect multiple Subscriber to a Flux:
-
and decide when to trigger the source with connect(): publish() (returns a ConnectableFlux)
-
and trigger the source immediately (late subscribers see later data):
share()(Flux|Mono) -
and permanently connect the source when enough subscribers have registered: .publish().autoConnect(n)
-
and automatically connect and cancel the source when subscribers go above/below the threshold: .publish().refCount(n)
-
…but giving a chance for new subscribers to come in before cancelling: .publish().refCount(n, Duration)
-
-
-
I want to cache data from a Publisher and replay it to later subscribers:
-
up to
nelements: cache(int) -
caching latest elements seen within a Duration (Time-To-Live):
cache(Duration)(Flux|Mono)-
…but retain no more than
nelements: cache(int, Duration)
-
-
but without immediately triggering the source: Flux#replay (returns a ConnectableFlux)
-
Appendix B: How to read marble diagrams?
When we introduced Flux and Mono, we showed an example of a "marble diagram".
These are found throughout the javadoc in order to explain the behavior of an operator in a more visual way.
In this section we’ll dig a little deeper into the conventions used by the Reactor documentation for these marble diagrams. First, let’s see how the most common patterns of operators are represented.
Some operators are instance methods: their output is produced by calling a method on a source Flux instance (like Flux<T> output = source.fluxOperator()):
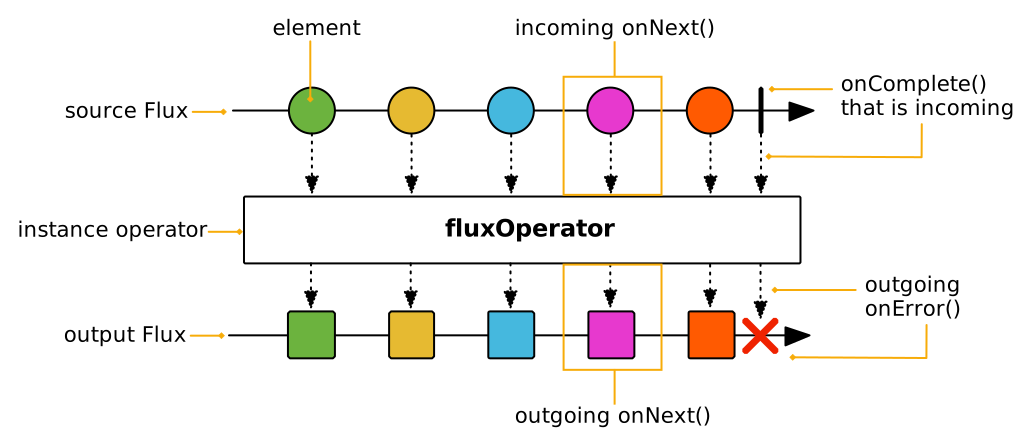
Other operators are static methods. They can still take a source as an input parameter, like in Flux<T> output = Flux.merge(sourceFlux1, sourcePublisher2).
These are represented like below:
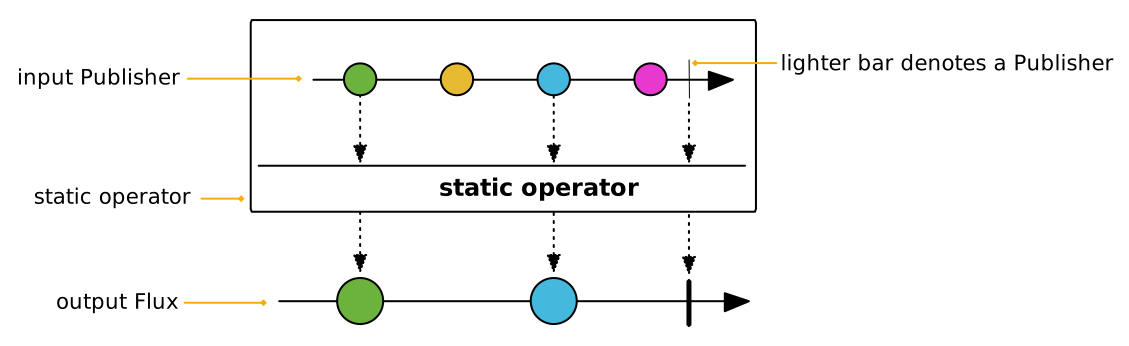
Note that sometimes we represent multiple variants or behaviors depending on the operator’s input, in which case there’s a single operator "box", but the source and output variants are separated like below:
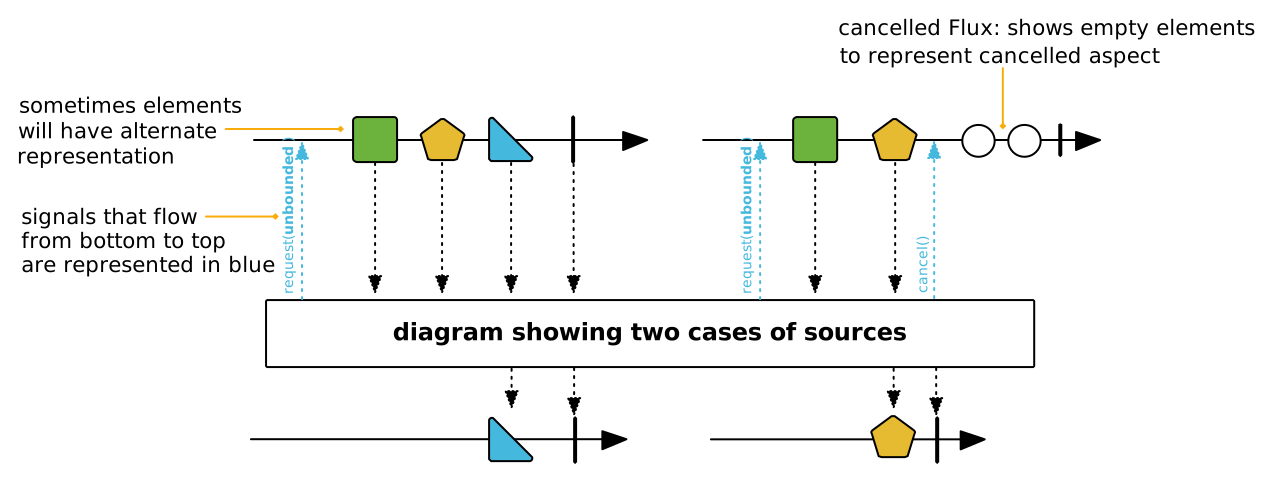
These are the basic cases, yet some operators display slightly more advanced patterns.
For instance, ParallelFlux creates multiple rails so they have multiple output Flux.
These are represented one below the other, like in the following diagram:
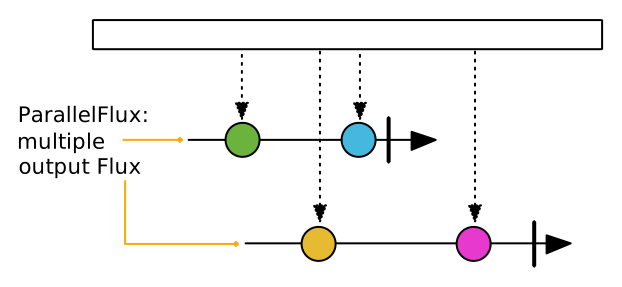
Windowing operators produce a Flux<Flux<T>>: the main Flux notifies of each window opening, while inner Flux represent the windows content and termination.
Windows are represented as branching out of the main Flux, like in the following diagram:
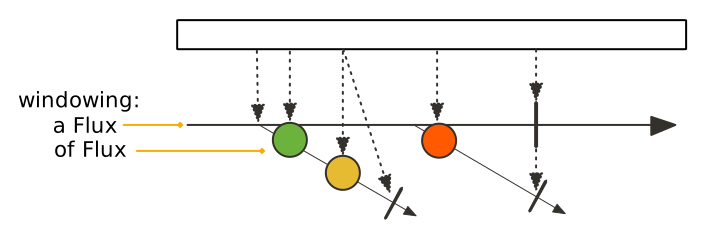
Sometimes, operators take a "companion publisher" as input (a Flux, Mono or arbitrary Reactive Stream Publisher).
Such companion publishers help to customize the operator’s behavior, which will use some of the companion’s signals as trigger for its own internal behavior.
They are represented like in the following diagram:
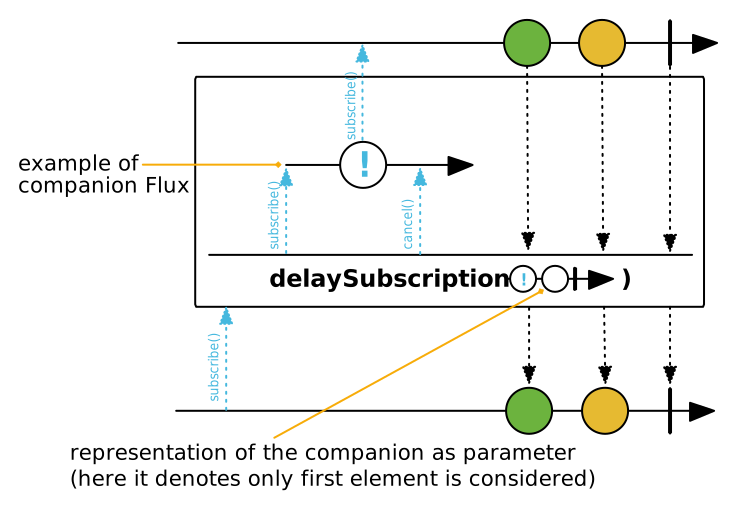
Now that we’ve seen the most common operator patterns, let’s show the graphical representation of all the different signals, events and elements that can occur in a Flux or Mono:
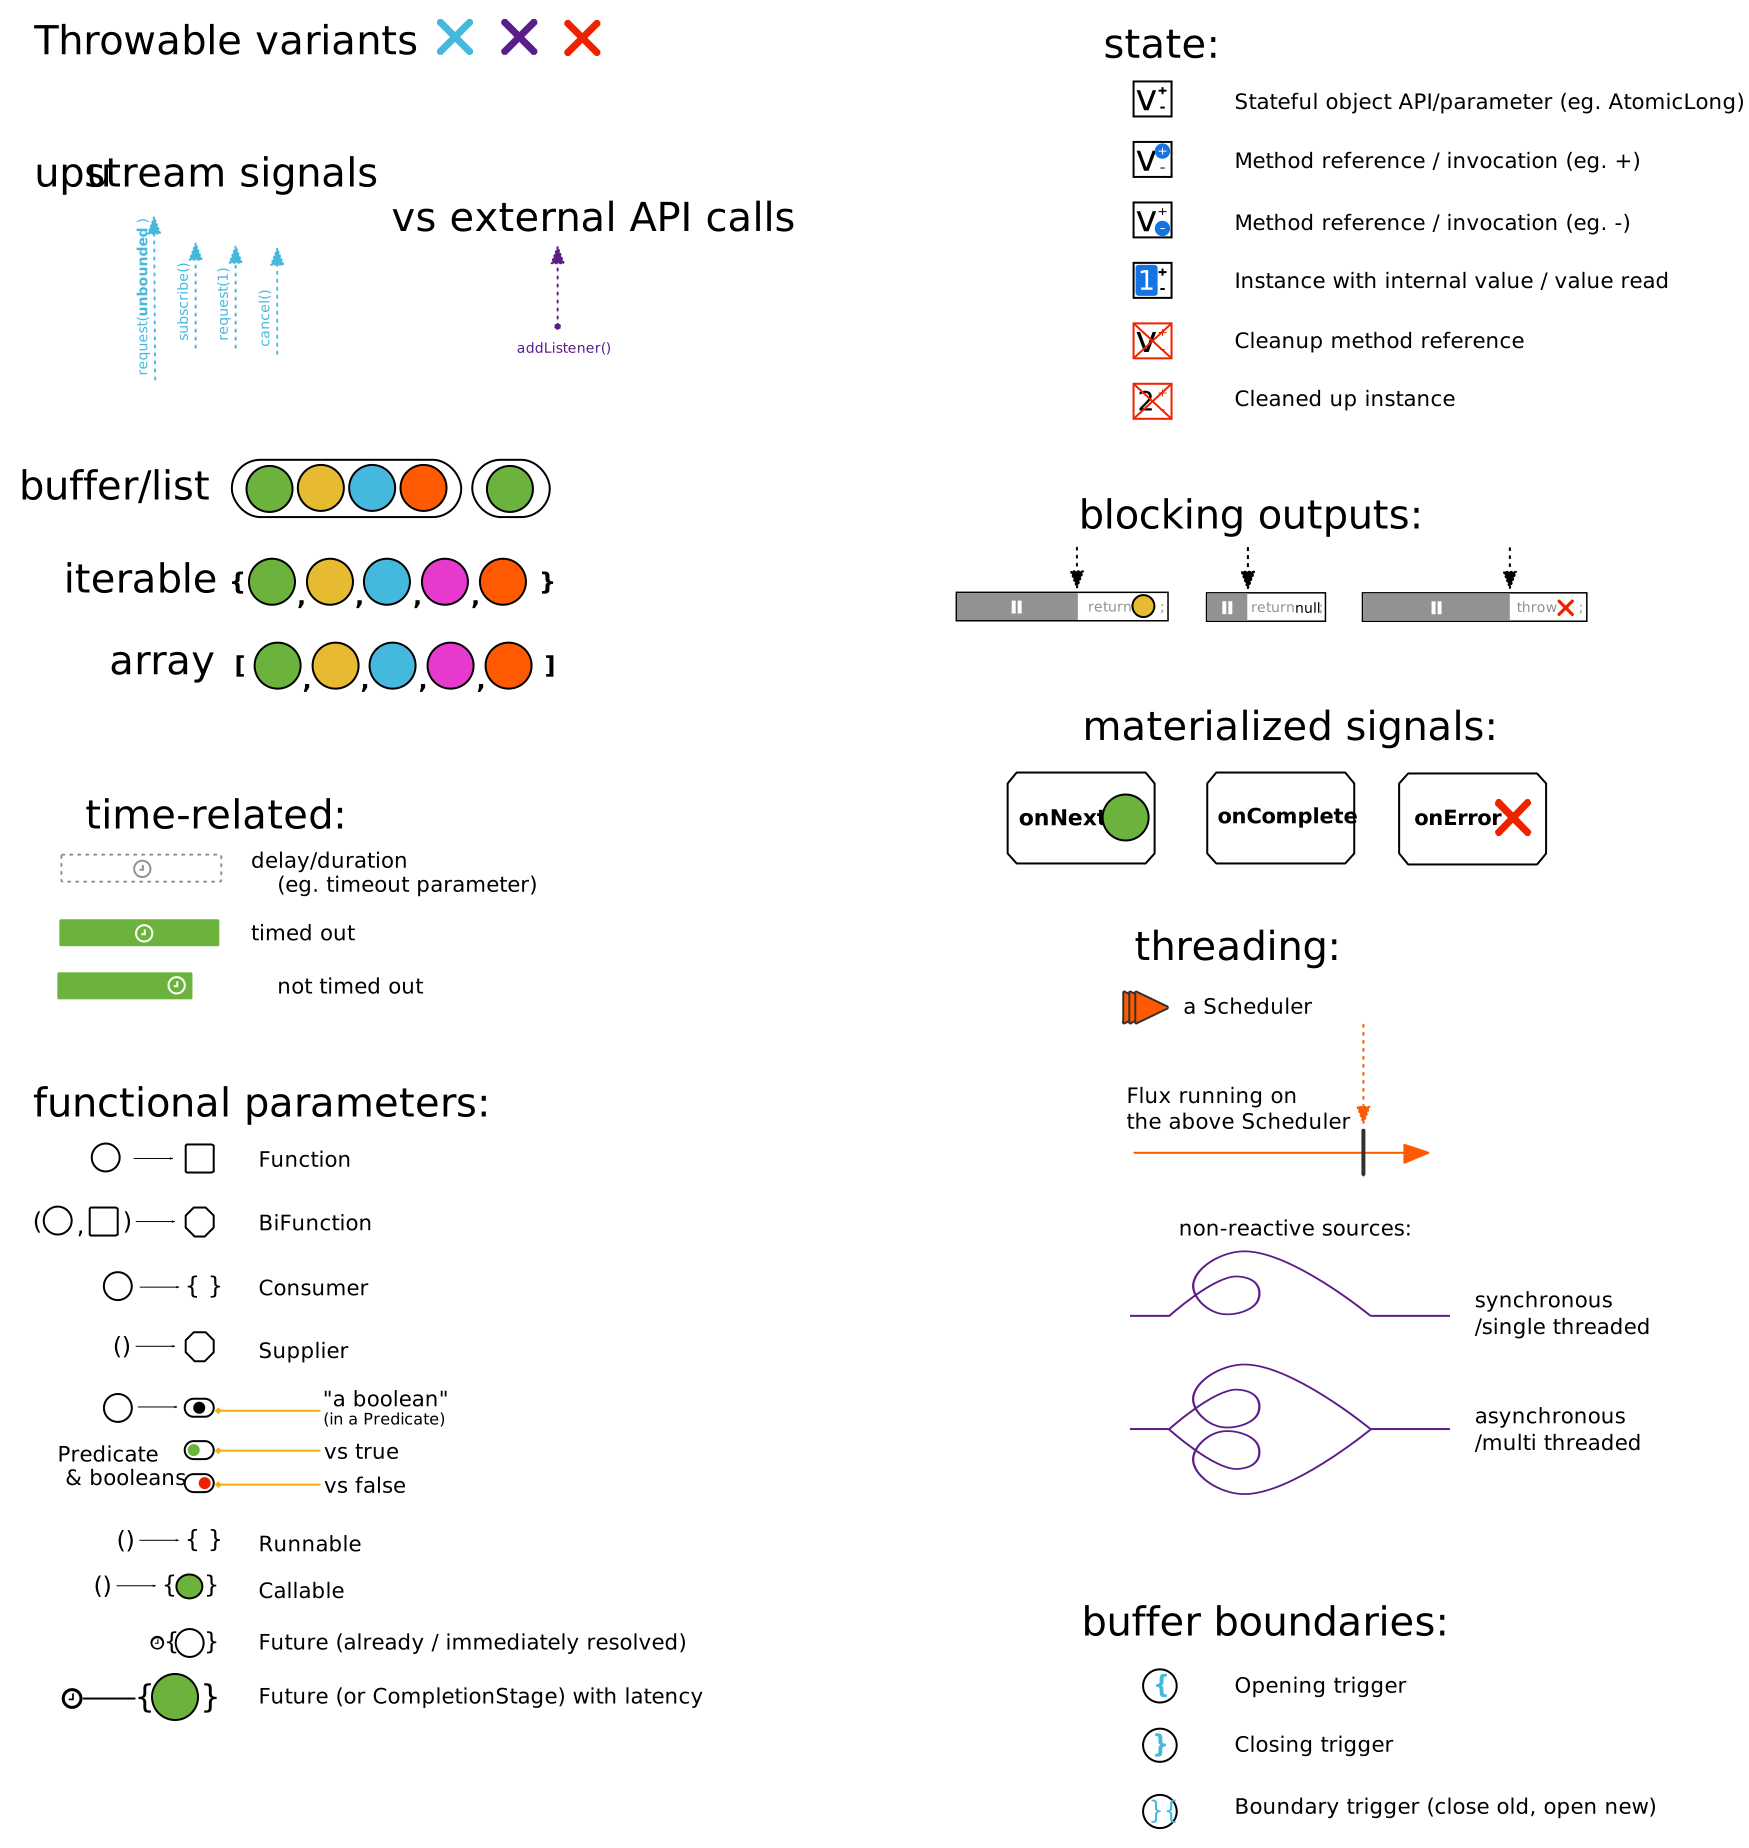
Finally, in the same vein we have the graphical representation of side effects, which occur alongside the Reactive Stream signals:
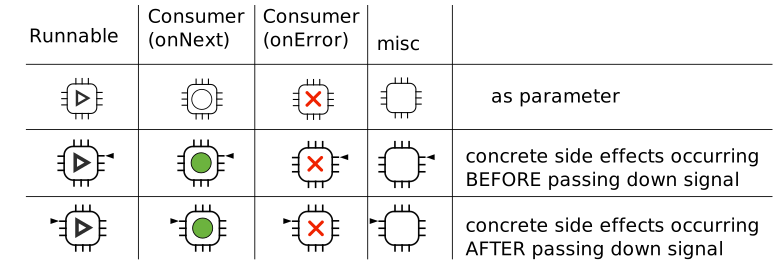
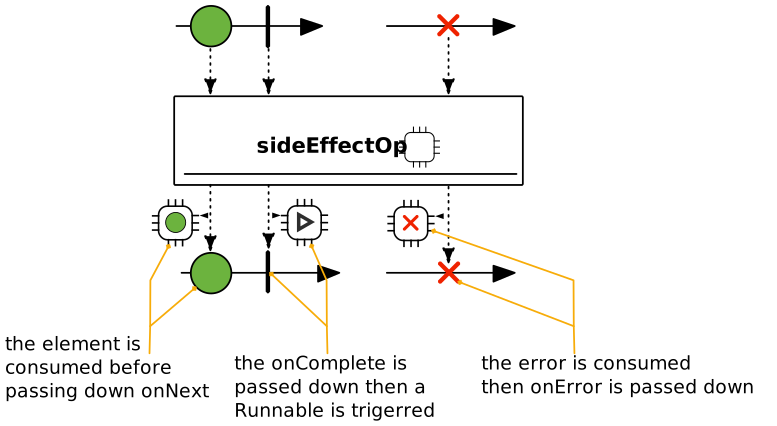
Appendix C: FAQ, Best Practices, and "How do I…?"
This section covers the following content:
C.1. How Do I Wrap a Synchronous, Blocking Call?
It is often the case that a source of information is synchronous and blocking. To deal with such sources in your Reactor applications, apply the following pattern:
Mono blockingWrapper = Mono.fromCallable(() -> { (1)
    return /* make a remote synchronous call */ (2)
});
blockingWrapper = blockingWrapper.subscribeOn(Schedulers.boundedElastic()); (3)| 1 | Create a new Mono by using fromCallable. |
| 2 | Return the asynchronous, blocking resource. |
| 3 | Ensure each subscription happens on a dedicated single-threaded worker
from Schedulers.boundedElastic(). |
You should use a Mono, because the source returns one value. You should use
Schedulers.boundedElastic, because it creates a dedicated thread to wait for the
blocking resource without impacting other non-blocking processing, while also ensuring
that there is a limit to the amount of threads that can be created, and blocking tasks
that can be enqueued and deferred during a spike.
Note that subscribeOn does not subscribe to the Mono. It specifies what
kind of Scheduler to use when a subscribe call happens.
C.2. I Used an Operator on my Flux but it Doesn’t Seem to Apply. What Gives?
Make sure that the variable you .subscribe() to has been affected by the
operators you think should have been applied to it.
Reactor operators are decorators. They return a different instance that wraps the source sequence and add behavior. That is why the preferred way of using operators is to chain the calls.
Compare the following two examples:
Flux<String> flux = Flux.just("something", "chain");
flux.map(secret -> secret.replaceAll(".", "*")); (1)
flux.subscribe(next -> System.out.println("Received: " + next));| 1 | The mistake is here. The result is not attached to the flux variable. |
Flux<String> flux = Flux.just("something", "chain");
flux = flux.map(secret -> secret.replaceAll(".", "*"));
flux.subscribe(next -> System.out.println("Received: " + next));
The following sample is even better (because it is simpler):
Flux.just("something", "chain")
    .map(secret -> secret.replaceAll(".", "*"))
    .subscribe(next -> System.out.println("Received: " + next));
The first version outputs the following:
Received: something
Received: chain
The two other versions output the expected values, as follows:
Received: *********
Received: *****
C.3. My Mono zipWith or zipWhen is never called
Consider the following example:
myMethod.process("a") // this method returns Mono<Void>
        .zipWith(myMethod.process("b"), combinator) //this is never called
        .subscribe();
If the source Mono is either empty or a Mono<Void> (a Mono<Void> is
empty for all intents and purposes), some combinations are never called.
This is the typical case for any transformer such as the zip static method or
the zipWith zipWhen operators, which (by definition) need an element from each
source to produce their output.
Using data-suppressing operators on sources of zip is thus problematic.
Examples of data-suppressing operators include then(), thenEmpty(Publisher<Void>),
ignoreElements() and ignoreElement(), and when(Publisher…).
Similarly, operators that use a Function<T,?> to tune their behavior, such as flatMap,
need at least one element to be emitted for the Function to have a chance
to apply. Applying these on an empty (or <Void>) sequence nevers produce an element.
You can use .defaultIfEmpty(T) and .switchIfEmpty(Publisher<T>) to
replace an empty sequence of T with a default value or a fallback Publisher<T> (respectively),
which could help avoid some of these situations. Note that this does not apply to
Flux<Void>/Mono<Void> sources, as you can only switch to another Publisher<Void>,
which is still guaranteed to be empty. The following example uses defaultIfEmpty:
defaultIfEmpty before zipWhenmyMethod.emptySequenceForKey("a") // this method returns empty Mono<String>
.defaultIfEmpty("") // this converts empty sequence to just the empty String
.zipWhen(aString -> myMethod.process("b")) //this is called with the empty String
.subscribe();C.4. How to Use retryWhen to Emulate retry(3)?
The retryWhen operator can be quite complex. Hopefully the following snippet of code
can help you understand how it works by attempting to emulate a simpler
retry(3):
AtomicInteger errorCount = new AtomicInteger();
Flux<String> flux =
		Flux.<String>error(new IllegalArgumentException())
				.doOnError(e -> errorCount.incrementAndGet())
				.retryWhen(Retry.from(companion -> (1)
						companion.map(rs -> { (2)
							if (rs.totalRetries() < 3) return rs.totalRetries(); (3)
							else throw Exceptions.propagate(rs.failure()); (4)
						})
));| 1 | We customize Retry by adapting from a Function lambda rather than providing a concrete class |
| 2 | The companion emits RetrySignal objects, which bear number of retries so far and last failure |
| 3 | To allow for three retries, we consider indexes < 3 and return a value to emit (here we simply return the index). |
| 4 | In order to terminate the sequence in error, we throw the original exception after these three retries. |
C.5. How can I use retryWhen for Exponential Backoff?
Exponential backoff produces retry attempts with a growing delay between each of the attempts, so as not to overload the source systems and risk an all-out crash. The rationale is that, if the source produces an error, it is already in an unstable state and is not likely to immediately recover from it. So blindly retrying immediately is likely to produce yet another error and add to the instability.
Since 3.3.4.RELEASE, Reactor comes with a builder for such a retry, to be used with Flux#retryWhen: Retry.backoff.
The following example showcases a simple use of the builder, with hooks logging message right before and after the retry attempt delays. It delays retries and increases the delay between each attempt (pseudocode: delay = 100ms * 2^attempt_number_starting_at_zero):
AtomicInteger errorCount = new AtomicInteger();
Flux<String> flux =
Flux.<String>error(new IllegalStateException("boom"))
		.doOnError(e -> { (1)
			errorCount.incrementAndGet();
			System.out.println(e + " at " + LocalTime.now());
		})
		.retryWhen(Retry
				.backoff(3, Duration.ofMillis(100)).jitter(0d) (2)
				.doAfterRetry(rs -> System.out.println("retried at " + LocalTime.now() + ", attempt " + rs.totalRetries())) (3)
				.onRetryExhaustedThrow((spec, rs) -> rs.failure()) (4)
);| 1 | We will log the time of errors emitted by the source and count them. |
| 2 | We configure an exponential backoff retry with at most 3 attempts and no jitter. |
| 3 | We also log the time at which the retry happens, and the retry attempt number (starting from 0). |
| 4 | By default, an Exceptions.retryExhausted exception would be thrown, with the last failure() as a cause.
Here we customize that to directly emit the cause as onError. |
When subscribed to, this fails and terminates after printing out the following:
java.lang.IllegalStateException: boom at 00:00:00.0
retried at 00:00:00.101, attempt 0 (1)
java.lang.IllegalStateException: boom at 00:00:00.101
retried at 00:00:00.304, attempt 1 (2)
java.lang.IllegalStateException: boom at 00:00:00.304
retried at 00:00:00.702, attempt 2 (3)
java.lang.IllegalStateException: boom at 00:00:00.702
| 1 | First retry after about 100ms |
| 2 | Second retry after about 200ms |
| 3 | Third retry after about 400ms |
C.6. How Do I Ensure Thread Affinity when I Use publishOn()?
As described in Schedulers, publishOn() can be used to switch
execution contexts. The publishOn operator influences the threading context
where the rest of the operators in the chain below it run, up to a new
occurrence of publishOn. So the placement of publishOn is significant.
Consider the following example:
Flux<Integer> source = Sinks.many().unicast().onBackpressureBuffer().asFlux();
source.publishOn(scheduler1)
	  .map(i -> transform(i))
	  .publishOn(scheduler2)
	  .doOnNext(i -> processNext(i))
	  .subscribe();
The transform function in map() is
run on a worker of scheduler1, and the processNext method in
doOnNext() is run on a worker of scheduler2. Each subscription gets
its own worker, so all elements pushed to the corresponding subscriber are published
on the same Thread.
You can use single-threaded schedulers to ensure thread affinity for different stages in the chain or for different subscribers.
C.7. What Is a Good Pattern for Contextual Logging? (MDC)
Most logging frameworks allow contextual logging, letting users store variables that are reflected in the logging pattern, generally by way of a Map called the MDC ("Mapped Diagnostic Context").
This is one of the most recurring use of ThreadLocal in Java, and as a consequence this pattern assumes that the code being logged is tied in a one-to-one relationship with a Thread.
That might have been a safe assumption to make before Java 8, but with the advent of functional programming elements in the Java language things have changed a bit…
Let’s take the example of a API that was imperative and used the template method pattern, then switches to a more functional style.
With the template method pattern, inheritance was at play. Now in its more functional approach, higher order functions are passed to define the "steps" of the algorithm.
Things are now more declarative than imperative, and that frees the library to make decisions about where each step should run.
For instance, knowing which steps of the underlying algorithm can be parallelized, the library can use an ExecutorService to execute some of the steps in parallel.
One concrete example of such a functional API is the Stream API introduced in Java 8 and its parallel() flavor.
Logging with a MDC in a parallel Stream is not a free lunch: one need to ensure the MDC is captured and reapplied in each step.
The functional style enables such optimizations, because each step is thread-agnostic and referentially transparent, but it can break the MDC assumption of a single Thread.
The most idiomatic way of ensuring any kind of contextual information is accessible to all stages would be to pass that context around through the composition chain.
During the development of Reactor we encountered the same general class of problem, and we wanted to avoid this very hands-down and explicit approach.
This is why the Context was introduced: it propagates through the execution chain as long as Flux and Mono are used as the return value, by letting stages (operators) peek at the Context of their downstream stage.
So instead of using ThreadLocal, Reactor offers this map-like object that is tied to a Subscription and not a Thread.
Now that we’ve established that MDC "just working" is not the best assumption to make in a declarative API, how can we perform contextualized log statements in relation to events in a Reactive Stream (onNext, onError, and onComplete)?
This entry of the FAQ offers a possible intermediate solution when one wants to log in relation to these signals in a straightforward and explicit manner. Make sure to read the Adding a Context to a Reactive Sequence section beforehand, and especially how a write must happen towards the bottom of the operator chain for operators above it to see it.
To get contextual information from the Context to the MDC, the simplest way is to wrap logging statements in a doOnEach operator with a little bit of boilerplate code.
This boilerplate depends on both the logging framework/abstraction of your choice and the information you want to put in the MDC, so it has to be in your codebase.
The following is an example of such a helper function around a single MDC variable and focused on logging onNext events, using Java 9 enhanced Optional API:
public static <T> Consumer<Signal<T>> logOnNext(Consumer<T> logStatement) {
	return signal -> {
		if (!signal.isOnNext()) return; (1)
		Optional<String> toPutInMdc = signal.getContext().getOrEmpty("CONTEXT_KEY"); (2)

		toPutInMdc.ifPresentOrElse(tpim -> {
			try (MDC.MDCCloseable cMdc = MDC.putCloseable("MDC_KEY", tpim)) { (3)
				logStatement.accept(signal.get()); (4)
			}
		},
		() -> logStatement.accept(signal.get())); (5)
	};
}| 1 | doOnEach signals include onComplete and onError. In this example we’re only interested in logging onNext |
| 2 | We will extract one interesting value from the Reactor Context (see the The Context API section) |
| 3 | We use the MDCCloseable from SLF4J 2 in this example, allowing try-with-resource syntax for automatic cleanup of the MDC after the log statement is executed |
| 4 | Proper log statement is provided by the caller as a Consumer<T> (consumer of the onNext value) |
| 5 | In case the expected key wasn’t set in the Context we use the alternative path where nothing is put in the MDC |
Using this boilerplate code ensures that we are good citizens with the MDC: we set a key right before we execute a logging statement and remove it immediately after. There is no risk of polluting the MDC for subsequent logging statements.
Of course, this is a suggestion. You might be interested in extracting multiple values from the Context or in logging things in case of onError.
You might want to create additional helper methods for these cases or craft a single method that makes use of additional lambdas to cover more ground.
In any case, the usage of the preceding helper method could look like the following reactive web controller:
@GetMapping("/byPrice")
public Flux<Restaurant> byPrice(@RequestParam Double maxPrice, @RequestHeader(required = false, name = "X-UserId") String userId) {
	String apiId = userId == null ? "" : userId; (1)

	return restaurantService.byPrice(maxPrice))
			   .doOnEach(logOnNext(r -> LOG.debug("found restaurant {} for ${}", (2)
					r.getName(), r.getPricePerPerson())))
			   .contextWrite(Context.of("CONTEXT_KEY", apiId)); (3)
}| 1 | We need to get the contextual information from the request header to put it in the Context |
| 2 | Here we apply our helper method to the Flux, using doOnEach. Remember: operators see Context values defined below them. |
| 3 | We write the value from the header to the Context using the chosen key CONTEXT_KEY. |
In this configuration, the restaurantService can emit its data on a shared thread, yet the logs will still reference the correct X-UserId for each request.
For completeness, we can also see what an error-logging helper could look like:
public static Consumer<Signal<?>> logOnError(Consumer<Throwable> errorLogStatement) {
	return signal -> {
		if (!signal.isOnError()) return;
		Optional<String> toPutInMdc = signal.getContext().getOrEmpty("CONTEXT_KEY");

		toPutInMdc.ifPresentOrElse(tpim -> {
			try (MDC.MDCCloseable cMdc = MDC.putCloseable("MDC_KEY", tpim)) {
				errorLogStatement.accept(signal.getThrowable());
			}
		},
		() -> errorLogStatement.accept(signal.getThrowable()));
	};
}
Nothing much has changed, except for the fact that we check that the Signal is effectively an onError, and that we provide said error (a Throwable) to the log statement lambda.
Applying this helper in the controller is very similar to what we’ve done before:
@GetMapping("/byPrice")
public Flux<Restaurant> byPrice(@RequestParam Double maxPrice, @RequestHeader(required = false, name = "X-UserId") String userId) {
	String apiId = userId == null ? "" : userId;

	return restaurantService.byPrice(maxPrice))
			   .doOnEach(logOnNext(v -> LOG.info("found restaurant {}", v))
			   .doOnEach(logOnError(e -> LOG.error("error when searching restaurants", e)) (1)
			   .contextWrite(Context.of("CONTEXT_KEY", apiId));
}| 1 | In case the restaurantService emits an error, it will be logged with MDC context here |
Appendix D: Reactor-Extra
The reactor-extra artifact contains additional operators and utilities that are for
users of reactor-core with advanced needs, or incubating operators.
As this is a separate artifact, you need to explicitly add it to your build. The following example shows how to do so in Gradle:
dependencies {
     compile 'io.projectreactor:reactor-core'
     compile 'io.projectreactor.addons:reactor-extra' (1)
}| 1 | Add the reactor extra artifact in addition to core. See Getting Reactor for details about why you do not need to specify a version if you use the BOM, usage in Maven, and other details. |
D.1. TupleUtils and Functional Interfaces
The reactor.function package contains functional interfaces that complement the Java 8
Function, Predicate, and Consumer interfaces, for three to eight values.
TupleUtils offers static methods that act as a bridge between lambdas of these functional
interfaces to a similar interface on the corresponding Tuple.
This lets you easily work with independent parts of any Tuple, as the following example shows:
.map(tuple -> {
  String firstName = tuple.getT1();
  String lastName = tuple.getT2();
  String address = tuple.getT3();

  return new Customer(firstName, lastName, address);
});
You can rewrite the preceding example as follows:
.map(TupleUtils.function(Customer::new)); (1)| 1 | (as Customer constructor conforms to Function3 functional interface signature) |
D.2. Math Operators With MathFlux
The reactor.math package contains a MathFlux specialized version of Flux that offers
mathematical operators, including max, min, sumInt, averageDouble, and others.